NGINX Proxy Manager SSL
A comprehensive guide to using Let's Encrypt SSL certificates with NGINX Proxy Manager on Proxmox using Cloudflare.
Overview
This wiki covers how to get a Let's Encrypt certificate for NGINX Proxy Manager on Proxmox using Cloudflare.
Prerequisites
You must have a domain name and a Cloudflare account. However, you can use a subdomain of an existing domain if you don't want to purchase a new one.
You also need to have NGINX Proxy Manager installed on your Proxmox server.
Cloudflare API Key
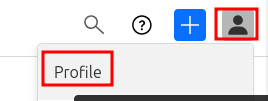
Log in to Cloudflare and open up the Profile page by clicking on your profile icon in the top right corner and selecting Profile.
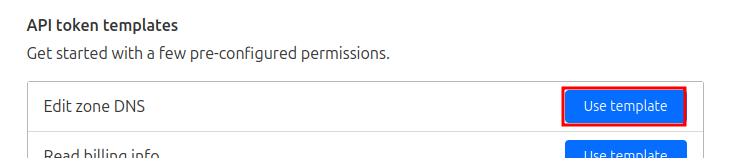
On the left hand side select API Tokens and then click on Create Token.

Select the Edit zone DNS template and click Continue to summary.
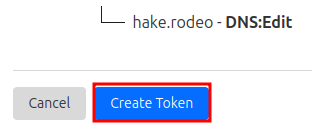
Under Zone Resources make sure to select the domain you wish to use.

Click Continue to summary, then Create Token.
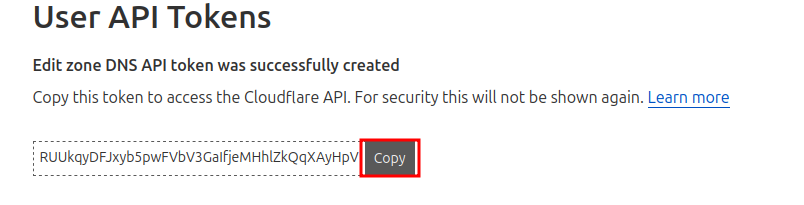
Now copy the provided token
NGINX Proxy Manager Configuration
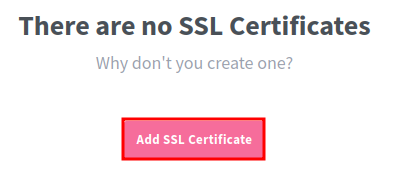
Open up the NGINX Proxy Manager web interface and log in. Navigate to the SSL Certificates tab and click Add SSL Certificate.
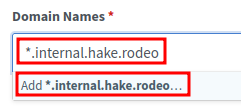
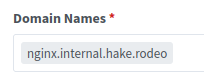
Under Domain Names, I usually use a wildcard certificate, so I enter *.yourdomain.com. However, you can also use a specific subdomain like nextcloud.yourdomain.com if you prefer.
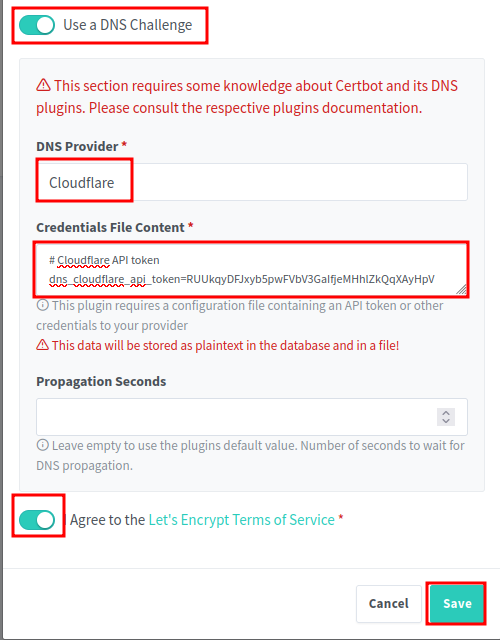
Toggle the Use a DNS Challenge option to On. This will allow NGINX Proxy Manager to use the Cloudflare API to automatically verify your domain ownership. Then select Cloudflare from the DNS Provider dropdown. Replace the dns_cloudflare_api_token with the token you copied from Cloudflare earlier. Then toggle the I Agree... to On and click Save.
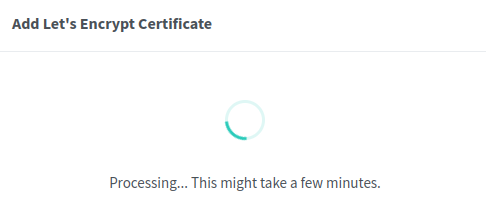
Wait for the actions to process, this can take some time. For me it was 30 seconds, but it can vary.
Update to SSL
Once the certificate is issued, you will see it listed under the SSL Certificates tab. Now you can use this certificate for your proxy hosts.

To update an existing proxy host to use the new SSL certificate, navigate to the Proxy Hosts tab.

Find the entry you wish to update, and click the three vertical dots, and click on Edit

Update the domain to use the one you used for the SSL certificate. Since I am using a wildcard, my certificate covers any subdomain of *.internal.hake.rodeo
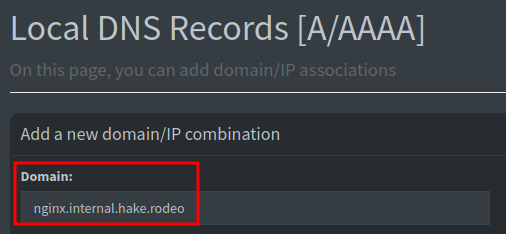
Don't forget to update Pi-hole or your DNS server to point to the new subdomain if you needed to change it.
Back in Nginx Proxy Manager, navigate to the SSL tab and select the new SSL certificate from the dropdown. Toggle ON the following:
- Force SSL
- HTTP/2 Support
- HSTS Enabled (optional, but recommended for security)
- HSTS Subdomains (optional, but recommended for security)
Click Save to apply the changes.

At this point the proxy host should be using the new SSL certificate. You can test this by navigating to the domain in your web browser. If everything is set up correctly, you should see a secure connection with a padlock icon in the address bar.
No more unsecure warnings!