Rustdesk Server [Helper Script]
A guide to setting up Rustdesk Server on Proxmox using Helper Scripts.
Proxmox - Installing Rustdesk Server [Helper Script]
Overview
This wiki covers how to install Rustdesk Server on Proxmox using Helper Scripts. Rustdesk is a remote desktop software that allows you to access and control your devices from anywhere. It is an open-source alternative to TeamViewer and AnyDesk, providing a secure and private way to connect to your devices.
Helper Scripts: Always be cautious when running scripts from the internet. Review the code and understand what it does before executing it on your system. That being said, ProxmoxVE Helper Scripts are widely used and trusted by the community.
Installation
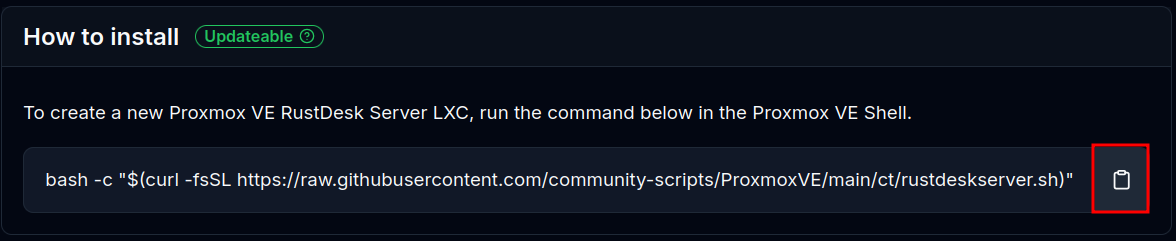
Navigate to ProxmoxVE Helper Scripts Rustdesk page and copy the script to your clipboard.
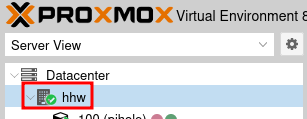
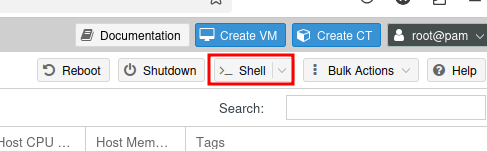
Then open up the Proxmox web interface, and with your Proxmox server selected click the Shell button on the top right corner.
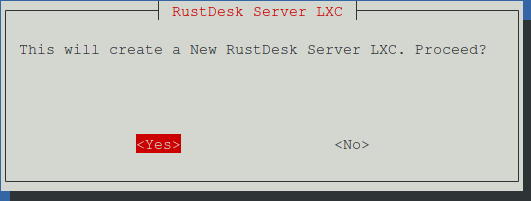
Now paste in the script and hit Enter. This will download and launch the script on your Proxmox server.

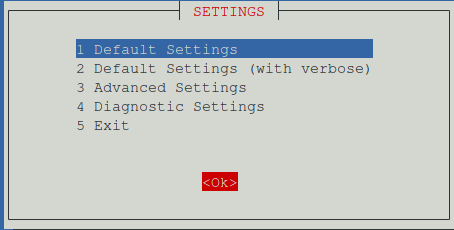
When prompted, select Yes to proceed with the installation.
I usually select the Default Settings option, but if you prefer to manually set the resources assigned to the container, select the option for Advanced Settings. The defaults will create an LXC with the following settings:
- Operating System: debian
- Version: 12
- Container Type: Unprivileged
- CPU Cores: 1
- RAM Size: 512MB
- Disk Size: 2GB
Pressing Tab will move the selection to the OK button, then hit Enter to proceed.
When completed, the script will provide you with the IP address of the Rustdesk server.

Setting up Rustdesk Server & Clients
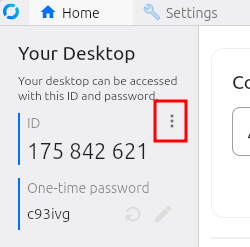
In order to connect to the Rustdesk server with your client, you must have the public key from the server. This can be found in the /var/lib/rustdesk-server/ directory. You can use the following command to view the public key:
cat /root/.config/rustdesk/id_ed25519.pub; echo
Now you can copy the public key and paste it into the Rustdesk client. Open the Rustdesk client and go to the settings.
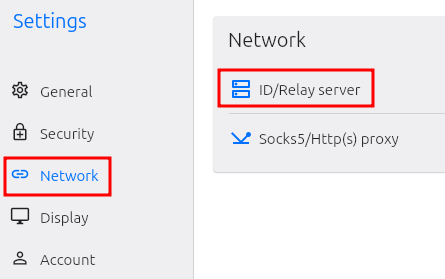
In the settings, select Network and then ID/Relay server.
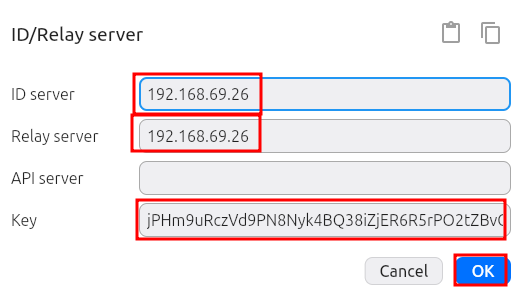
Enter the IP address of your Rustdesk server for both the ID server and Relay server. Then paste in the key that was just copied from the server. Then click OK to save the settings.
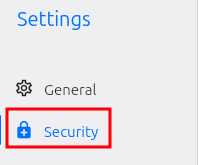
I like to set up passwords on each of my clients that I intend to connect to. This can be done by going into the Settings on the clients you plan to connect to and selecting Security.
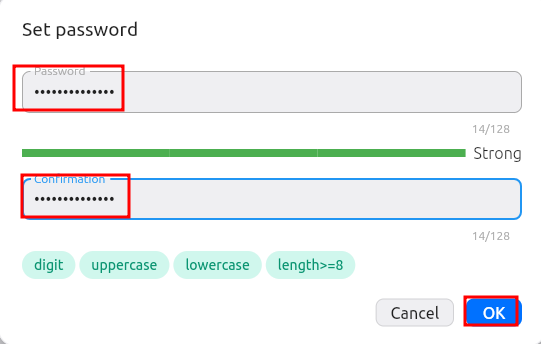
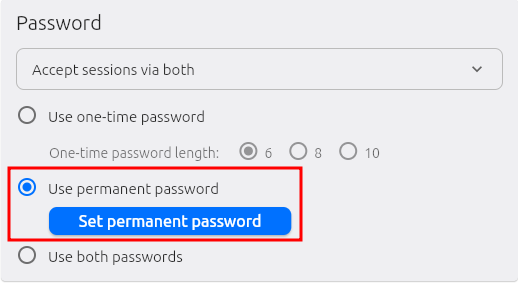
Then select Use permanent password and enter a password. This will allow you to connect to the client without needing to accept the connection on the client side. Then click OK to save the settings.
You should now see the Use permanent password option selected.
Connecting to the Client
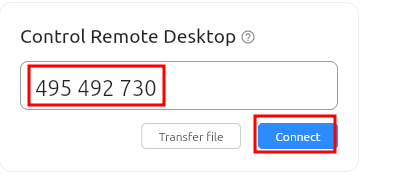
Make sure all clients are connected to the Rustdesk server, then grab the ID of the client you want to connect to and enter it into the Control Remote Desktop input, then click connect.
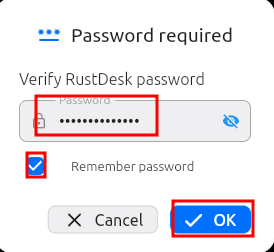
Now enter the password you set for the client, optionally select Remember password and then click OK.
Set resolution
Depending on the resolution of the client, I like to set to the resolution to Scale adaptive.
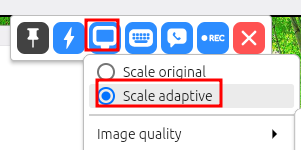
This will allow you to see the entire screen of the client without having to scroll around.
Conclusion
That's it! You have successfully installed Rustdesk Server on Proxmox using Helper Scripts. You can now connect to your devices remotely using the Rustdesk client.