This post contains affiliate links. If you purchase through these links, I may earn a small commission at no extra cost to you.
SuperMicro IPMI Web UI Guide: First Login and Feature Tour (M12SWA-TF)
A complete walkthrough of the SuperMicro IPMI web UI on the M12SWA-TF motherboard — from changing the default password to exploring system info, sensors, fan control, KVM, and power management.
If you have a SuperMicro board, you have access to one of the best out-of-band management interfaces available — but the first login isn't always intuitive, and the password requirements will trip you up if you're not ready for them.
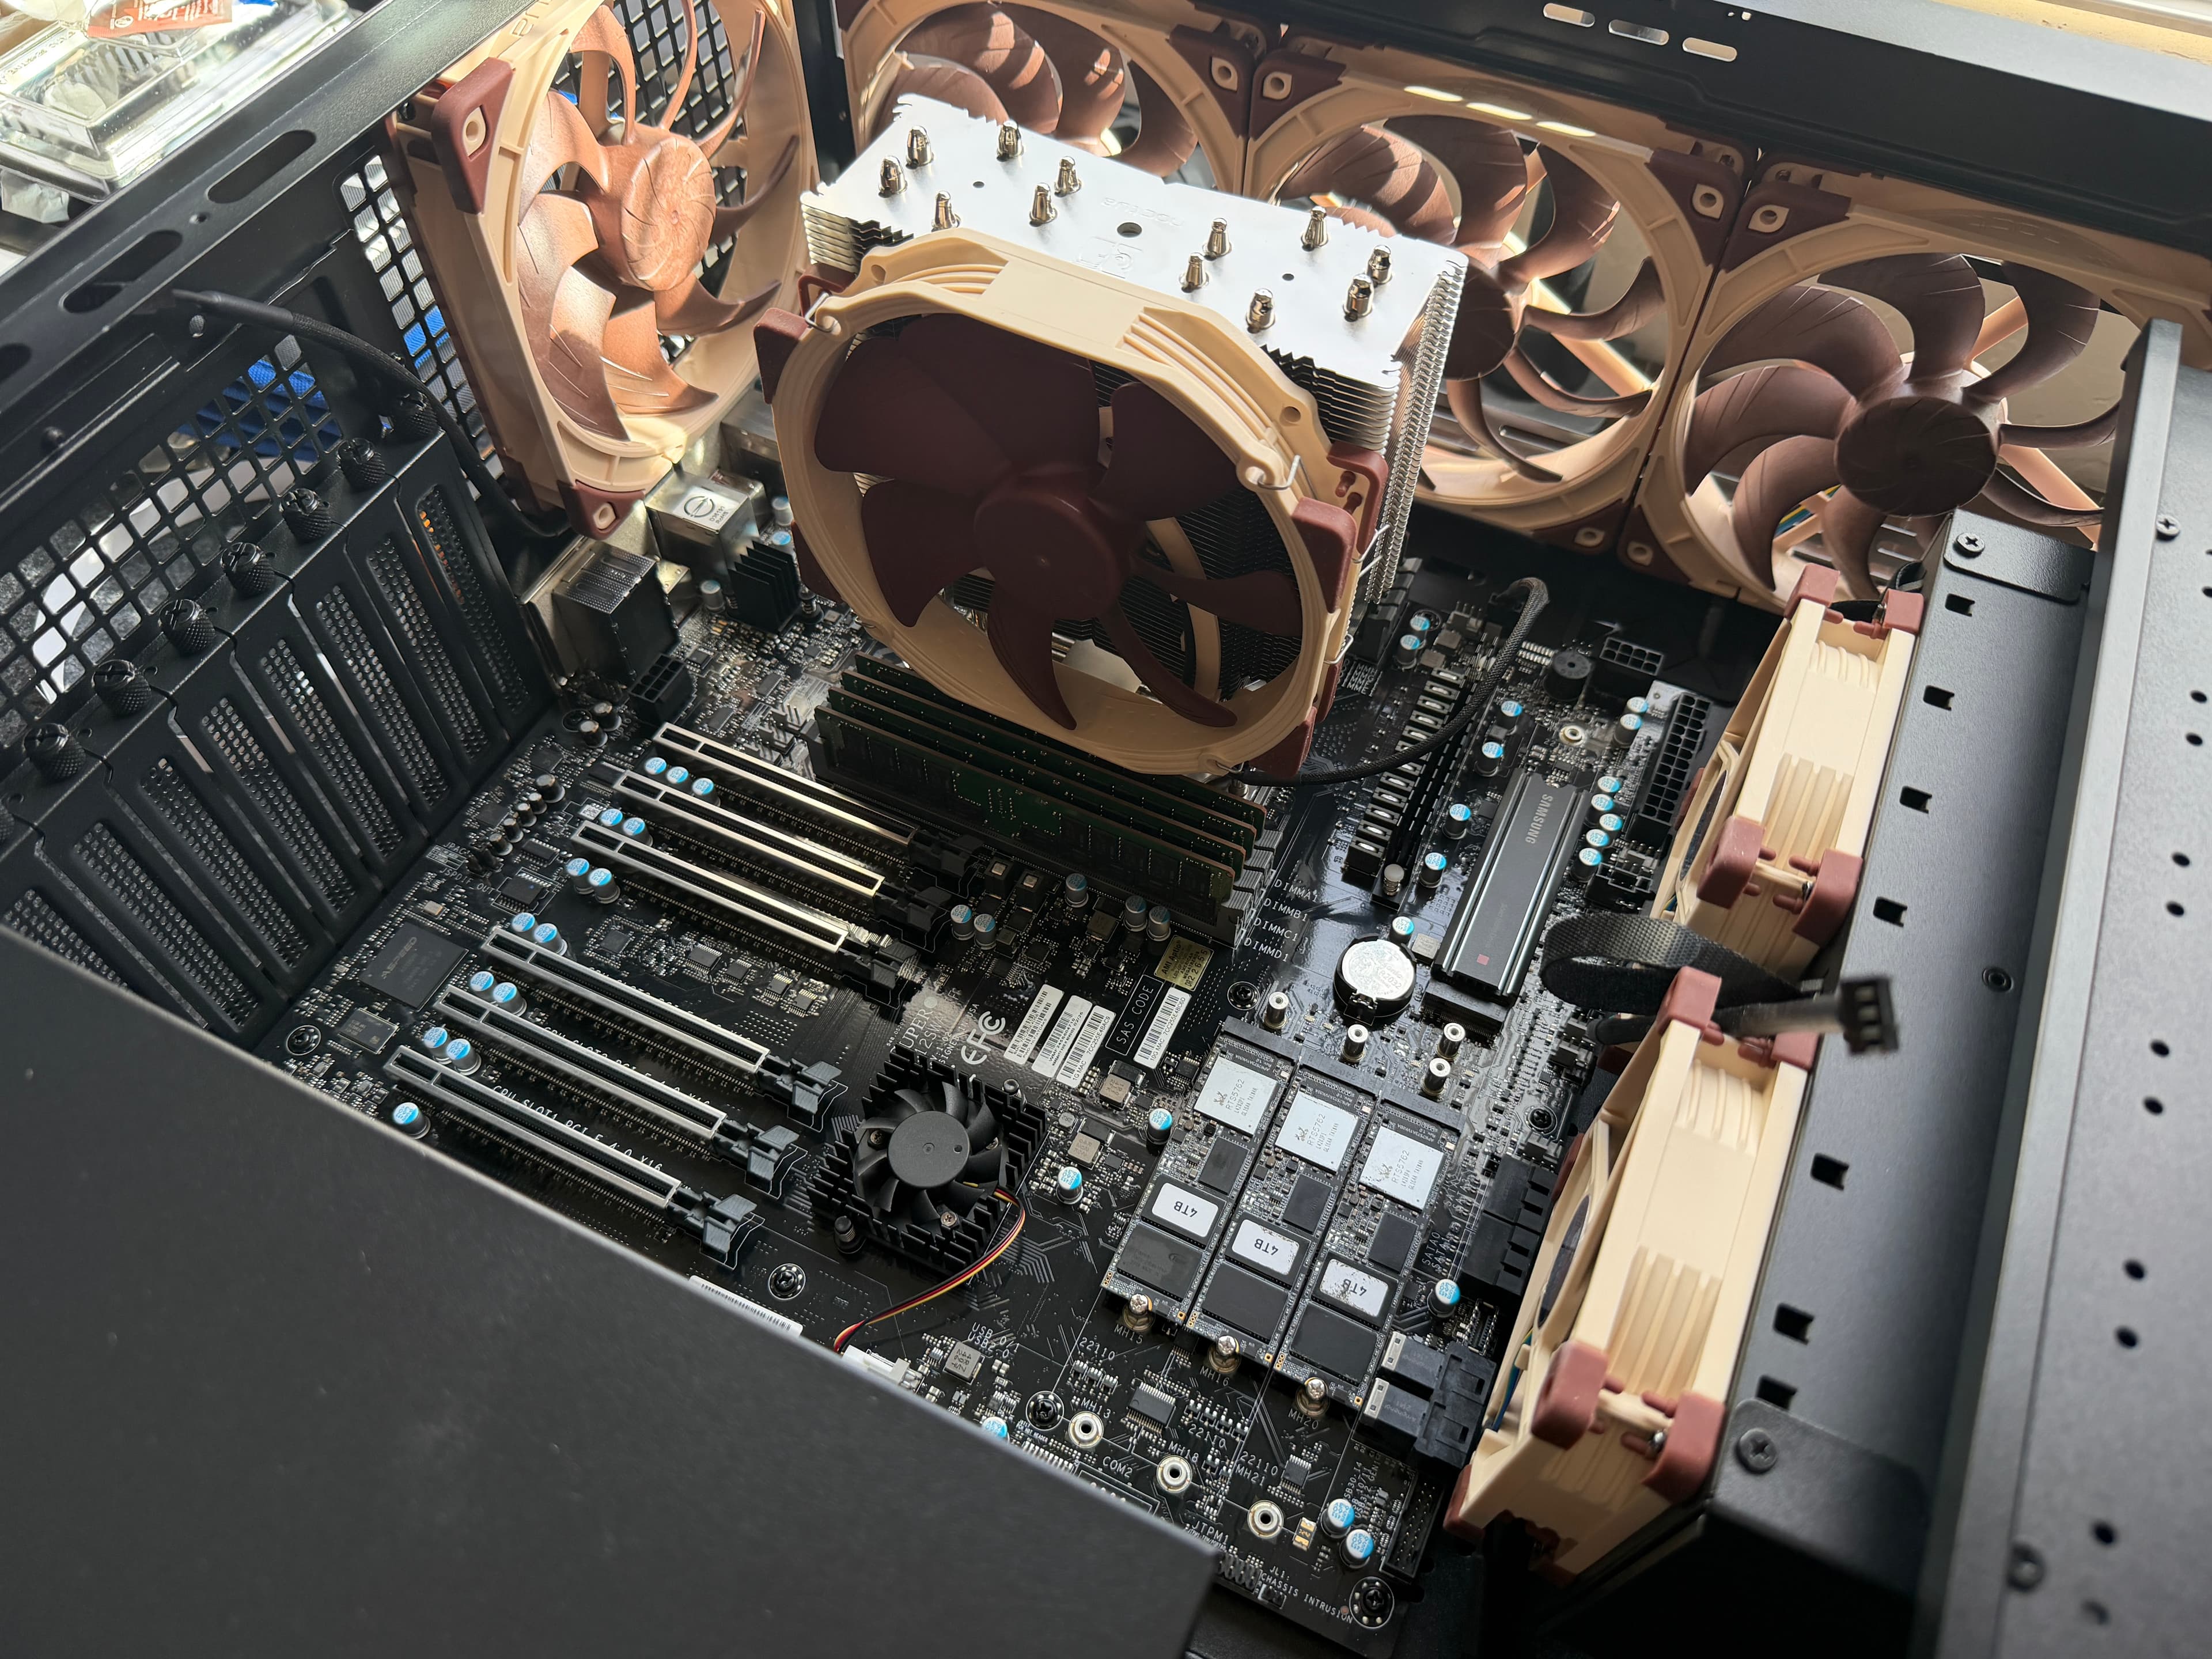
This guide walks through the initial setup of the IPMI web UI on a SuperMicro M12SWA-TF motherboard with an ASPEED AST2600 BMC. I'm running this board with an AMD Ryzen Threadripper PRO 3995WX (64 cores, 128 threads) and 256GB of DDR4 ECC RAM under Proxmox VE 9.1.6. The IPMI interface is the same across most modern SuperMicro boards using the AST2600, so this guide applies broadly — not only to the M12SWA-TF.
We'll cover changing the default password, logging in for the first time, and then take a tour of what the web UI offers — from hardware inventory and sensor monitoring to fan control and remote console access.
Prerequisites
- A SuperMicro motherboard with IPMI/BMC (most server and workstation boards have this)
- Network cable connected to the IPMI/BMC LAN port
- An IP address assigned to the BMC (via DHCP reservation or static config)
- The factory default password (printed on a sticker on the motherboard — each board has a unique password, not a generic default)
ipmitoolinstalled on the host OS (included with Proxmox, available viaapt install ipmitoolon Debian/Ubuntu)
Network Setup
The M12SWA-TF has a shared LAN port — the Intel I210 1G NIC handles both regular network traffic and BMC/IPMI management. If you're using a different NIC for your host OS (like I am with the Aquantia 10G), the 1G port is effectively dedicated to IPMI.
Make sure:
- An ethernet cable is plugged into the IPMI LAN port
- Your router has a DHCP reservation (or you've configured a static IP) for the BMC's MAC address
You can find the BMC's MAC address and current IP from the host OS:
ipmitool lan print 1Look for the IP Address and MAC Address fields. Once you have the IP, verify connectivity:
ping 10.1.10.11Replace 10.1.10.11 with your BMC's IP address.
Changing the Default Password
The factory sticker password works, but it's long and not something you want to type every time. You can change it via ipmitool from the host before ever opening the web UI:
ipmitool user set password 2 'YourNewPassword!23'User ID 2 is the default ADMIN account on SuperMicro boards. You can confirm this with:
ipmitool user list 1Watch out for the misleading error message. If your password doesn't meet the BMC's complexity requirements,
ipmitoolreturnsRequest data field length limit exceeded— which sounds like a message length problem but is actually a password policy rejection. The BMC requires 8-20 characters with at least 3 of these 4 character classes: lowercase (a-z), uppercase (A-Z), digits (0-9), and special characters.A password like
monday99(only lowercase + digits = 2 classes) will fail. Something likeSunFlow3r!@#(lowercase + uppercase + digits + special = 4 classes) works fine.
You can also change the password from the web UI (covered below), which shows the requirements clearly. But ipmitool is faster if you know the rules.
After changing it, verify the new password works over the network:
ipmitool -I lanplus -H 10.1.10.11 -U ADMIN -P 'YourNewPassword!23' chassis statusYou should see output like:
System Power         : on
Power Overload       : false
Power Restore Policy : always-off
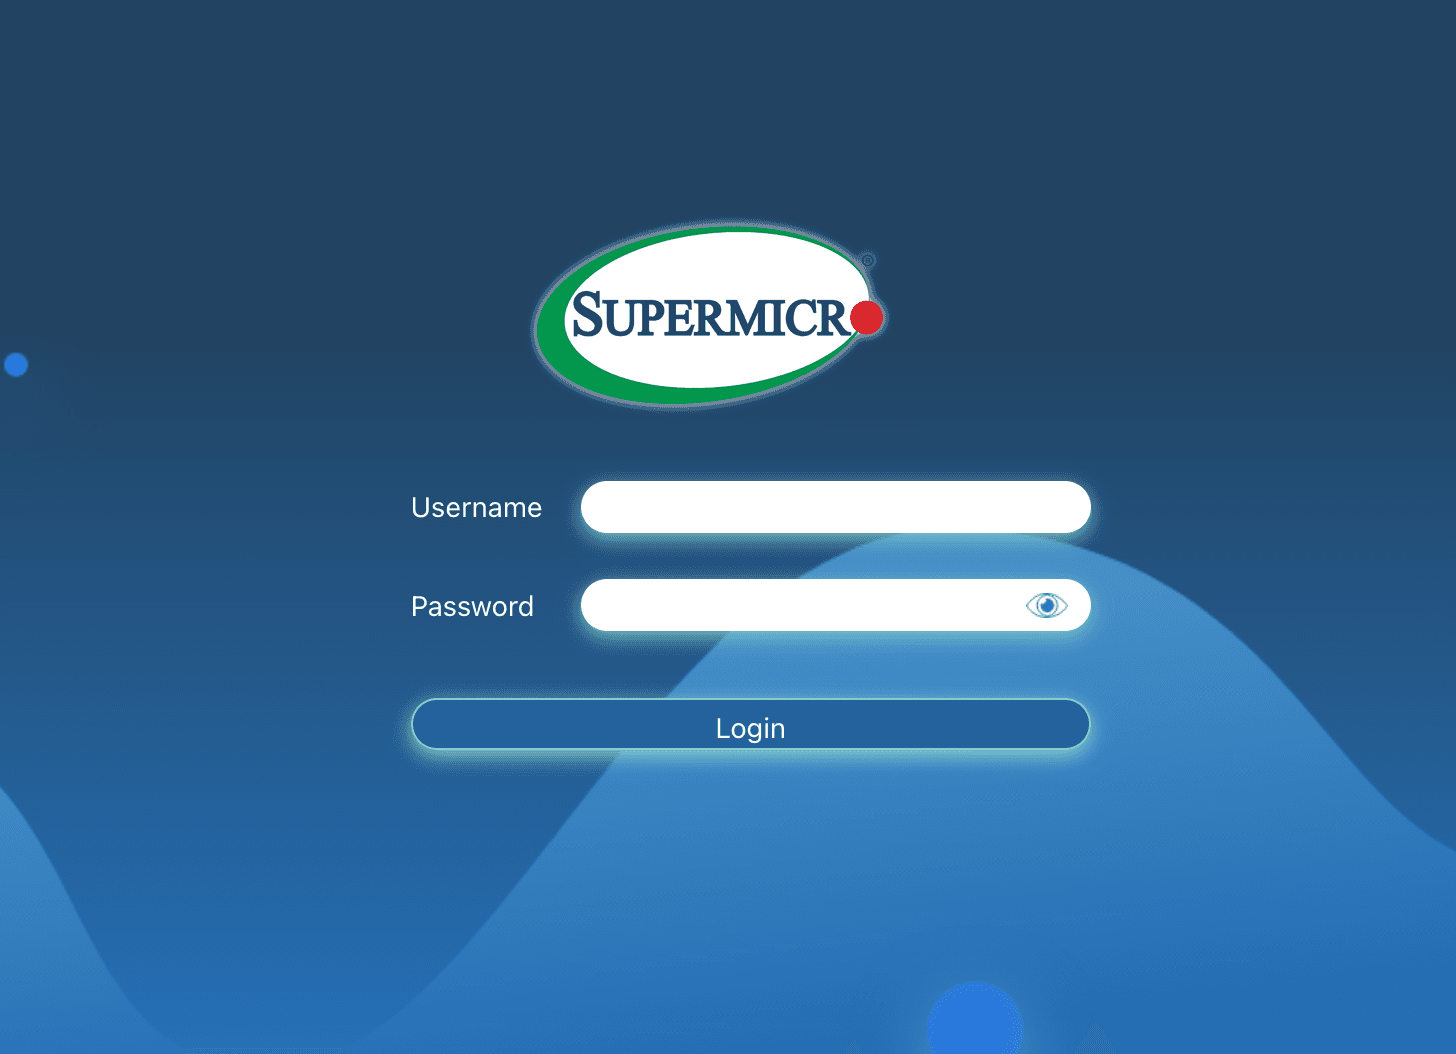
First Login
Open a browser and navigate to https://<your-bmc-ip>/. You'll get a certificate warning because the BMC uses a self-signed SSL certificate — accept it and continue.
Log in with:
- Username:
ADMIN - Password: your new password (or the factory sticker password if you haven't changed it yet)
System Information
The first thing worth exploring is the system information section. The BMC reads hardware details directly — independent of whatever operating system is running. This means you get accurate hardware inventory even if the OS is down or not yet installed.
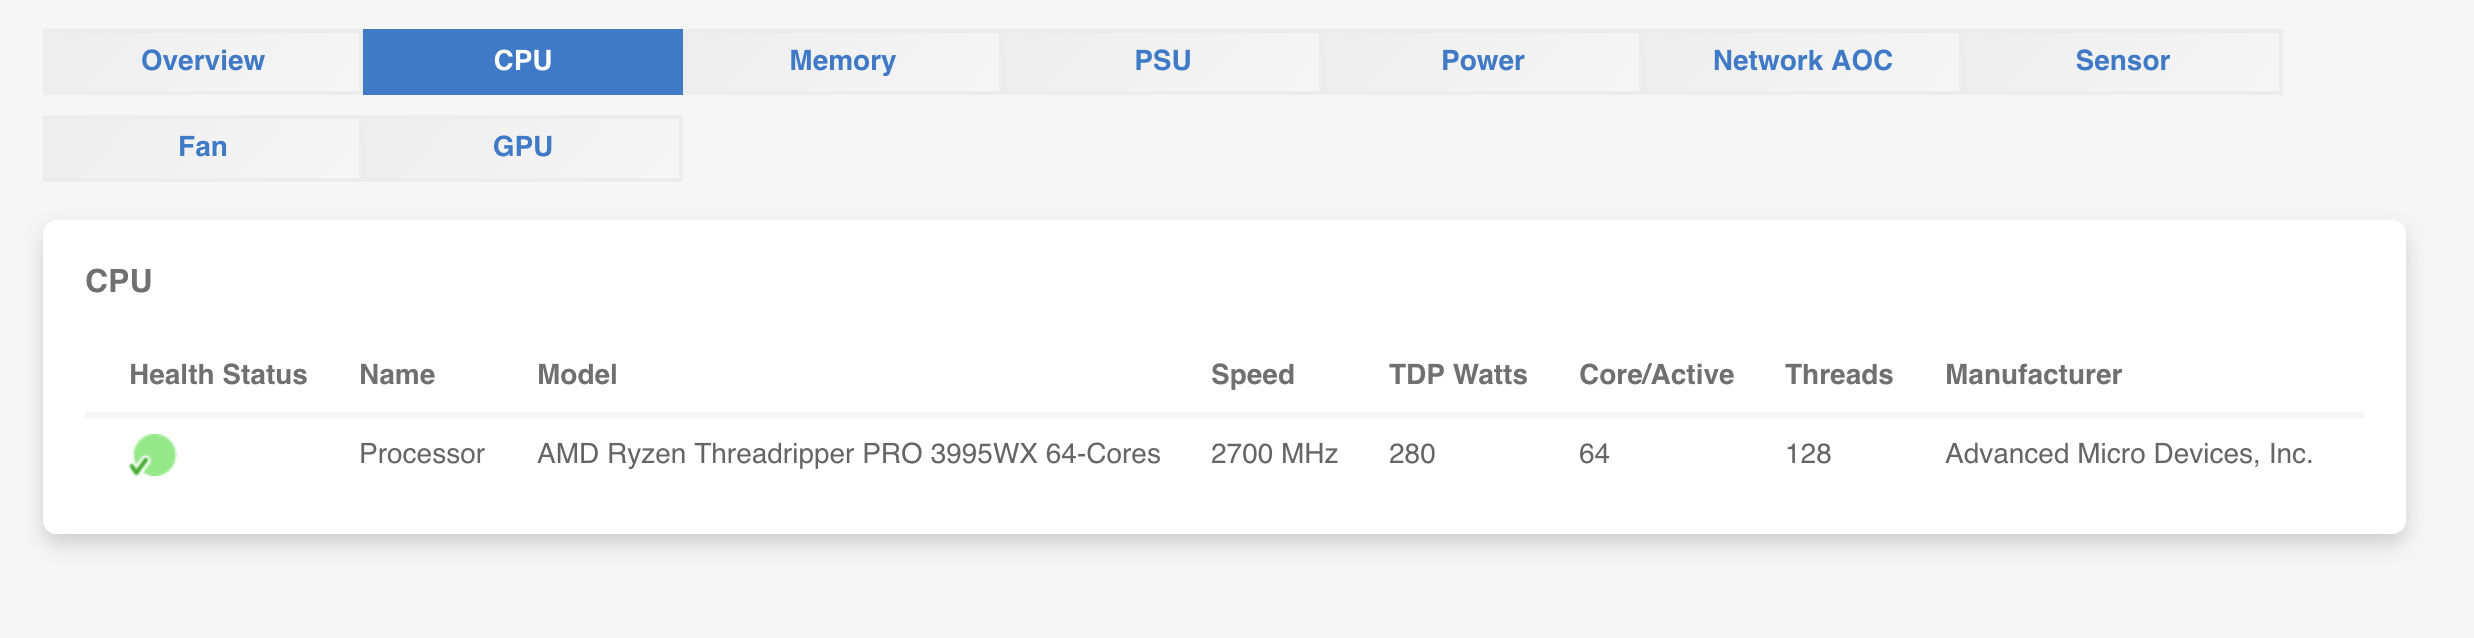
CPU
The CPU tab shows your processor model, base clock speed, TDP, core and thread count, and manufacturer.
Memory
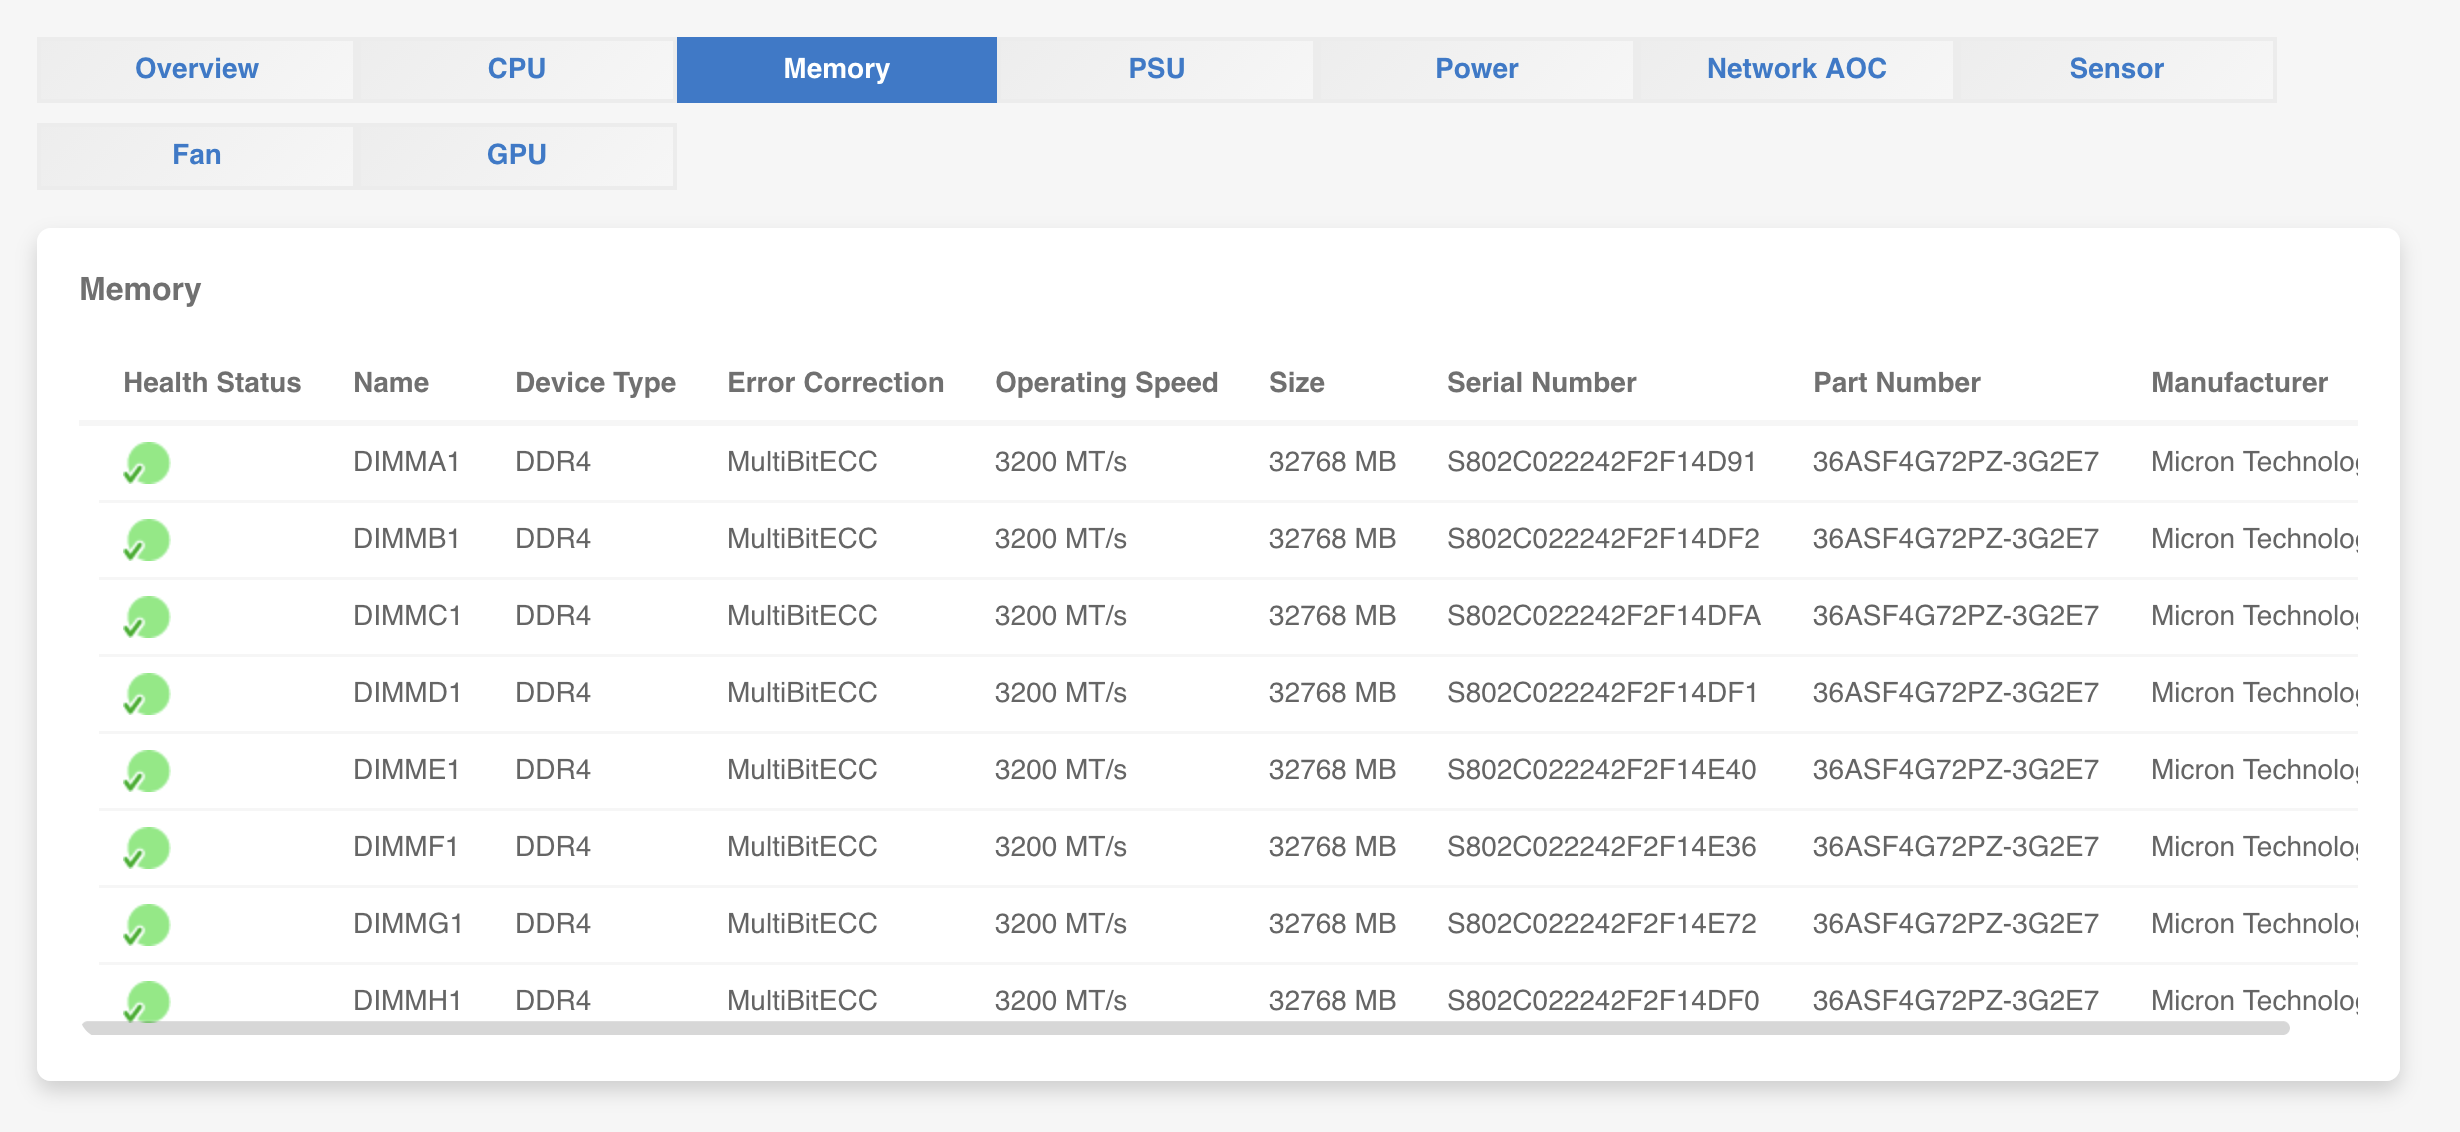
The Memory tab lists every DIMM slot with the installed module's capacity, speed, type, serial number, part number, and manufacturer. This is particularly useful for identifying a failed DIMM without opening the case — the health status indicator turns red for any module with errors.
GPU
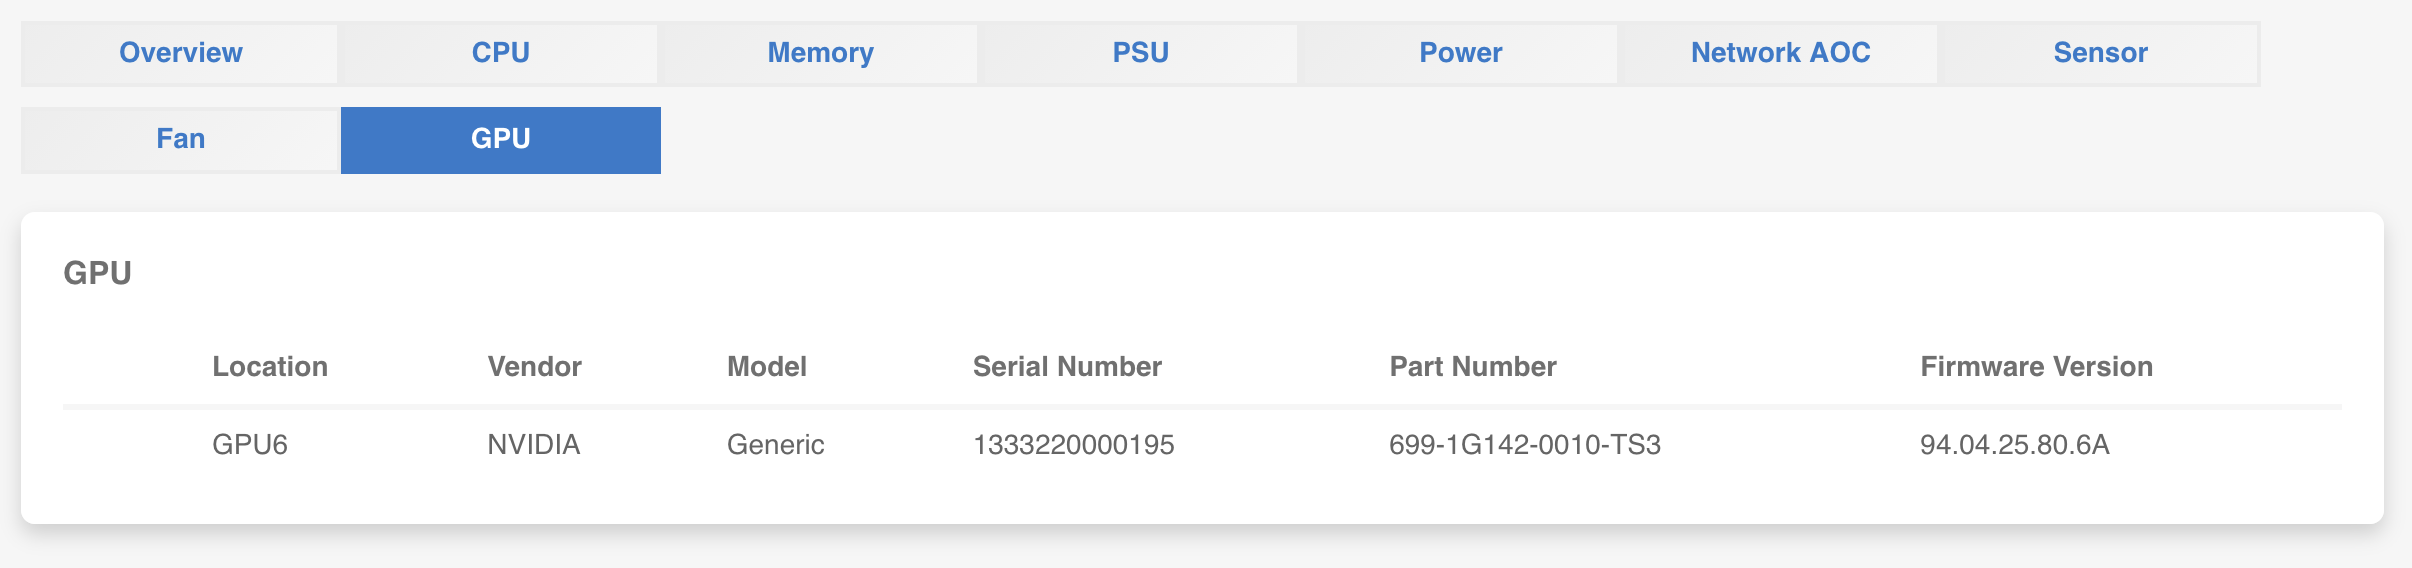
The GPU tab shows installed graphics cards with their PCI slot location, vendor, serial number, and firmware version. The BMC reads PCI configuration space directly, so you get basic hardware identifiers but not driver-level details like VRAM capacity or GPU clock speeds.
There are also tabs for PSU, Power, and Network AOC (add-on card) information — same idea, hardware details read directly from the components.
Sensor Readings
The Sensor tab gives you a real-time view of every IPMI sensor on the board — temperatures, voltages, fan speeds, and more. You can filter by sensor category and search by name.
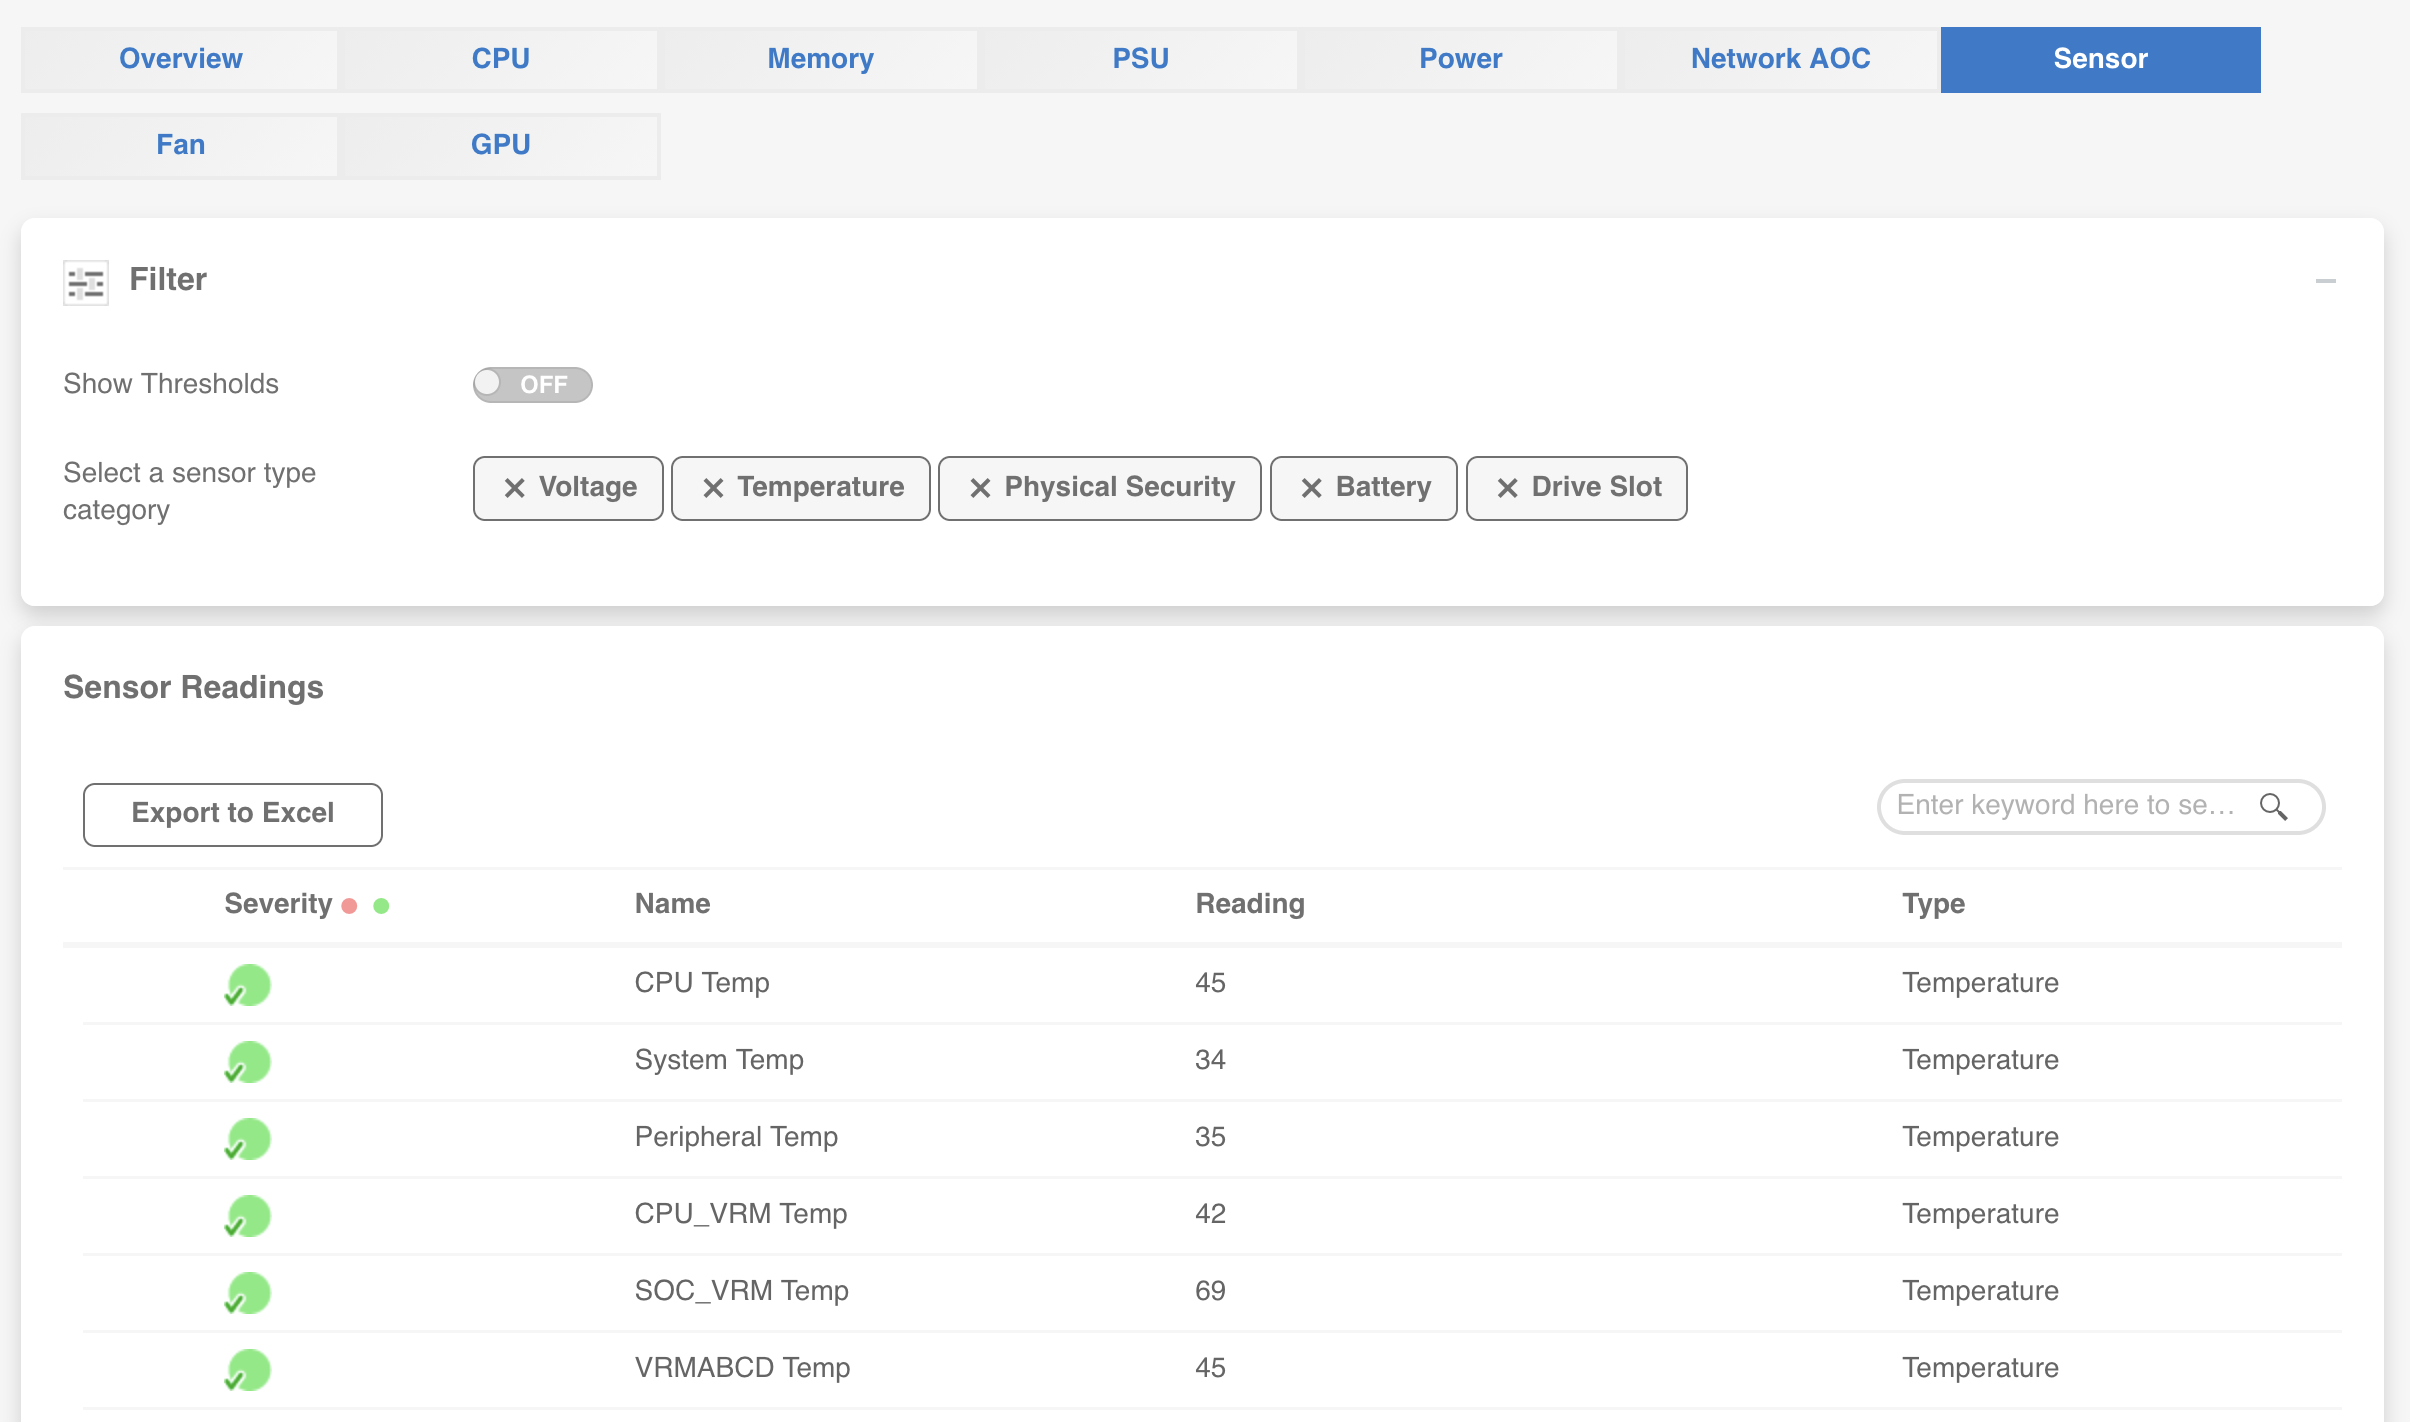
Each sensor shows a severity indicator (green = normal), the current reading, and the sensor type. You can toggle "Show Thresholds" to see the warning and critical limits for each sensor.
This is the same data you'd get from ipmitool sensor list on the command line, but in a searchable, filterable table that's easier to scan — especially useful when you're troubleshooting thermal issues or checking that everything is within spec after a hardware change.
The web UI also has sensor history graphs that show trends over time, and a full event log (equivalent to ipmitool sel list) in a searchable table format.
Fan Control
The Fan tab is where things get interesting if you've replaced the stock fans with quieter alternatives like Noctua.
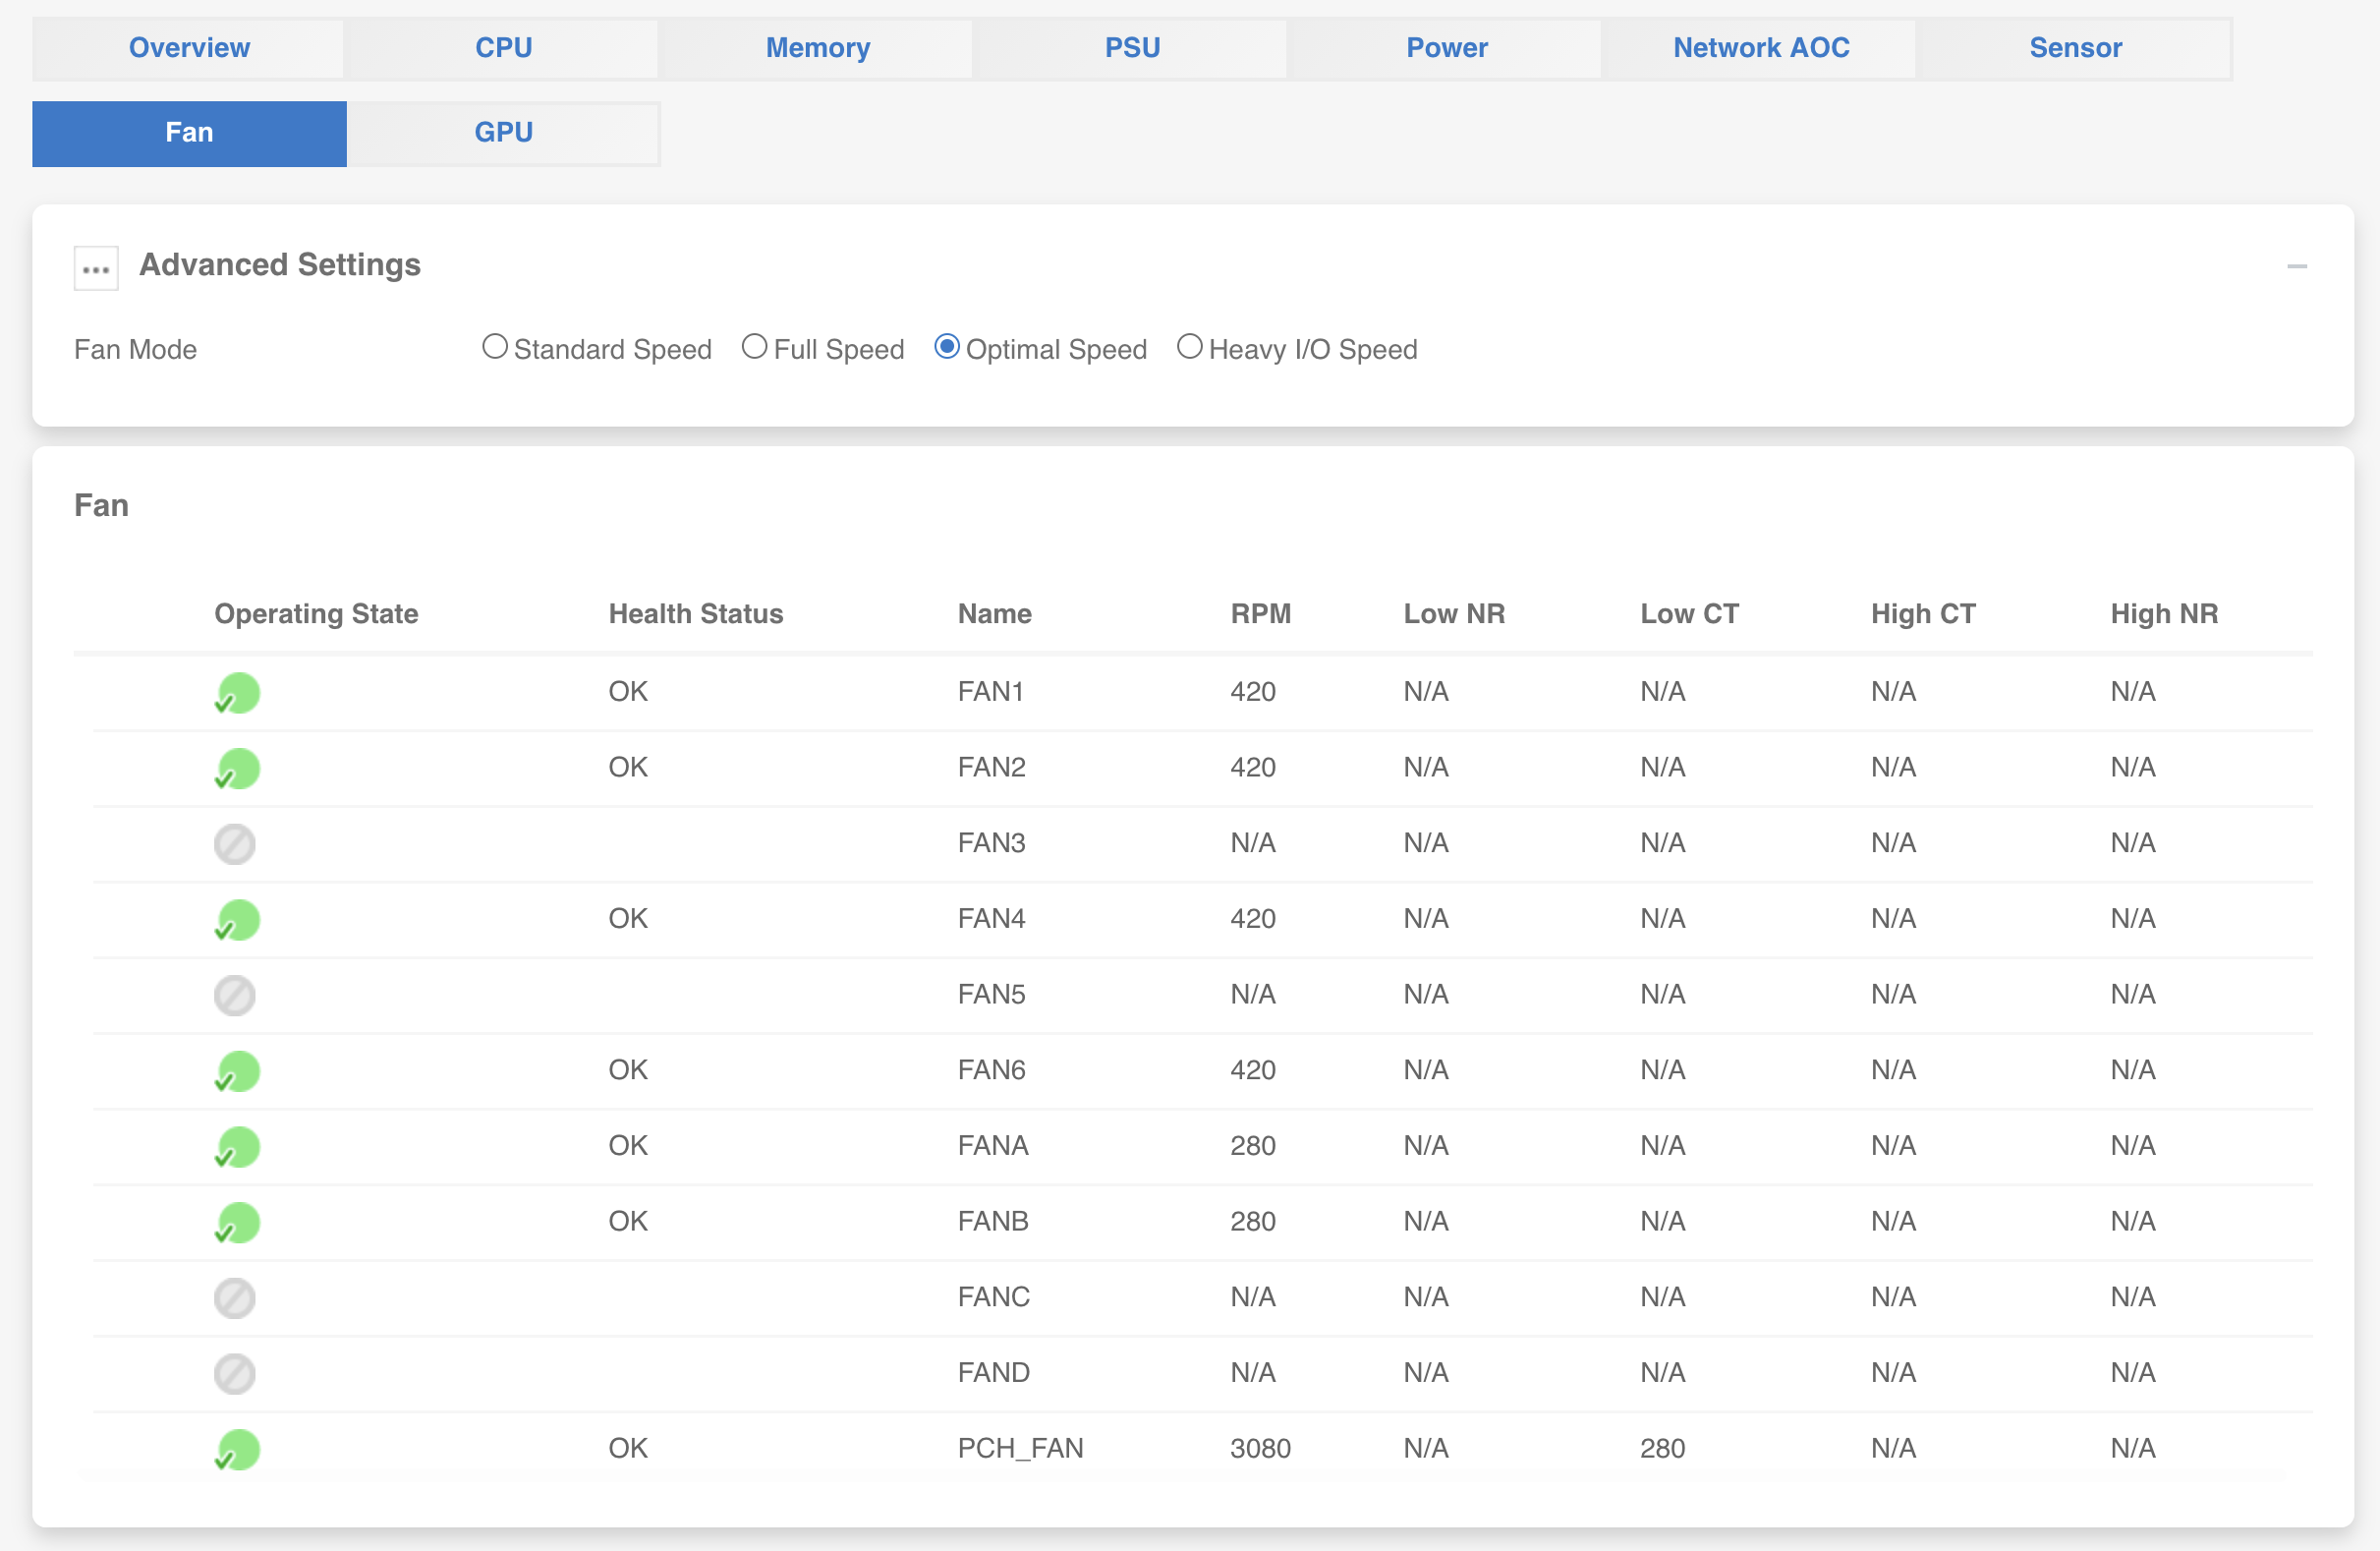
At the top, you can select the fan mode:
- Standard Speed — default conservative profile
- Full Speed — all fans at 100% (loud, but useful for burn-in testing)
- Optimal Speed — BMC adjusts fan speeds based on temperatures (recommended for most setups)
- Heavy I/O Speed — more aggressive cooling for storage-heavy workloads
Below that, you get a table of every fan header with its current RPM, operating state, health status, and threshold values.
If you've swapped to Noctua fans, you'll likely need to lower the fan speed thresholds in the BMC — Noctua fans spin slower than the stock fans and will trigger low-RPM warnings at the default thresholds. I covered that process in detail in a companion guide on fixing Noctua fan cycling with ipmitool.
User Management
To change your password through the web UI (or to add additional BMC user accounts), navigate to Configuration > Account Services > Users.
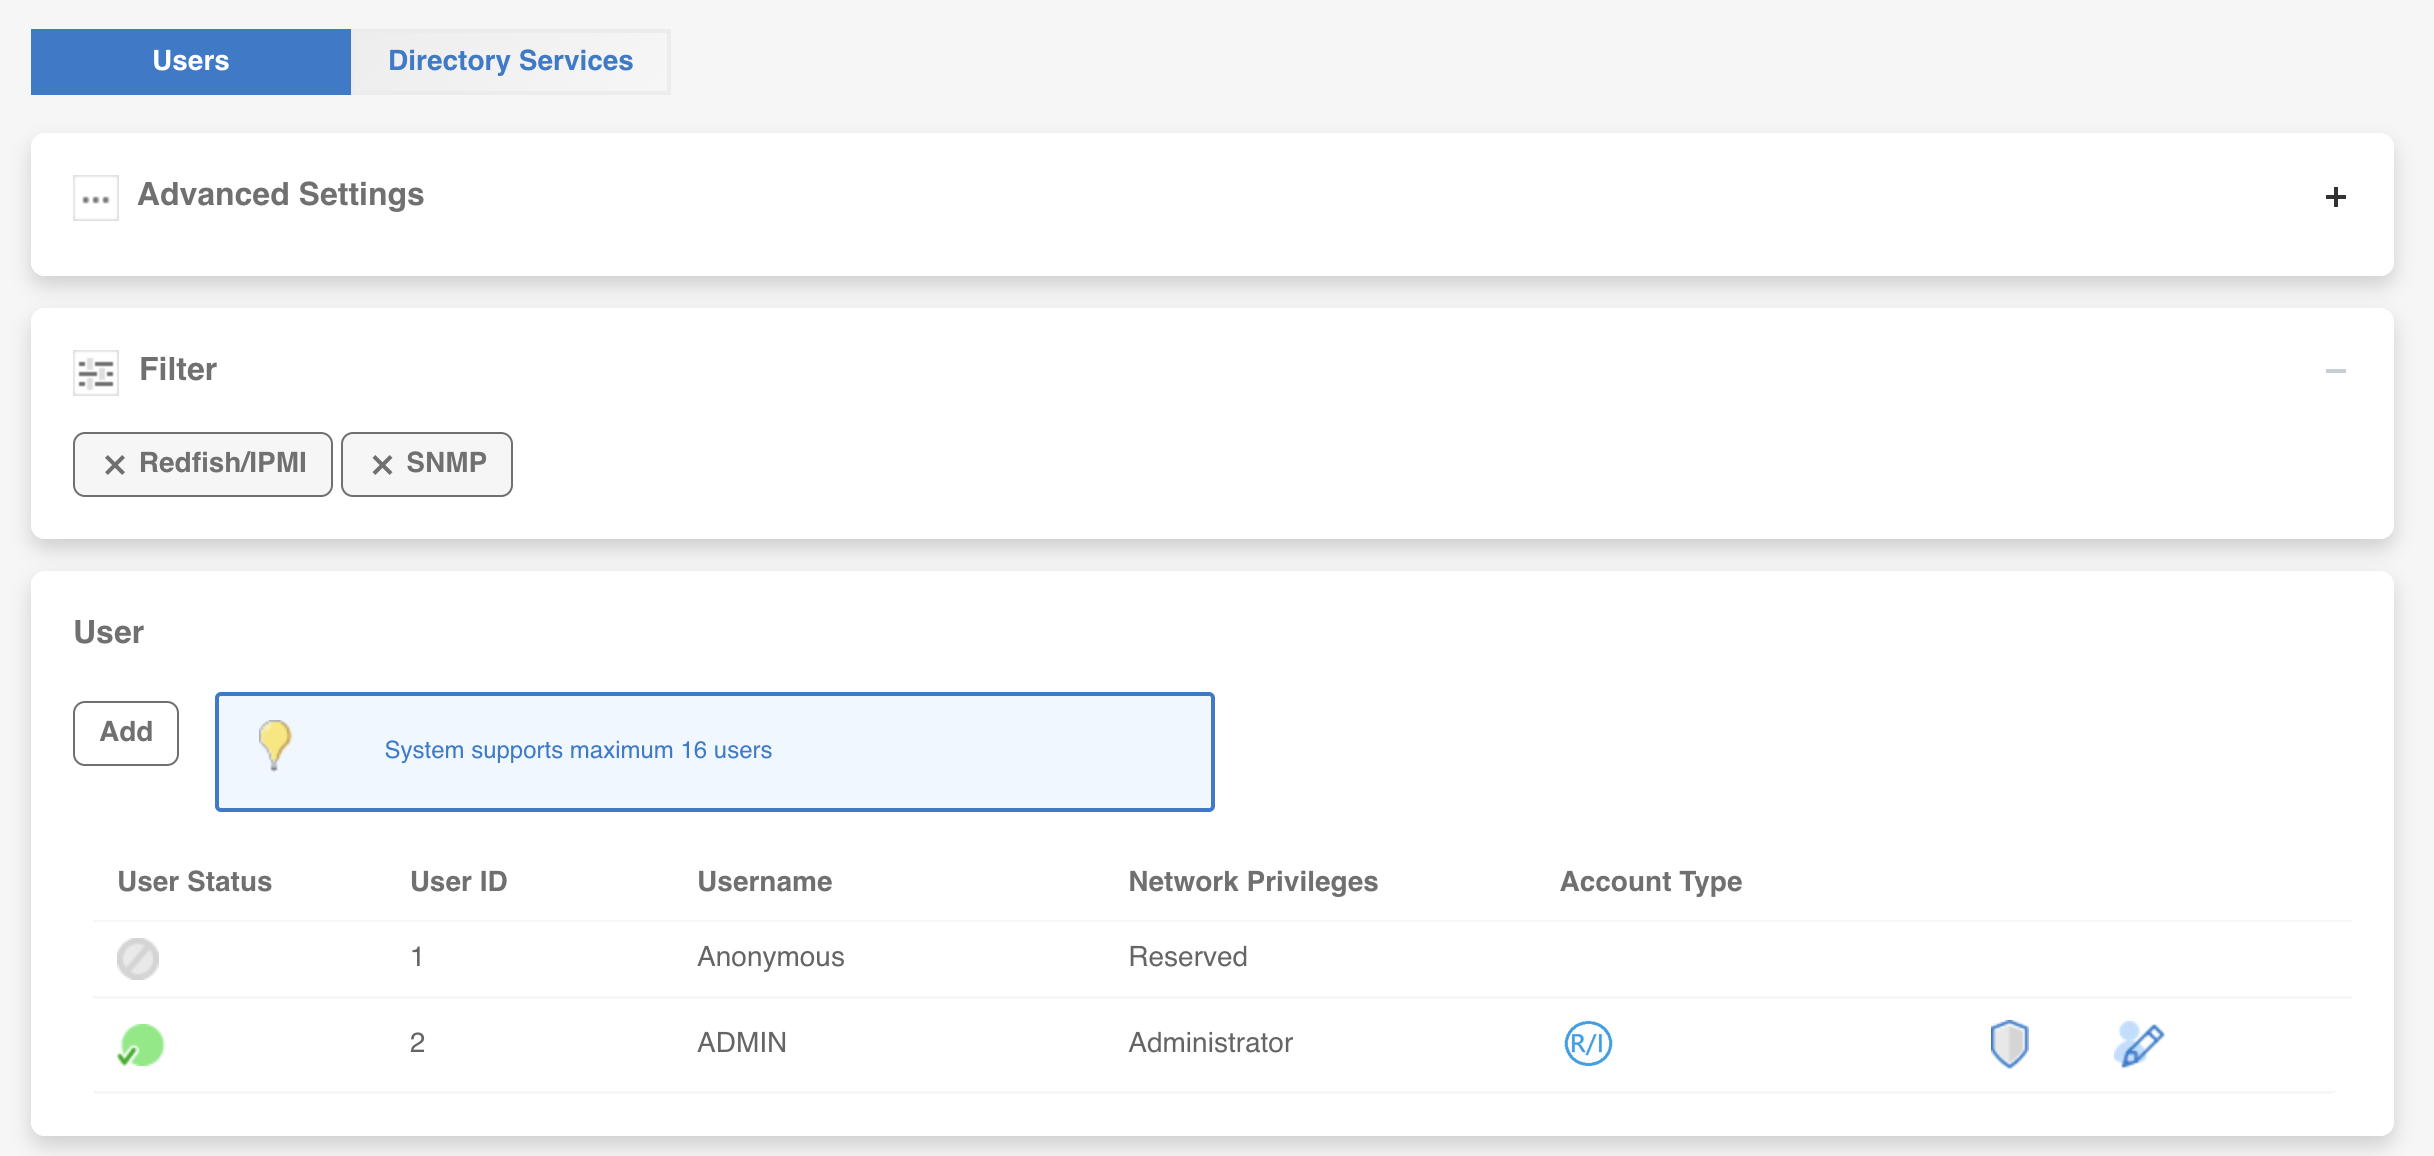
You'll see the default accounts — Anonymous (reserved, disabled) and ADMIN (your active administrator account). Click the edit icon on the ADMIN row to open the Modify User dialog:
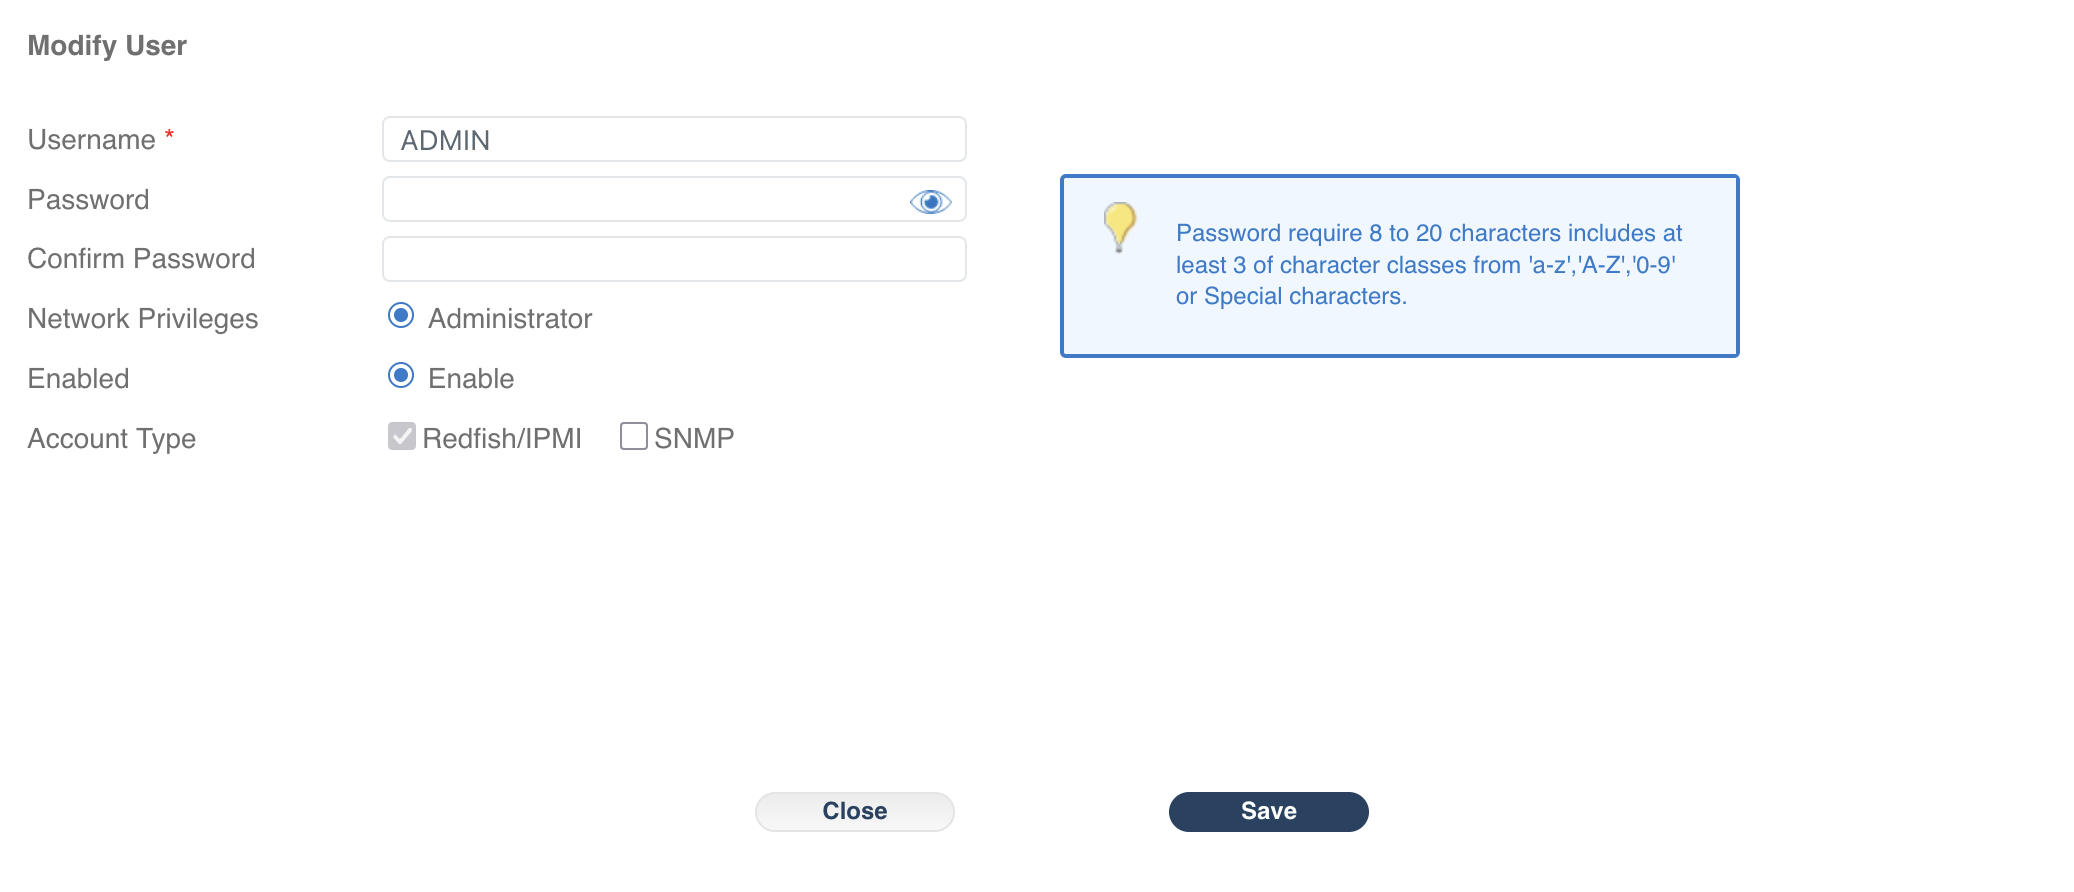
Notice the yellow info box — this is where the BMC clearly states the password requirements: 8 to 20 characters with at least 3 character classes (lowercase, uppercase, digits, special). This is the same policy that ipmitool enforces with the misleading error message mentioned earlier.
The BMC supports up to 16 user accounts. For a homelab, one ADMIN account is typically fine, but you can create operator-level accounts with reduced privileges if others need monitoring access without full control.
Other Key Features
Beyond what's shown in the screenshots, the IPMI web UI offers several more capabilities worth knowing about:
Remote Console (KVM)
This is the standout feature of IPMI. The HTML5-based KVM (keyboard/video/mouse) console gives you full remote access to the server's display — including BIOS POST, GRUB bootloader, and OS login screens. No Java plugin required on modern SuperMicro firmware.
This works even when the OS isn't running, which makes it invaluable for:
- Installing an OS remotely
- Troubleshooting boot failures
- Accessing BIOS/UEFI settings without a physical monitor
- Recovery operations when SSH is unavailable
Virtual Media
You can mount ISO files from your workstation directly to the server through the BMC. The server sees them as a physical USB drive or optical disc. Combined with KVM, this means you can do a full remote OS install without physically touching the machine.
Power Control
Power on, off, reset, and graceful ACPI shutdown — all from the web UI. You can also configure the power restore policy, which controls what happens after a power outage:
- Always off — server stays off until manually powered on (the default)
- Restore previous state — if it was running when power was lost, it boots back up automatically
- Always on — powers on whenever AC power is restored
For a homelab server, "restore previous state" is the right choice. You can set it from the web UI or via ipmitool:
ipmitool chassis policy previousNetwork and NTP
Under Configuration, you can adjust the BMC's network settings (static IP vs. DHCP, DNS, VLAN tagging) and configure NTP for time synchronization. Setting up NTP is worth doing — the BMC's internal clock drifts without it, and accurate timestamps matter for event logs and sensor history.
SMTP Alerts
You can configure the BMC to send email notifications when critical events occur — over-temperature conditions, power supply failures, fan failures, and other hardware alerts. This requires an SMTP server or relay on your network.
Redfish API
The BMC also exposes a Redfish REST API — the modern, standards-based successor to raw IPMI commands. You can query it from any machine on the network:
curl -k -u ADMIN:'YourPassword' https://10.1.10.11/redfish/v1/Systems/1This returns JSON with system health, sensor data, power state, and more. Useful if you want to integrate BMC monitoring into scripts, dashboards (Grafana, Home Assistant), or monitoring tools (LibreNMS, Zabbix).
Firmware Updates
The web UI supports flashing BMC firmware and (on some boards) BIOS updates. Always read the release notes before updating BMC firmware — and keep in mind that a failed flash can require physical SPI recovery to fix.
Verification
To confirm everything is set up correctly:
- Password works over the network:
ipmitool -I lanplus -H 10.1.10.11 -U ADMIN -P 'YourPassword' chassis status- Web UI is accessible: navigate to
https://<bmc-ip>/and log in - Power restore policy is set (if you changed it):
ipmitool chassis status | grep 'Power Restore'Should show Power Restore Policy : previous (or whatever you configured).
Wrap-Up
The IPMI web UI gives you full remote control over your server hardware — from basic monitoring and fan control to complete remote console access via KVM. Once the initial password is set and you know where things are, you probably won't open the web UI daily, but it becomes essential when you need to troubleshoot a boot failure, mount an ISO remotely, or check on temperatures from your phone while you're away from your desk.
The main gotcha on SuperMicro boards is the password complexity requirement that masquerades as a message length error in ipmitool. Now you know what it actually means — and the web UI's Modify User dialog shows the real requirements in plain English.