
Install Paperless-ngx on Proxmox LXC (2026)
April 22, 2026Tutorial
⚠This site is under active development. Some features may not work as expected, and new content is being added regularly.

Every device on your network makes hundreds of DNS queries a day. By default, those queries go to your ISP or a third-party provider like Google or Cloudflare — and they can see every domain you visit.
Pi-hole intercepts those queries at the network level, blocking ads, trackers, and telemetry domains before they ever leave your network. Pair it with Unbound, a recursive DNS resolver, and your queries go directly to the authoritative DNS servers — no third party in the middle.
This guide covers installing Pi-hole v6 and Unbound on a Proxmox LXC container. Pi-hole v6 is a major rewrite from v5 — the web interface, configuration system, and underlying architecture are all new. If you've followed older Pi-hole tutorials, most of them are outdated.
We'll also set up local DNS records, which are the foundation for the Caddy reverse proxy tutorial. Every service you deploy will get a friendly name like pbs.hake.rodeo instead of an IP address.
Pi-hole needs a static IP because every device on the network will point to it for DNS. If the IP changes, DNS breaks for everything.
SSH into your Proxmox host and create the container:
pct create 100 local:vztmpl/debian-13-standard_13.1-2_amd64.tar.zst \
  --hostname pihole \
  --cores 1 \
  --memory 512 \
  --rootfs local-lvm:4 \
  --net0 name=eth0,bridge=vmbr0,ip=10.1.20.100/24,gw=10.1.20.1 \
  --nameserver 10.1.20.1 \
  --unprivileged 1 \
  --features nesting=1 \
  --onboot 1 \
  --start 1
WARNING
Replace the IP address, gateway, and DNS with values that match your network. The CT ID and hostname are your choice. Check your available templates with pveam list local if the template name doesn't match.
A few things to note about this command:
--nameserver 10.1.20.1 points DNS at the gateway temporarily. We can't point it at Pi-hole yet because Pi-hole isn't installed — the installer needs to download packages.--features nesting=1 is required for Debian 13. Without it, systemd can't create namespaces and the container starts in a degraded state.--onboot 1 enables autostart. Pi-hole is critical infrastructure — if your host reboots, DNS should come back automatically.--start 1 starts the container immediately after creation.Debian 13 has a quirk where /tmp is mounted as a tmpfs sized to the host's RAM, not the container's memory limit. On a host with 64 GB RAM and a container with 512 MB, this can cause apt to OOM-kill the container. Fix it before doing anything else.
Enter the container:
pct enter 100Mask the tmpfs mount and set a root password (you'll need this for the PVE console later):
systemctl mask tmp.mountpasswd rootExit the container and reboot to apply the tmpfs fix:
exitpct reboot 100Wait a few seconds for the container to come back up, then enter it again to finish the prep:
pct enter 100Install curl, which the Pi-hole installer needs:
apt-get update && apt-get install -y curlexitPi-hole's installer is interactive — it uses dialog prompts to walk you through each configuration choice. These dialogs require a proper terminal that pct enter via SSH doesn't always provide. Use the PVE web console for the install.
WARNING
The Pi-hole installer crashes with "cannot open tty-output" when run through pct enter over SSH. This is a known issue with how dialog handles TTY allocation in LXC containers. Use the PVE web console (CT 100 > Console) instead. After the install, you can switch back to your SSH client for everything else.
In the PVE web UI, click CT 100 > Console. Log in as root with the password you set in Step 1.
Download the installer first, then run it as a separate step. Piping directly to bash (curl | bash) can also cause TTY issues:
curl -sSL https://install.pi-hole.net -o /tmp/pihole-install.shbash /tmp/pihole-install.shThe installer presents several screens:
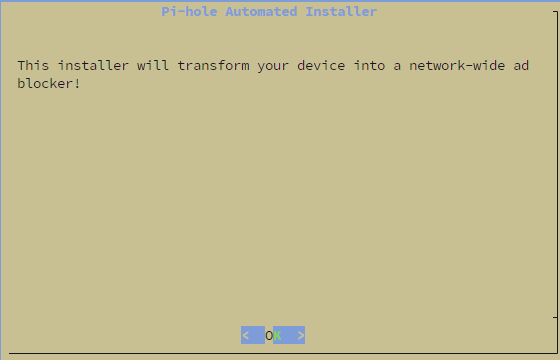
Click OK to proceed through the welcome and donation screens.
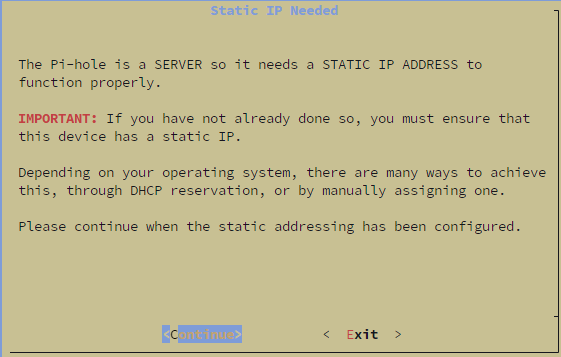
Static IP confirmation — click Continue. We already configured a static IP when creating the container.
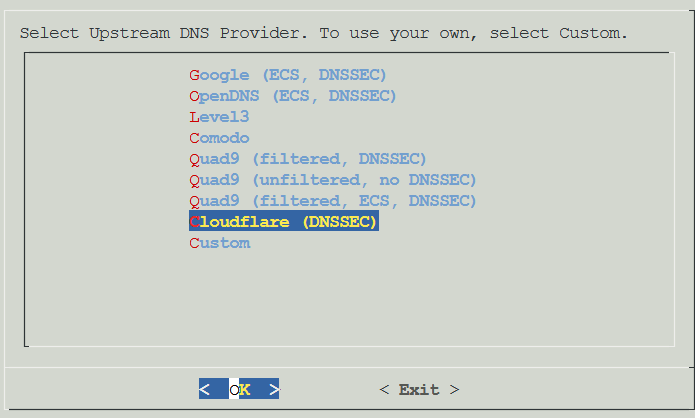
Upstream DNS provider — select any provider for now (e.g., Cloudflare). We'll replace this with Unbound in a later step.
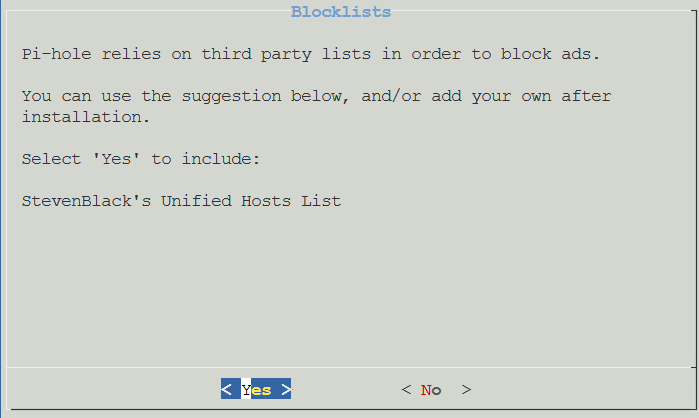
Blocklists — select Yes to include StevenBlack's Unified Hosts List. You can add more lists later.
Enable Logging — select Yes.
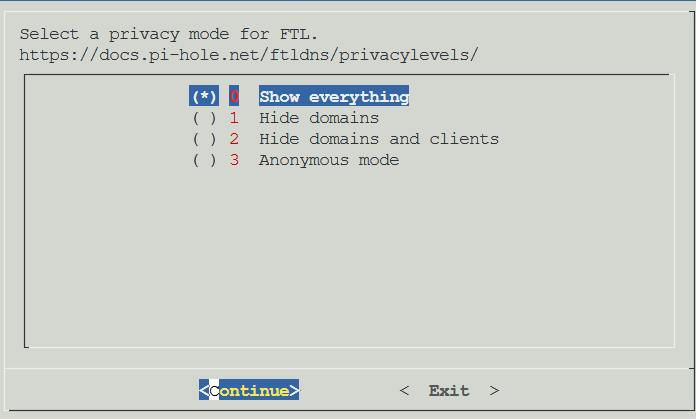
Privacy mode — select 0 Show everything. This gives you full visibility in the query log.
The installer runs and finishes with a summary screen showing your admin password:
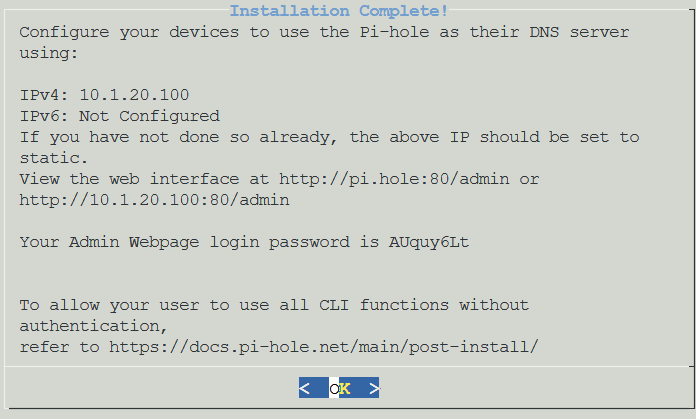
Save the admin password — you'll need it to log into the web interface.
NOTE
Pi-hole v6 replaced lighttpd and PHP with an embedded web server built directly into the pihole-FTL binary. If you've installed Pi-hole before, the installer may look different from what you remember — there's no separate web server to configure.
Open a browser and navigate to http://<your-pihole-ip>/admin. Log in with the password from the installer.
The first thing you'll notice is that Domains on Lists shows Error (-2). This is normal — the gravity database hasn't been populated yet.
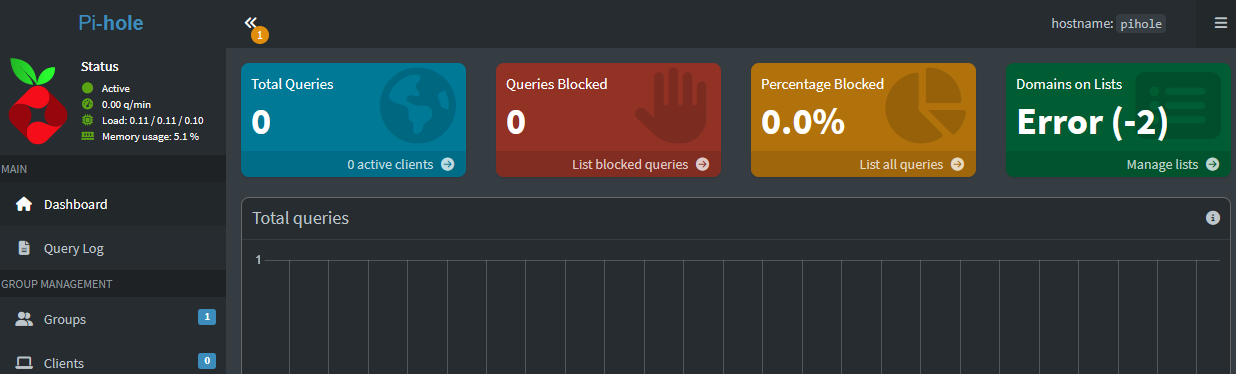
Go to Tools > Update Gravity and click Update. This downloads the blocklists and populates the database. Without this, Pi-hole is running but not actually blocking anything.
Pi-hole v6's web interface is completely rebuilt. A few things to look at:
pbs.hake.rodeoTIP
The admin UI runs on port 80 — no port number needed in the URL. If you have another service using port 80 in the same container (you shouldn't with a dedicated Pi-hole LXC), FTL will fall back to port 8080.
Unbound is a recursive DNS resolver. Instead of forwarding your queries to Cloudflare or Google, it resolves them by going directly to the authoritative DNS servers — starting from the root servers and working down the chain. No third party ever sees your full query.
From here on, you can use your SSH client again — no more dialog prompts. Enter the container:
pct enter 100Install Unbound from the Debian repos:
apt-get install -y unboundNOTE
Unbound may show an error when it first installs — it tries to bind to port 53, which Pi-hole already owns. This is expected. We're about to configure it to use port 5335 instead.
Create the Unbound configuration file. This config is based on the official Pi-hole Unbound guide with settings tuned for a Pi-hole setup:
nano /etc/unbound/unbound.conf.d/pi-hole.confPaste the following, then save with Ctrl+X, Y, Enter:
server:
    verbosity: 0

    interface: 127.0.0.1
    port: 5335

    do-ip4: yes
    do-udp: yes
    do-tcp: yes
    do-ip6: no

    prefer-ip6: no

    harden-glue: yes
    harden-dnssec-stripped: yes

    use-caps-for-id: no

    edns-buffer-size: 1232

    prefetch: yes

    num-threads: 1

    so-rcvbuf: 1m
    so-sndbuf: 1m

    private-address: 192.168.0.0/16
    private-address: 169.254.0.0/16
    private-address: 172.16.0.0/12
    private-address: 10.0.0.0/8
    private-address: fd00::/8
    private-address: fe80::/10
The key settings:
port: 5335 — avoids the port 53 conflict with Pi-holeharden-dnssec-stripped: yes — enables DNSSEC validation, rejecting responses with invalid signaturesprefetch: yes — refreshes popular domains before they expire from cache, keeping queries fastprivate-address blocks — prevents DNS rebinding attacks by refusing to return private IP addresses from public queriesNow restart Unbound:
systemctl restart unboundCheck that it's running:
systemctl status unbound --no-pager | head -5You should see active (running). If it fails, check the config for typos with unbound-checkconf.
WARNING
On some Debian installations, the unbound-resolvconf service can interfere with DNS configuration. If Unbound won't start after configuration, try: systemctl disable --now unbound-resolvconf.service
Before connecting Unbound to Pi-hole, verify it works on its own. Install dig if it's not already available:
apt-get install -y dnsutilsTest a basic query through Unbound:
dig google.com @127.0.0.1 -p 5335You should see a NOERROR status with an IP address in the answer section. The first query will be slow (200-500ms) because Unbound is resolving from root servers. That's recursive DNS working as designed — it's going to the root servers, then the TLD servers, then the authoritative server. Subsequent queries for the same domain are cached and near-instant.
Now test DNSSEC. This domain intentionally has a broken DNSSEC signature:
dig fail01.dnssec.works @127.0.0.1 -p 5335This should return SERVFAIL — Unbound caught the invalid signature and refused to return the result. That's exactly what we want.
Test the positive case:
dig dnssec.works @127.0.0.1 -p 5335This should return NOERROR. If you add the +ad flag, you'll see the ad (authenticated data) flag in the response, confirming DNSSEC validation passed.
Exit the container shell:
exitNow that Unbound is working, point Pi-hole at it instead of Cloudflare.
In the Pi-hole web UI, go to Settings > DNS.
Under Upstream DNS Servers, uncheck all existing providers (Cloudflare, Google, etc.).
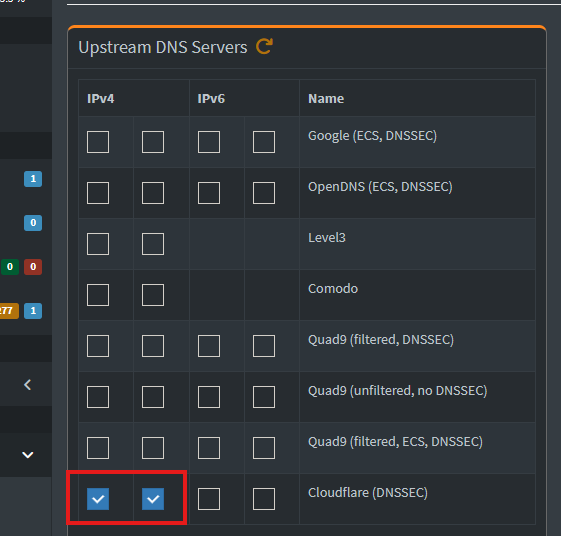
In the Custom DNS servers field, enter:
127.0.0.1#5335
The #5335 tells Pi-hole to use Unbound's port instead of the default 53.
Scroll down to Interface settings. This controls which devices Pi-hole responds to.
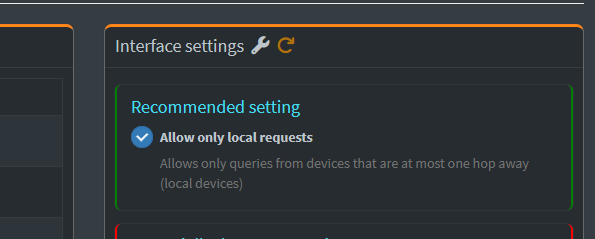
The options are:
If all your devices and containers are on the same subnet as Pi-hole, Allow only local requests is the right choice — it's the most restrictive option that works.
If you're querying Pi-hole from a different VLAN or subnet (e.g., your PC is on VLAN 10 but Pi-hole is on VLAN 20), you'll need Permit all origins. Since Pi-hole is internal-only with no internet exposure, there's no security risk either way.
Click Save.
Test that the complete chain works — client to Pi-hole to Unbound to root servers:
dig google.com @10.1.20.100WARNING
Replace 10.1.20.100 with your Pi-hole's IP address.
You should get a NOERROR response. Check the Pi-hole query log in the web UI — the query should show as forwarded to 127.0.0.1#5335.

That confirms the full chain: your device asks Pi-hole, Pi-hole asks Unbound, Unbound resolves recursively from the root servers.
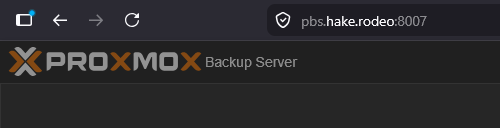
Local DNS records let you give services friendly names instead of IP addresses. Instead of accessing PBS at https://10.1.20.200:8007, you can use pbs.hake.rodeo:8007. This is also the foundation for the Caddy reverse proxy tutorial — Caddy handles the routing, but Pi-hole handles the name resolution.
NOTE
Without Caddy, local DNS only resolves the name to an IP — you'll still need the port number (e.g., pbs.hake.rodeo:8007). The Caddy tutorial eliminates the port requirement by routing everything through HTTPS on port 443.
In the Pi-hole web UI, go to Local DNS > DNS Records.
Add a record:
pbs.hake.rodeo10.1.20.200Click Add. The record appears immediately.
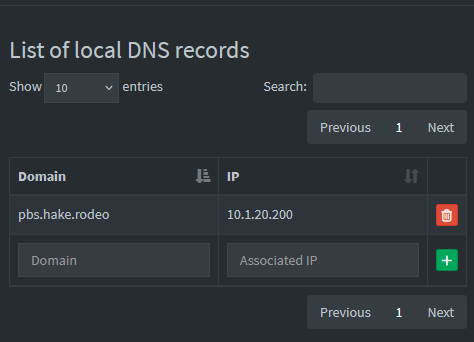
Verify it resolves:
dig pbs.hake.rodeo @10.1.20.100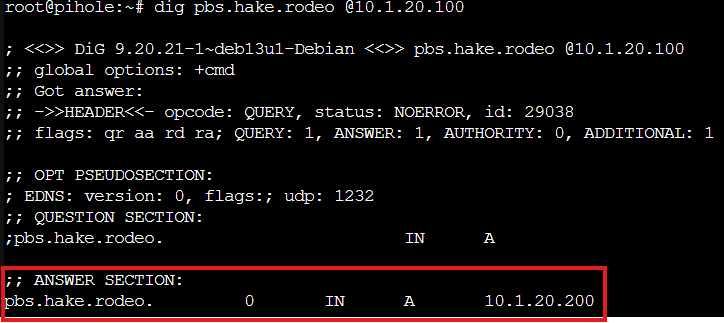
You should see 10.1.20.200 in the answer section. Add more records for any other services you want to access by name — like uptime.hake.rodeo for Uptime Kuma.
Now that Pi-hole is running with Unbound, update your containers and VMs to use it for DNS.
For LXC containers, pct set updates the DNS directly — no reboot needed:
pct set 100 --nameserver 127.0.0.1Pi-hole's own container uses 127.0.0.1 since it queries itself. For other containers, use Pi-hole's IP:
pct set 102 --nameserver 10.1.20.100Repeat for each container you want to use Pi-hole. Replace 102 with your container IDs.
VMs are different from containers — PVE doesn't control the VM's DNS directly. For VMs like PBS that were installed from their own ISO, you need to update DNS inside the VM.
SSH into the VM and edit /etc/resolv.conf:
nano /etc/resolv.confChange the nameserver line to Pi-hole's IP, then save with Ctrl+X, Y, Enter:
nameserver 10.1.20.100This persists across reboots unless something like dhcpcd overwrites it.
NOTE
The qm set --nameserver command exists but only works if the VM has cloud-init configured. For VMs installed from a standalone ISO (like PBS), manual /etc/resolv.conf editing is the way to go.
To use Pi-hole from devices outside the Proxmox host, you can either update DNS per-device or update your router's DHCP settings.
Per-device (Windows example): Go to Settings > Network & Internet > your adapter > DNS settings > Edit. Set the Preferred DNS to Pi-hole's IP.
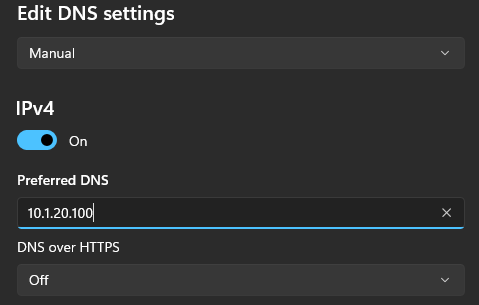
Router DHCP: Log into your router's admin panel, find the DHCP settings, and change the DNS server to Pi-hole's IP. All devices will pick it up on their next DHCP renewal.
Once DNS is pointing at Pi-hole, you can access services by name:
TIP
If your PC is on a different VLAN than Pi-hole (e.g., your PC is on VLAN 10 but Pi-hole is on VLAN 20), you'll need to change Pi-hole's interface setting to Permit all origins. The default "Allow only local requests" only responds to devices on the same subnet.
Pi-hole is critical infrastructure — if it goes down, DNS breaks for every device using it. Set up three monitors in Uptime Kuma to catch different failure modes:
Ping monitor — is the container alive?
DNS monitor — is Pi-hole actually resolving queries?
HTTP monitor — is the admin UI accessible?
http://<your-pihole-ip>/adminEach monitor catches a different problem:
systemctl status pihole-FTL.
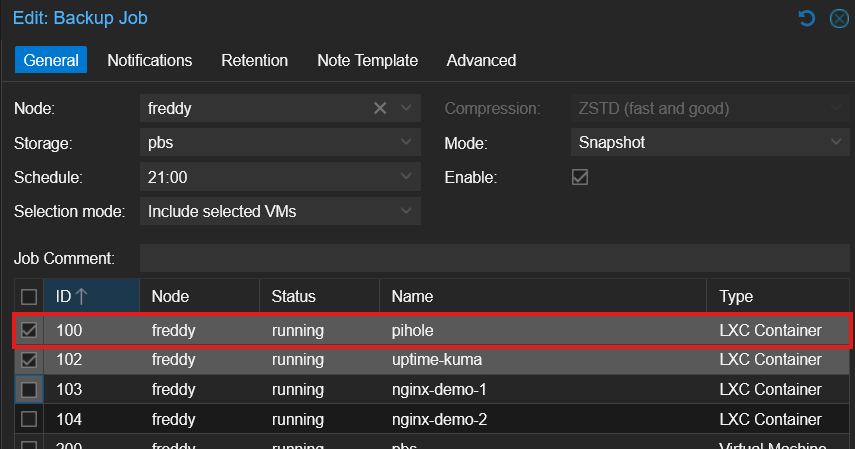
If you have Proxmox Backup Server set up, add the Pi-hole container to your backup job. In the PVE web UI, go to Datacenter > Backup, edit your backup job, and add CT 100 to the selection.
A full container backup captures everything — the Pi-hole config at /etc/pihole/pihole.toml, the gravity database (blocklists), local DNS records, and query history.
The dialog tool needs a proper TTY to render its interactive prompts. Running the installer through pct enter via SSH doesn't always provide one. Use the PVE web console (CT > Console) instead. Download the script first, then run it — don't pipe to bash.
The gravity database hasn't been populated. Go to Tools > Update Gravity in the Pi-hole web UI, or run pihole -g from the CLI.
Unbound tries to bind to port 53 on first install, but Pi-hole already owns that port. Configure Unbound to use port 5335 (Step 4), then restart it. If it still fails, check for typos with unbound-checkconf and make sure unbound-resolvconf.service isn't interfering: systemctl disable --now unbound-resolvconf.service.
Normal. The first query for any domain through Unbound takes 200-500ms because it resolves from root servers — walking the chain from root to TLD to authoritative. Subsequent queries for the same domain are cached and resolve in under 1ms.
The pihole binary is installed to /usr/local/bin/, which isn't always in the PATH. Use pct enter 100 for an interactive session where the full PATH is loaded.
Debian 13 mounts /tmp as tmpfs sized to the host's RAM, not the container's cgroup limit. If apt operations crash the container, mask the tmpfs mount: enter the container, run systemctl mask tmp.mount, exit, and pct reboot 100.
If Pi-hole's interface setting is "Allow only local requests," it only responds to devices on the same subnet. Change it to Permit all origins in Settings > DNS > Interface settings. Since Pi-hole is internal-only with no internet exposure, this is safe.
If the container's DNS is pointed at Pi-hole before Pi-hole is installed, the installer can't download packages. Keep DNS pointed at the gateway until Pi-hole is fully running, then switch.
If the Pi-hole installer crashes with "Unable to find IPv6 ULA/GUA address," disable IPv6 before running the installer: add net.ipv6.conf.all.disable_ipv6=1 and net.ipv6.conf.default.disable_ipv6=1 to /etc/sysctl.conf and run sysctl -p.
You now have network-wide DNS filtering and private recursive resolution:
pbs.hake.rodeoThis is the DNS foundation for your homelab. In the Caddy tutorial, we'll add a reverse proxy that takes those local DNS records and serves every service over HTTPS with valid certificates — no ports to remember, no certificate warnings.
Some links are affiliate links. I may earn a small commission at no extra cost to you.