Install Paperless-ngx on Proxmox LXC (2026)
April 22, 2026Tutorial
⚠This site is under active development. Some features may not work as expected, and new content is being added regularly.
Your containers are running services you care about. Pi-hole, Caddy, Uptime Kuma, Jellyfin — whatever you've built. If you accidentally delete a container, botch an upgrade, or corrupt a config, can you get back to a working state?
Proxmox Backup Server (PBS) is the official backup solution for Proxmox VE. It deduplicates and compresses backups so they take a fraction of the raw storage. Three containers sharing the same Debian 13 base? PBS stores the shared packages once. And restoring is a few clicks in the PVE web UI.
In this guide, we'll install PBS 4.1 as a VM on your Proxmox host, connect it to PVE, run a backup, and prove the restore works by destroying a container and bringing it back. We'll also set up automated maintenance and a retention strategy so the whole thing runs itself.
NOTE
We're running PBS as a VM on the same host it's backing up. This is the most common homelab setup and it protects against software disasters — accidental deletion, bad upgrades, corrupted configs. It does not protect against hardware failure (if the drive dies, the backups die too). Offsite and redundant backups are covered in a follow-up guide.
SSH into your Proxmox host and download the PBS 4.1 ISO directly to local storage. This is faster than downloading to your laptop and uploading through the web UI.
wget -P /var/lib/vz/template/iso/ https://enterprise.proxmox.com/iso/proxmox-backup-server_4.1-1.isoThe ISO is about 1.5 GB. Despite being on the "enterprise" URL, it's freely downloadable — no subscription required.
Always verify the checksum. You're trusting this system with your backups.
echo "670f0a71ee25e00cc7839bebb3f399594f5257e49a224a91ce517460e7ab171e /var/lib/vz/template/iso/proxmox-backup-server_4.1-1.iso" | sha256sum -cYou should see OK. The checksum is from the Proxmox downloads page — check there if the version has been updated since this guide was written.
TIP
Why a VM and not an LXC container? PBS is designed to run as a standalone system with its own kernel, web UI, and storage management. You can install PBS packages inside a Debian LXC, but it's not officially supported and misses features like ZFS management. A VM gives you the full PBS experience with clean isolation from the host.
One command creates the entire VM. Each flag is explained below.
qm create 200 \
  --name pbs \
  --cores 2 \
  --memory 4096 \
  --net0 virtio,bridge=vmbr0 \
  --scsihw virtio-scsi-single \
  --scsi0 local-lvm:32 \
  --cdrom local:iso/proxmox-backup-server_4.1-1.iso \
  --boot order=ide2 \
--ostype l26| Flag | What it does |
|---|---|
--name pbs | VM name in the PVE sidebar |
--cores 2 | 2 CPU cores |
--memory 4096 | 4 GB RAM — PBS recommended minimum |
--net0 virtio,bridge=vmbr0 | VirtIO NIC on the default bridge |
--scsihw virtio-scsi-single | VirtIO SCSI controller (best disk performance) |
--scsi0 local-lvm:32 | 32 GB virtual disk on local-lvm |
--cdrom local:iso/... | Mount the PBS installer ISO |
--boot order=ide2 | Boot from CD-ROM first (for the installer) |
--ostype l26 | Linux 2.6+ kernel type |
NOTE
32 GB is enough for this tutorial — our containers total about 800 MB raw, and dedup compresses that further. In production, size the disk based on what you're backing up. A homelab with 10-15 typical containers (Pi-hole, Caddy, Jellyfin, etc.) might have 20-30 GB of raw container data. With daily backups and a month of retention, PBS dedup usually brings storage to 1.5-2x the raw size, so 100-200 GB handles most homelabs comfortably. We'll cover adding more storage in a follow-up guide.
Start the VM and open the console from the PVE web UI. The PBS installer boots to a welcome screen.
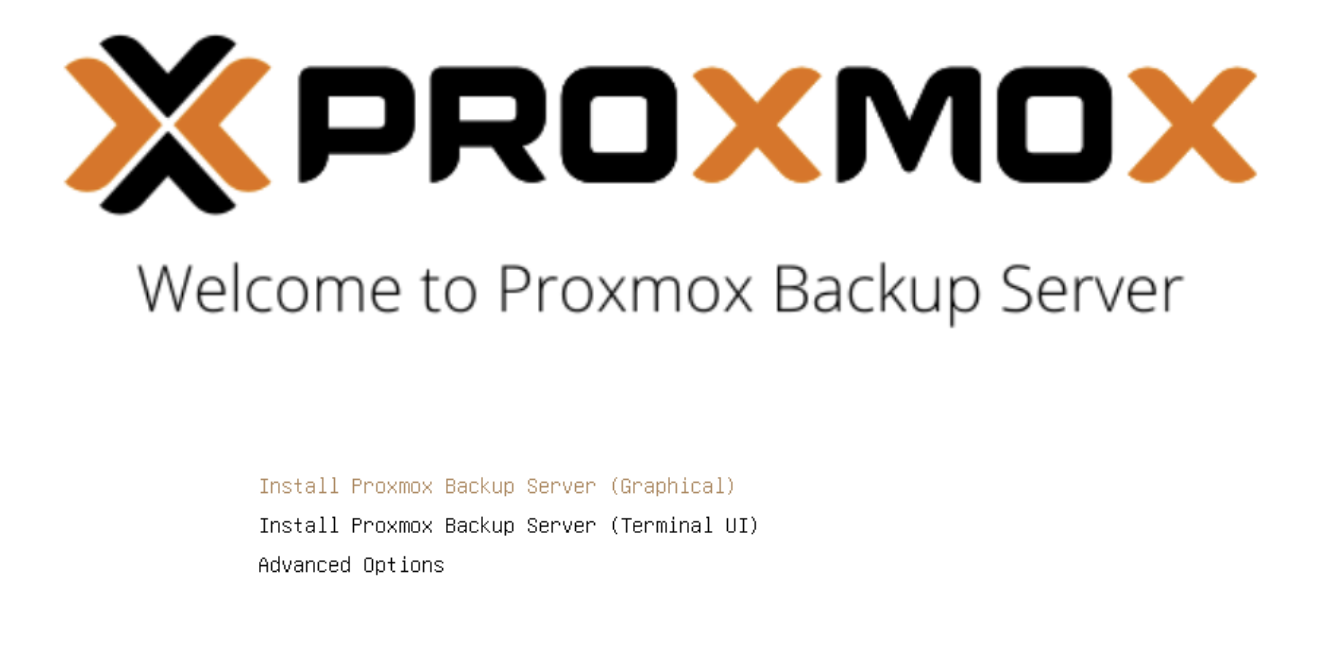
Select Install Proxmox Backup Server (Graphical) and accept the EULA.
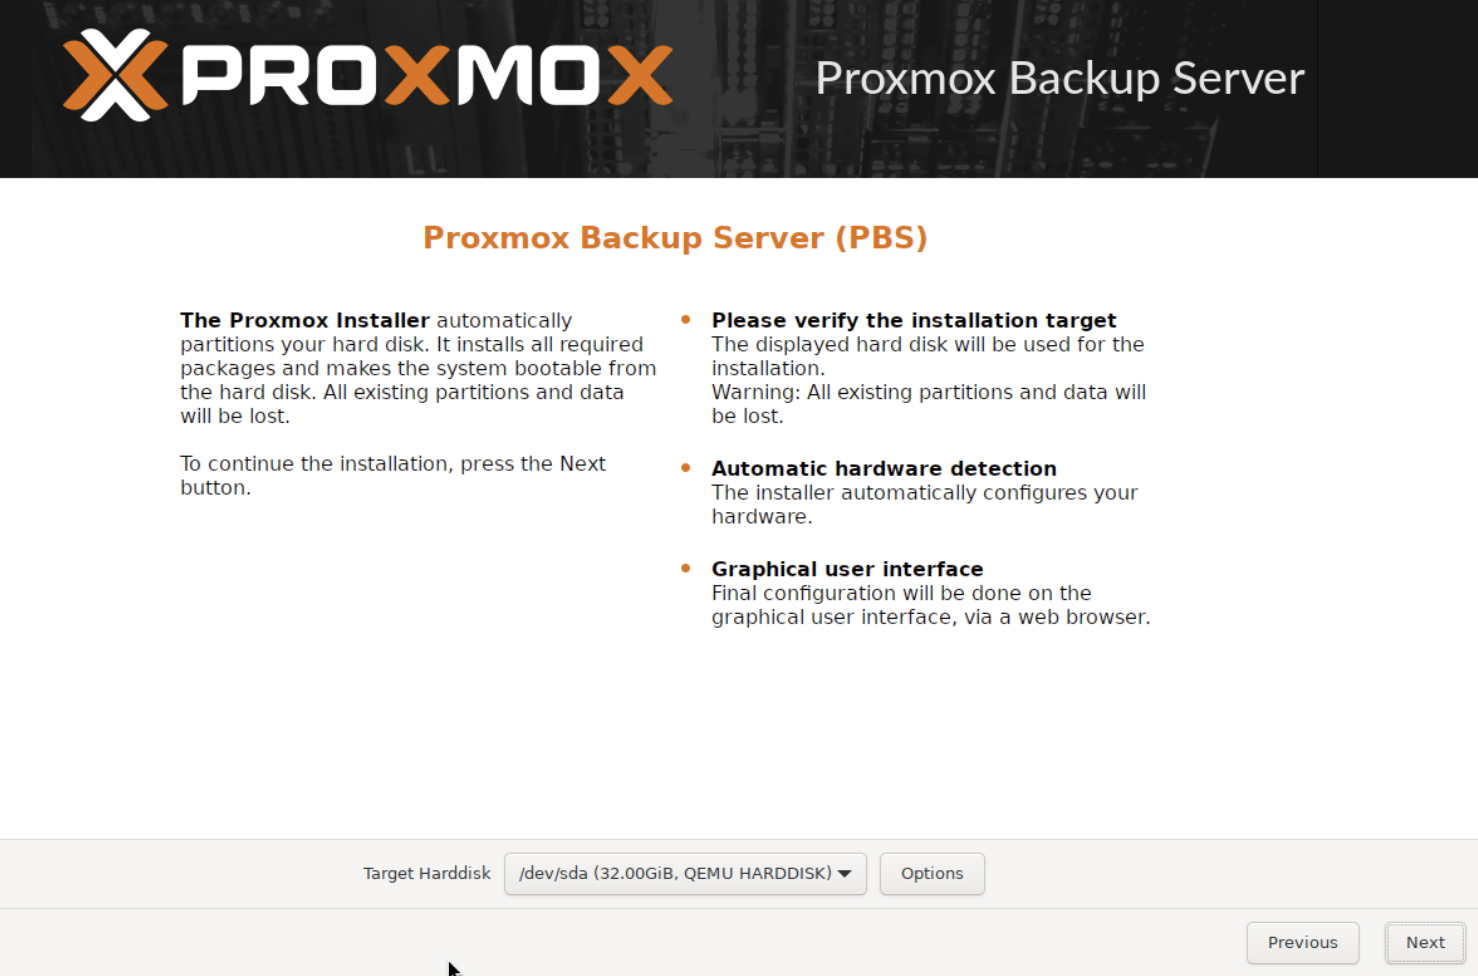
Target disk — select the 32 GB VirtIO disk. Leave the filesystem as ext4 (LVM), which is the default.
Location and timezone — select your country and timezone.
Password and email — set a root password and enter an email address for notifications.
Network configuration — this is the most important screen. Set a static IP on your network.
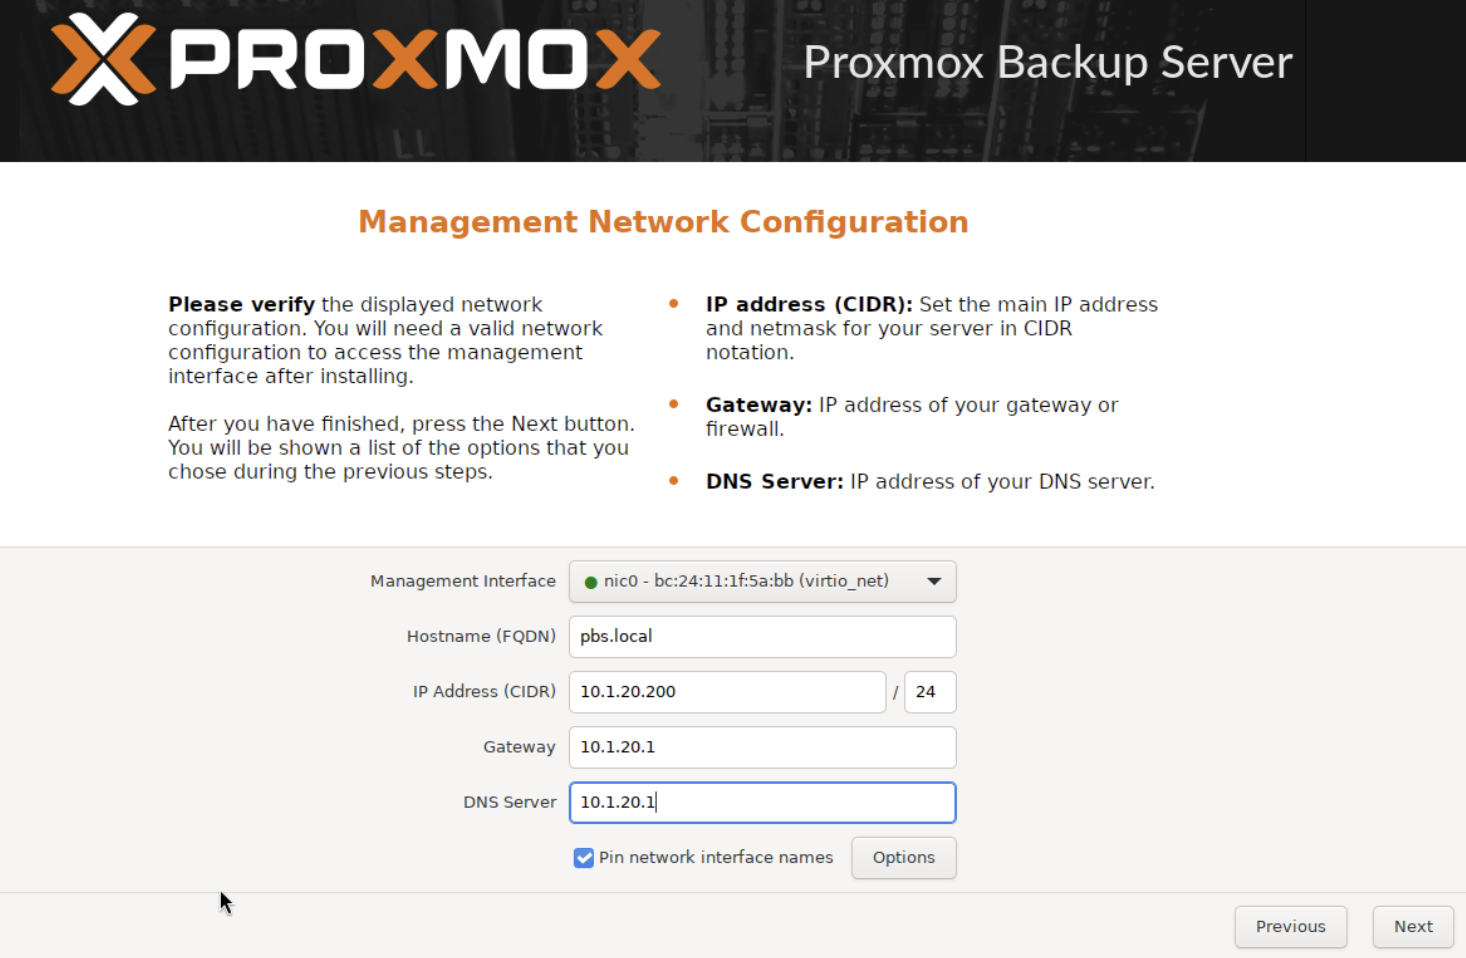
WARNING
Replace these values with your own network settings. The IP, gateway, and DNS must match your environment.
Summary — review everything and click Install.
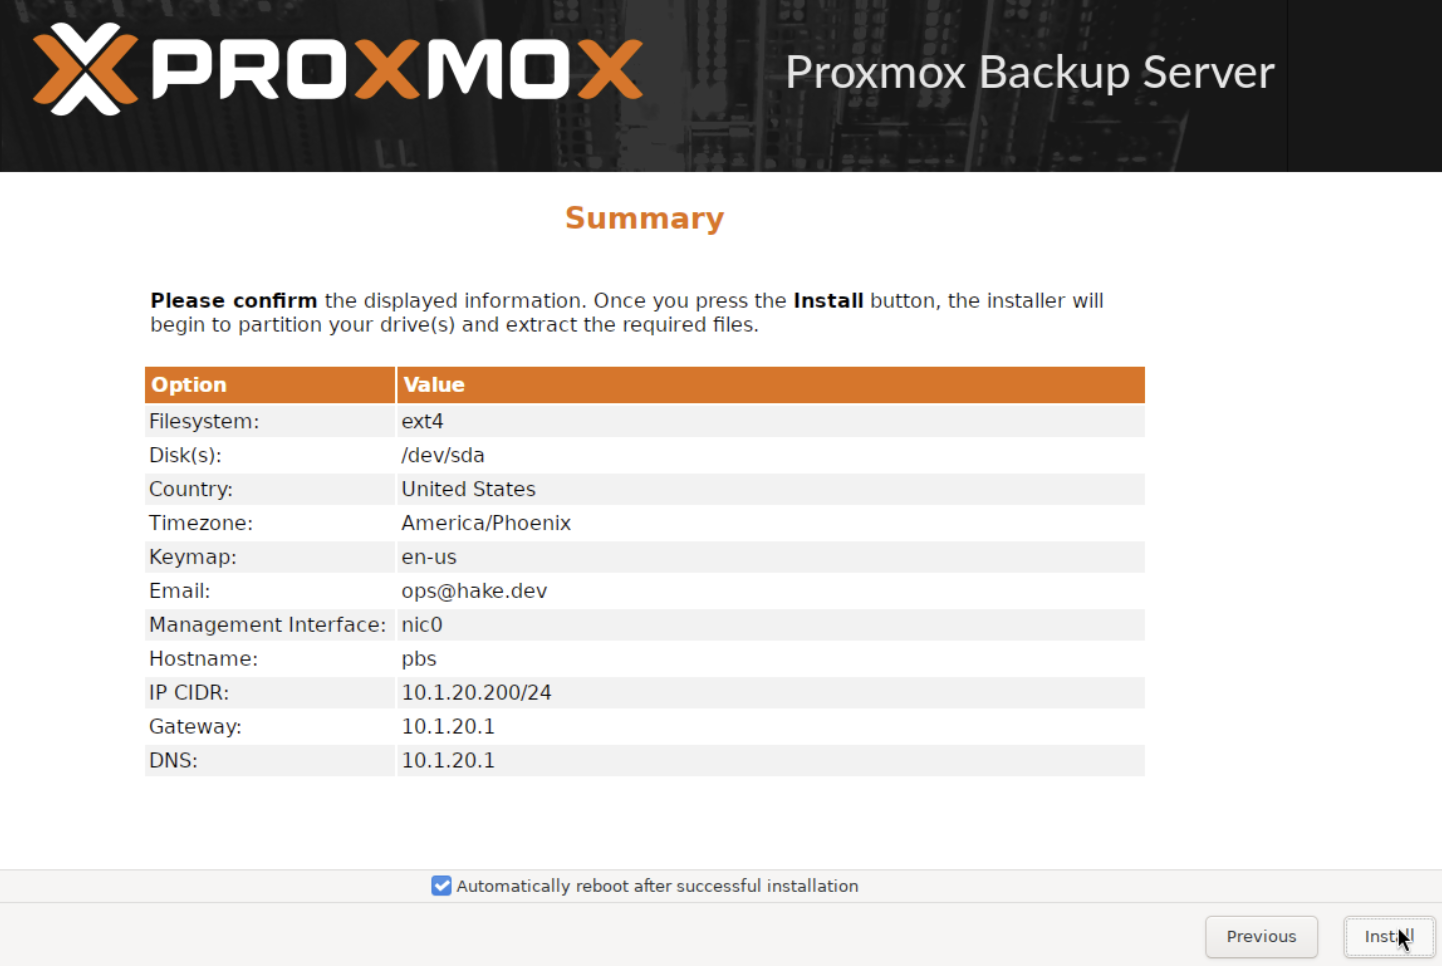
The installation takes 2-3 minutes. When it finishes, you'll see a success screen with the PBS web UI URL.
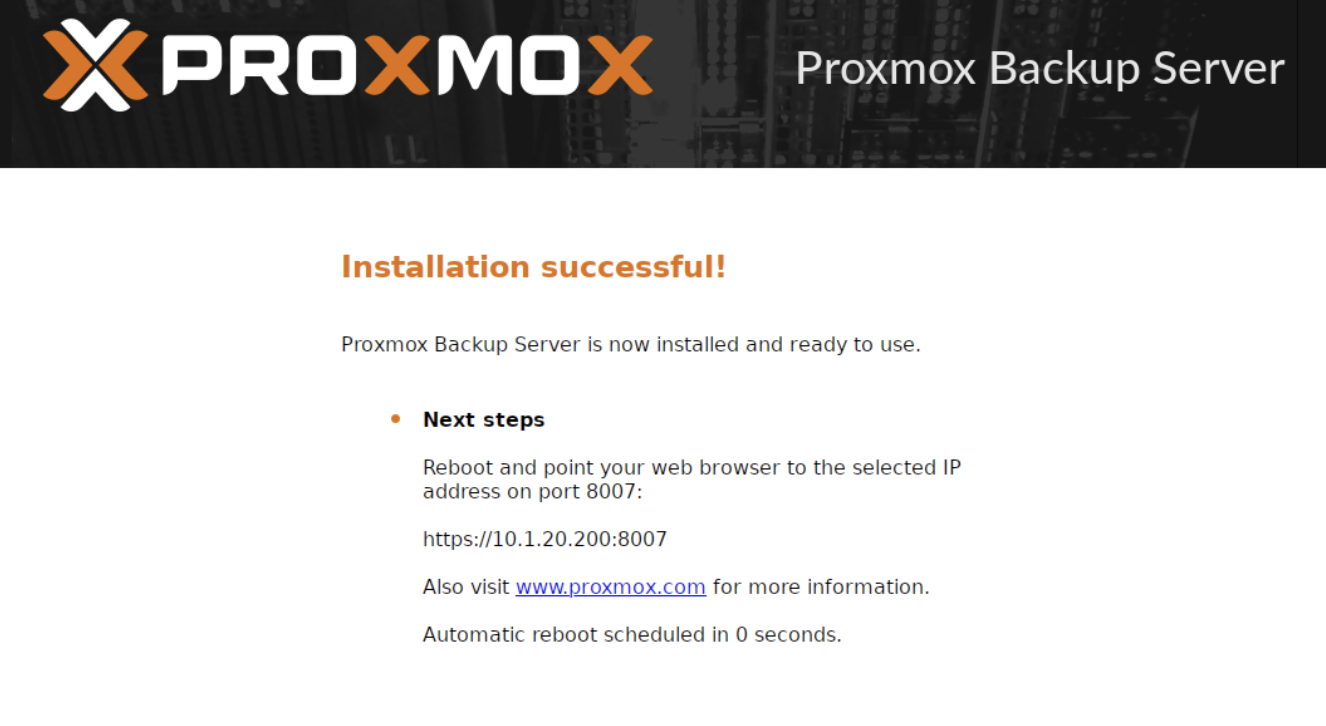
Click Reboot, then shut the VM down immediately — it will try to boot the installer ISO again. Back on your Proxmox host, remove the ISO and set the boot order to disk:
qm set 200 --cdrom noneqm set 200 --boot order=scsi0qm set 200 --onboot 1The first command removes the ISO. The second sets the VM to boot from disk instead of CD-ROM. The third enables autostart so PBS comes back after a host reboot.
Now start the VM:
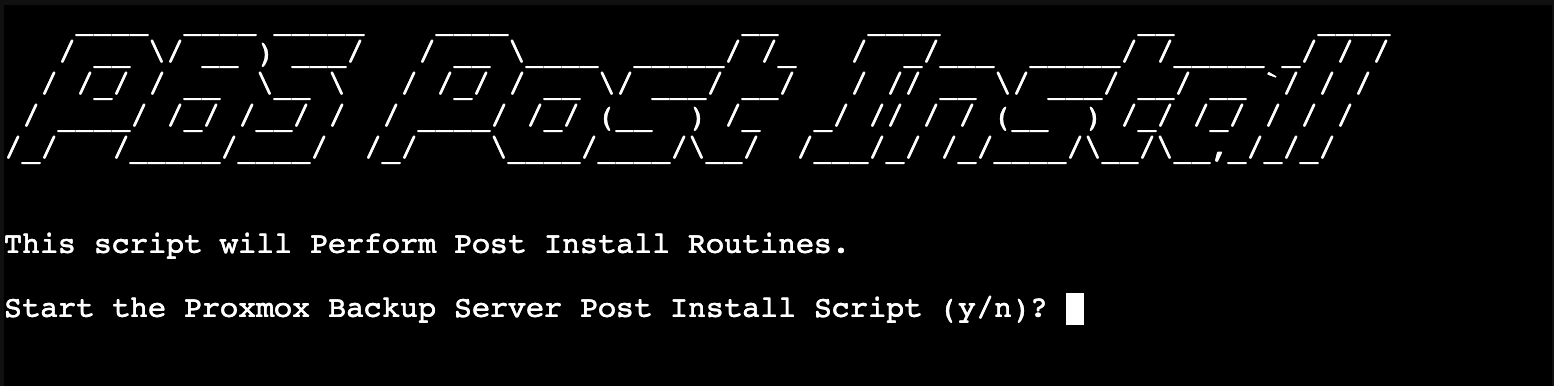
qm start 200Just like Proxmox VE, PBS ships with an enterprise repository that requires a paid subscription. The community post-install script fixes the repositories, disables the subscription nag, and updates the system.
This script comes from the Proxmox VE Helper-Scripts project — an open-source collection of automation scripts maintained by the community. The project was originally created by tteck, who passed away in November 2024. It's now maintained by volunteers at the community-scripts GitHub organization.
WARNING
There are several URLs floating around for this project. The official sources are:
Older URLs like helper-scripts.com and tteck.github.io/Proxmox still work but redirect through stale chains. Always verify you're pulling scripts from the official community-scripts GitHub org.
SSH into your PBS VM (or use the console):
bash -c "$(curl -fsSL https://raw.githubusercontent.com/community-scripts/ProxmoxVE/main/tools/pve/post-pbs-install.sh)"The script presents interactive menus. Select Yes for each:
apt update && apt dist-upgradeAfter the reboot, install the QEMU guest agent. This is standard practice for any VM on Proxmox — it gives PVE better visibility into the guest, enables clean shutdowns, and allows PVE to freeze the filesystem during backup snapshots for consistent backups.
SSH back into the PBS VM:
apt-get install -y qemu-guest-agentsystemctl enable --now qemu-guest-agentThen enable the agent in PVE from your Proxmox host:
qm set 200 --agent enabled=1Reboot the VM for the agent to connect:
qm reboot 200After the reboot, PBS is ready to use — no subscription warnings, guest agent active, and PVE has full visibility into the VM.
A datastore is where PBS stores your backup data. Before creating one in the web UI, make the directory on disk.
mkdir -p /mnt/datastore/backupsThis creates the directory on the PBS VM's root filesystem. In production, you'd want the datastore on a separate disk or ZFS pool to keep backup data isolated from the OS. For this tutorial, the root filesystem is fine.
Now open the PBS web UI at https://<your-pbs-ip>:8007 and log in as root with the password you set during installation.
TIP
PBS uses port 8007, not 8006 like PVE. You'll get a self-signed certificate warning — that's expected. Accept it and proceed.
In the left sidebar, click Add Datastore.
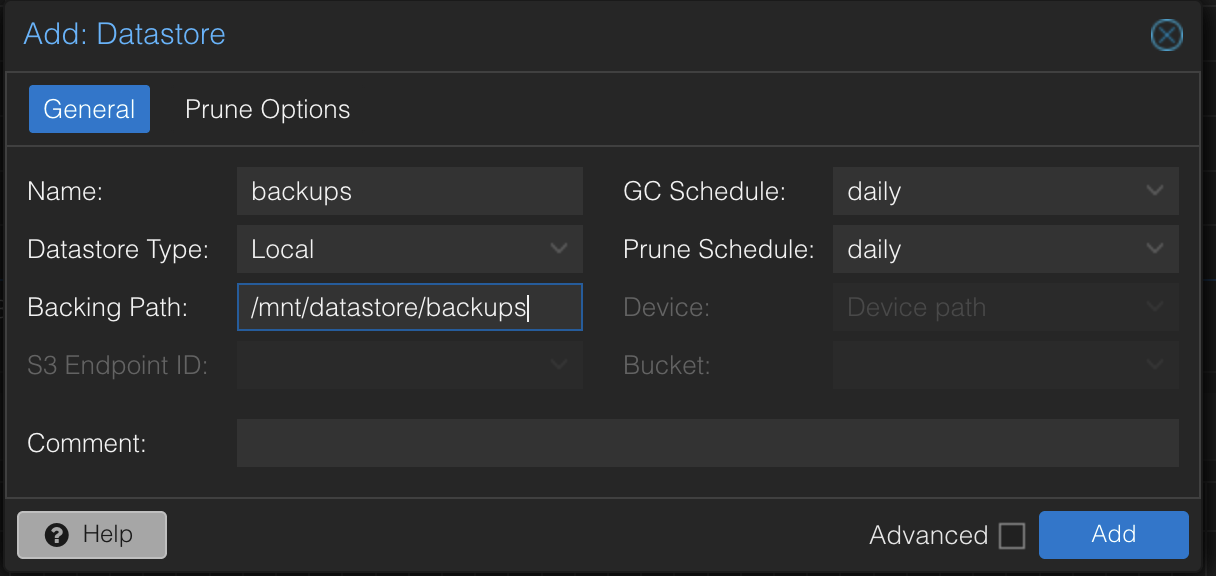
backups/mnt/datastore/backupsClick Add. The datastore appears in the left sidebar.
To connect Proxmox VE to your new backup server, you need three things: an API token, the token's permissions, and the PBS certificate fingerprint.
In the PBS web UI, navigate to Configuration > Access Control and click the API Token tab.

Click Add and configure:
root@pampve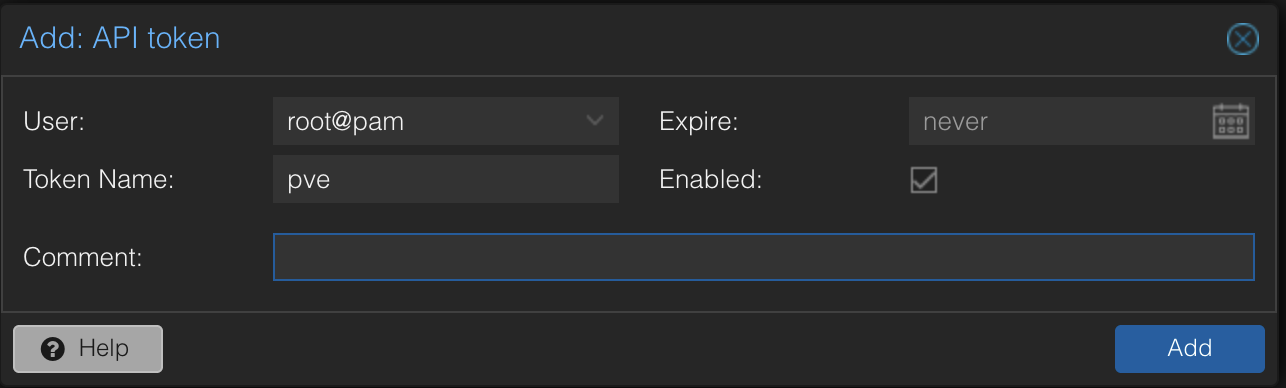
Click Add. A dialog shows the token secret — copy it immediately. It's only shown once.
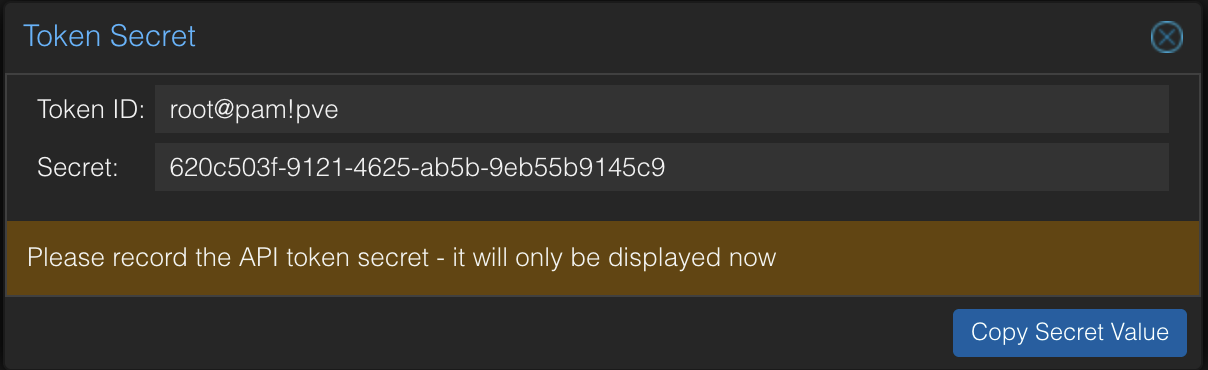
WARNING
If you lose the token secret, you'll need to delete the token and create a new one. Save it in a password manager or text file temporarily.
PBS 4.1 always creates tokens with privilege separation — the token has no permissions by default. Without this step, PVE will fail with a misleading "Cannot find datastore" error that makes you think the datastore doesn't exist.
SSH into your PBS VM and grant the token access to the datastore:
proxmox-backup-manager acl update /datastore/backups DatastoreAdmin --auth-id 'root@pam!pve'NOTE
The single quotes around root@pam!pve are important. The ! character triggers history expansion in bash — without quotes, the command will fail or behave unexpectedly.
This gives the token full datastore permissions: backup, restore, prune, and verify.
Verify it worked:
proxmox-backup-manager user permissions 'root@pam!pve'You should see six permissions listed under /datastore/backups.
PVE needs the PBS certificate fingerprint to verify the connection (since we're using a self-signed cert). You can grab it from the PBS web UI by clicking Show Connection Information on the datastore dashboard, or via CLI:
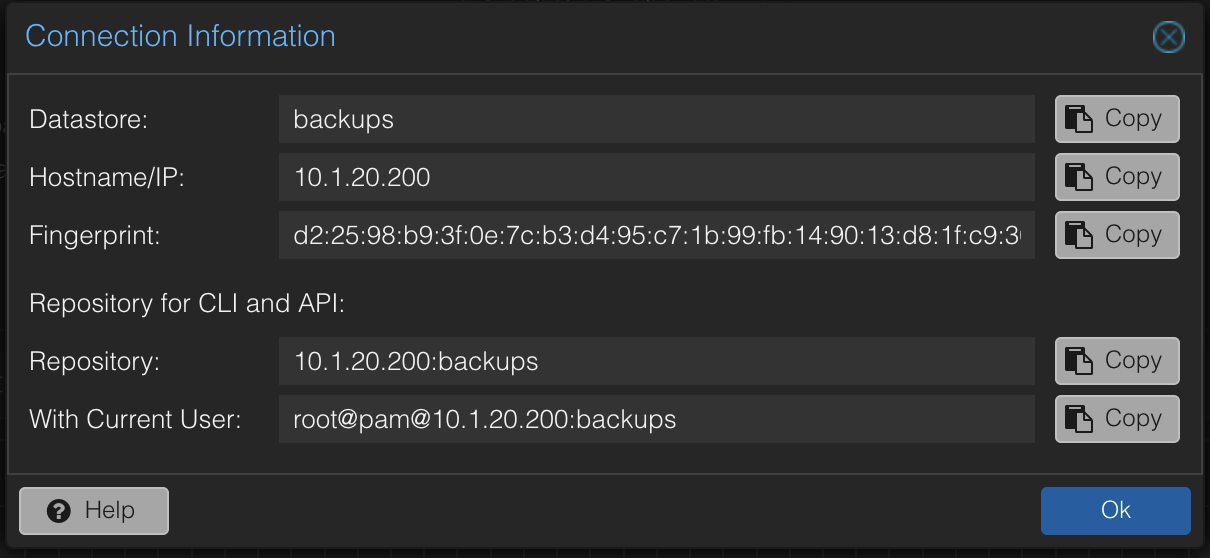
proxmox-backup-manager cert info 2>/dev/null | grep FingerprintCopy the fingerprint — you'll paste it in the next step.
Switch to the PVE web UI. Navigate to Datacenter > Storage and click Add > Proxmox Backup Server.
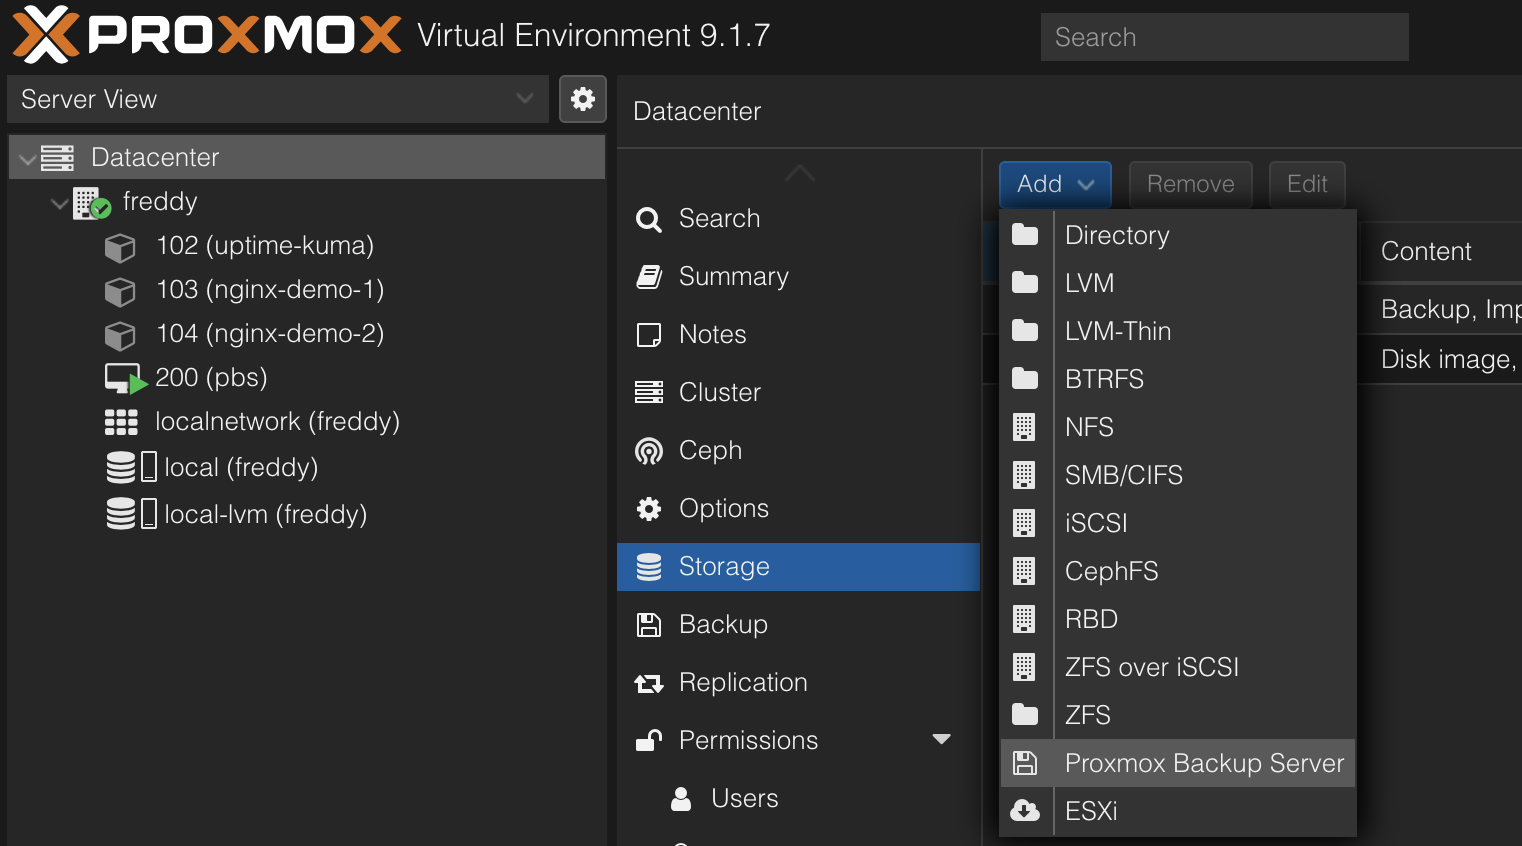
Fill in the connection details:
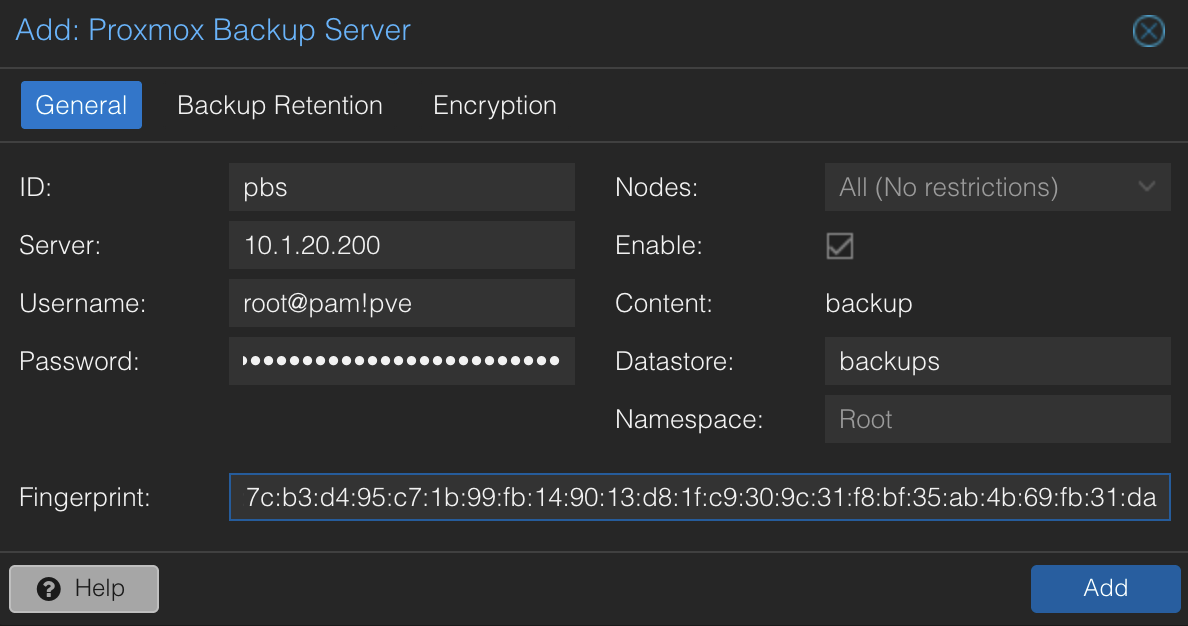
pbsroot@pam!pvebackupsNOTE
The "Password" field accepts API token secrets despite being labeled "Password." The Username field in the PVE web UI handles the ! character correctly — no quoting needed there, only in bash commands.
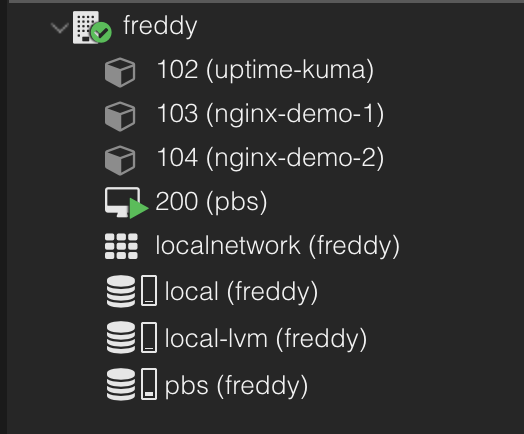
Click Add. The pbs storage appears in the left sidebar.
Now the fun part — backing up your containers. In the PVE web UI, navigate to Datacenter > Backup and click Add.
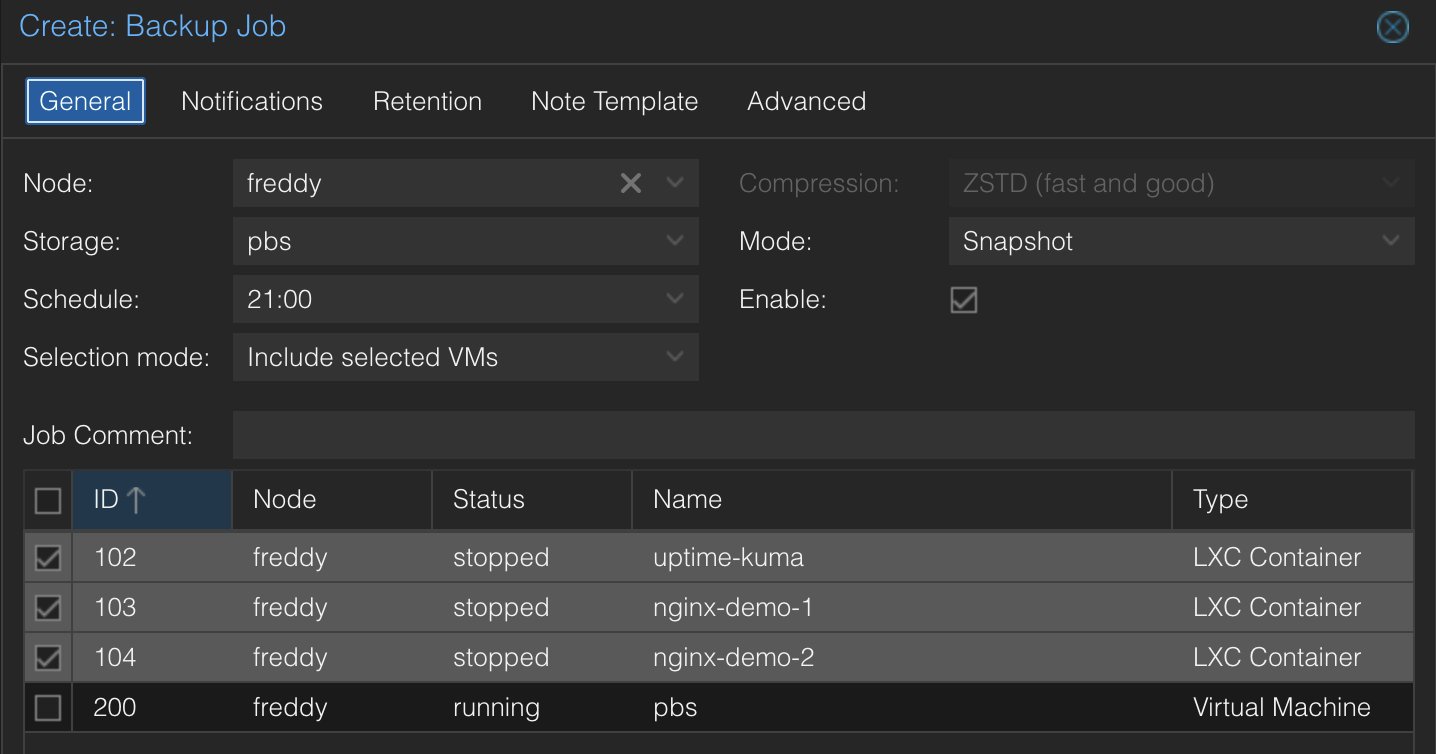
Configure the job:
pbsSnapshot — backs up containers while they're running, no downtimeZSTD — best balance of speed and compressionTIP
Yes, you can include the PBS VM itself in the backup job. PVE takes a point-in-time snapshot of the VM's disk and streams it to PBS while PBS continues running. This protects you if you break the PBS configuration — you can restore the PBS VM from the backup that was already written before the breakage. The one scenario it doesn't cover is if the datastore itself is corrupted or the disk dies, since the backup of the PBS VM is stored on PBS. That's what offsite backups solve.
On the Retention tab, leave it set to Keep all backups. Retention is managed on the PBS side — not here. We'll configure that in Step 9.
WARNING
Proxmox recommends configuring retention on the PBS datastore, not on the PVE backup job. If you set retention in both places, the most aggressive policy wins, which can lead to unexpected deletion. Keep it in one place — PBS.
Click Create, then select the job and click Run Now to run the first backup immediately.
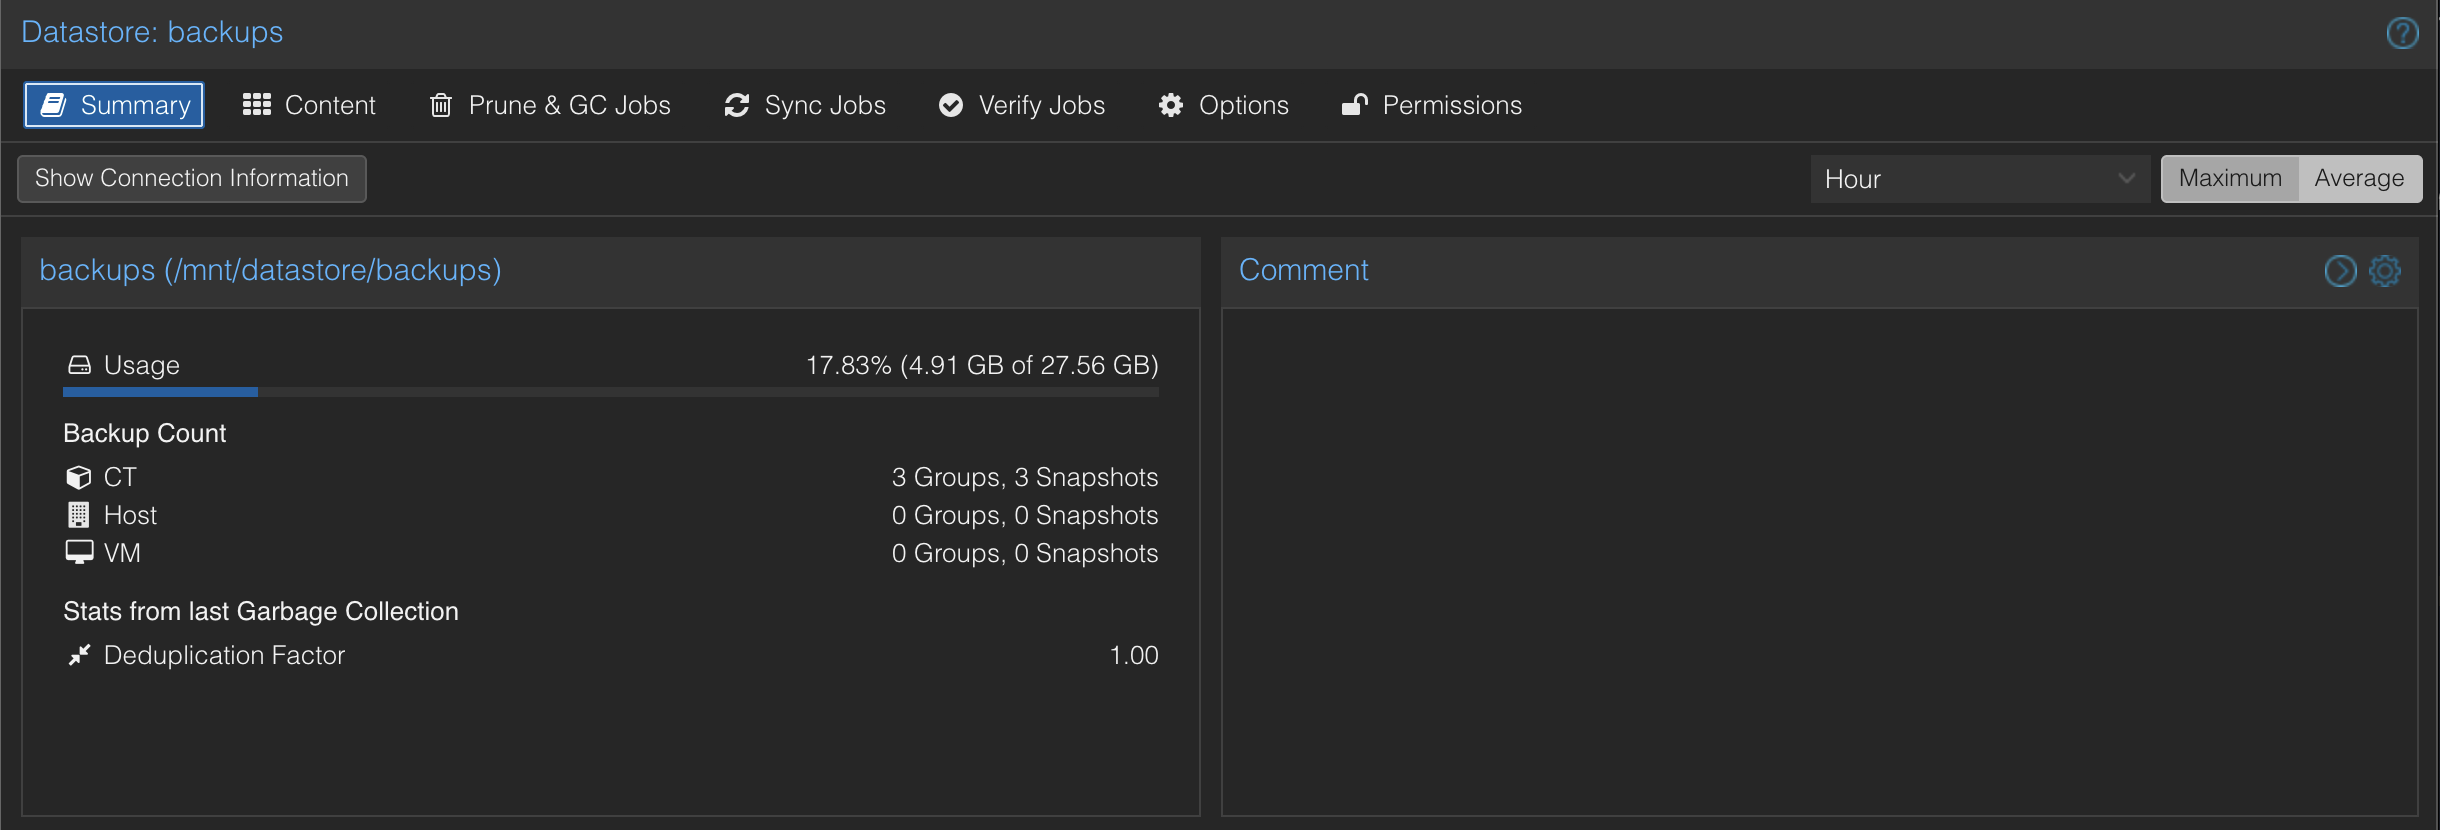
After the backup completes, switch to the PBS web UI and click the backups datastore. The Content tab shows your backed-up containers.
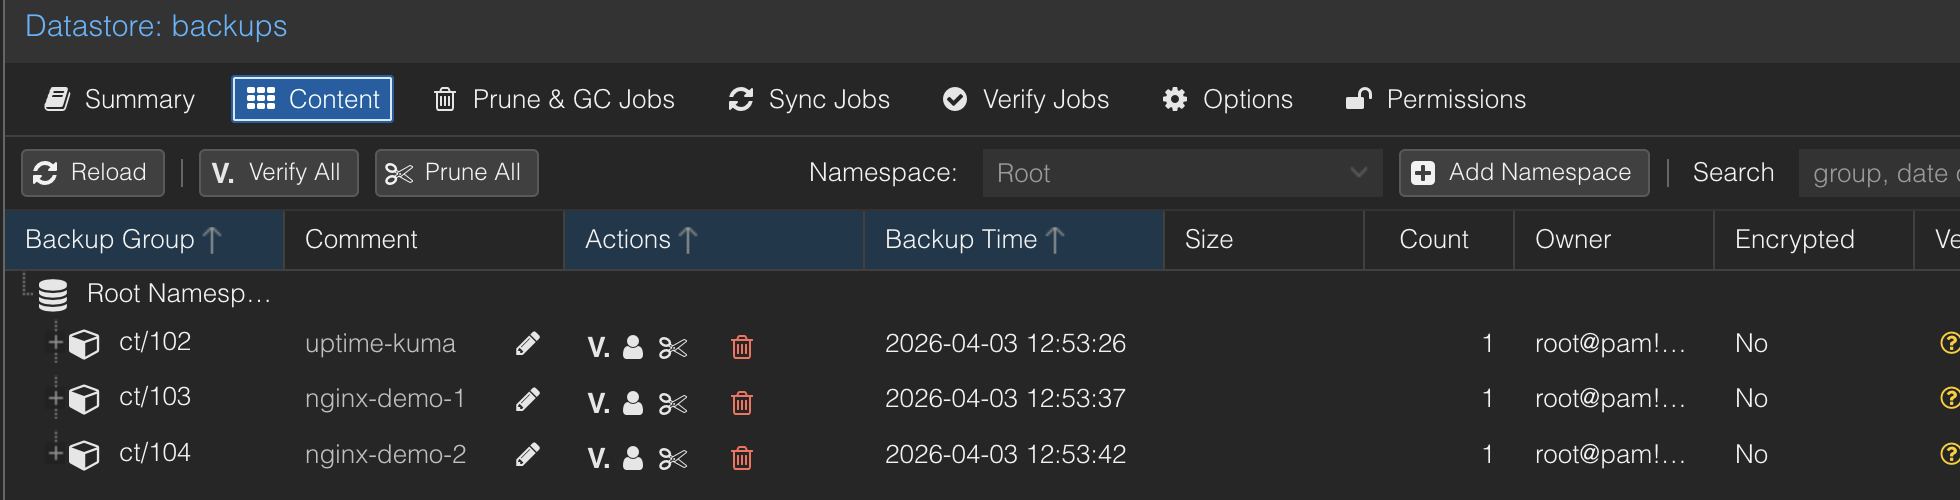
Check the Summary tab for dedup statistics. If your containers share the same OS base (which they likely do), PBS stores the shared packages once — the actual storage used will be significantly less than the raw data.
Retention controls how long backups are kept before being pruned. We're configuring this on the PBS datastore — the single source of truth for how long backups live.
In the PBS web UI, go to the backups datastore and click Prune & GC Jobs. Click Add to create a prune job.
Set the schedule to daily and configure these retention settings:
374This is a sensible starting point. Here's what it means in practice after a few weeks of daily backups:
| Rule | What it keeps | Why |
|---|---|---|
| Keep Last 3 | The 3 most recent snapshots, regardless of timing | Safety net for ad-hoc backups (e.g., a manual backup before a risky upgrade) |
| Keep Daily 7 | One snapshot per day for the last 7 days | Granular recent recovery — "I broke something yesterday" |
| Keep Weekly 4 | One snapshot per week for the last 4 weeks | Medium-term recovery — "this was working two weeks ago" |
After a month of daily backups, you'll have roughly 10-12 total snapshots at any time — not 30+ copies eating your storage. Snapshots can satisfy multiple rules, and they only get pruned when they don't satisfy any rule.
TIP
Proxmox provides an interactive prune simulator that shows exactly which snapshots survive given your backup schedule and retention settings. Try it before deploying a custom retention policy.
The settings above are a good starting point, but you should adjust based on your needs. Here are common strategies from the community:
Storage-conscious homelab:
Simple and minimal. One week of daily granularity, one month of weekly. Good when storage is tight.
GFS (Grandfather-Father-Son) — most recommended:
Two weeks of daily, two months of weekly, a full year of monthly snapshots. This is the most battle-tested backup retention pattern. The storage cost of adding keep-monthly is almost zero thanks to deduplication — monthly snapshots share most chunks with adjacent backups.
Production-adjacent:
Adds a year of monthly granularity and one year-end snapshot. The yearly snapshot costs nothing to store (dedup) but can save you if you need to reference something from last year.
"Days" means days with backups, not calendar days. If you only back up on weekdays, keep-daily: 30 spans about 6 calendar weeks, not 4. This catches people off guard.
Keep Last protects ad-hoc backups. If you run a manual backup before a risky upgrade, keep-last: 3 ensures that snapshot survives even if keep-daily would otherwise prune it as a duplicate for that day.
Deduplication makes longer retention cheap. One user reported a 6x dedup ratio after a month — meaning 6 full backup snapshots consumed roughly the space of one. Don't be afraid to add keep-monthly: 12. The marginal storage cost is negligible.
To demonstrate how restores work, we set up a test container with a simple nginx web page, backed it up, destroyed it completely, and restored it from PBS. Here's the restore workflow so you know what to do when you need it.
In the PVE web UI, click the pbs storage in the left sidebar, then the Content tab. This lists every backup PBS has stored.
Find the backup you want to restore — backups are listed by container/VM ID and timestamp. Select it and click Restore.
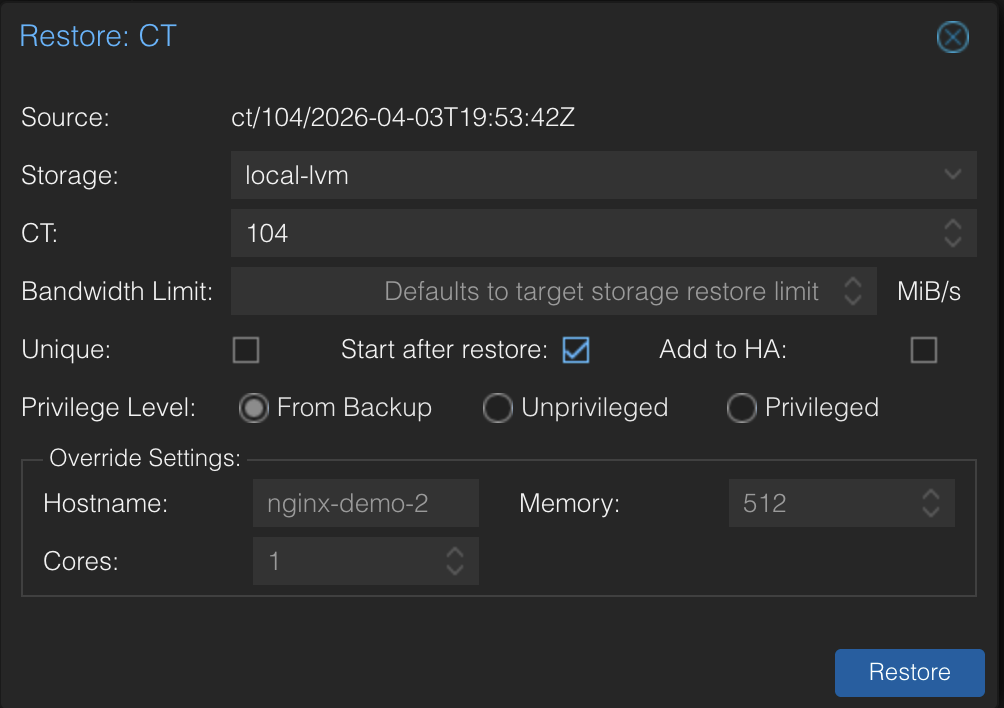
local-lvm)Click Restore. The task log shows the progress — extracting the backup data, recreating the filesystem, and restoring the configuration.
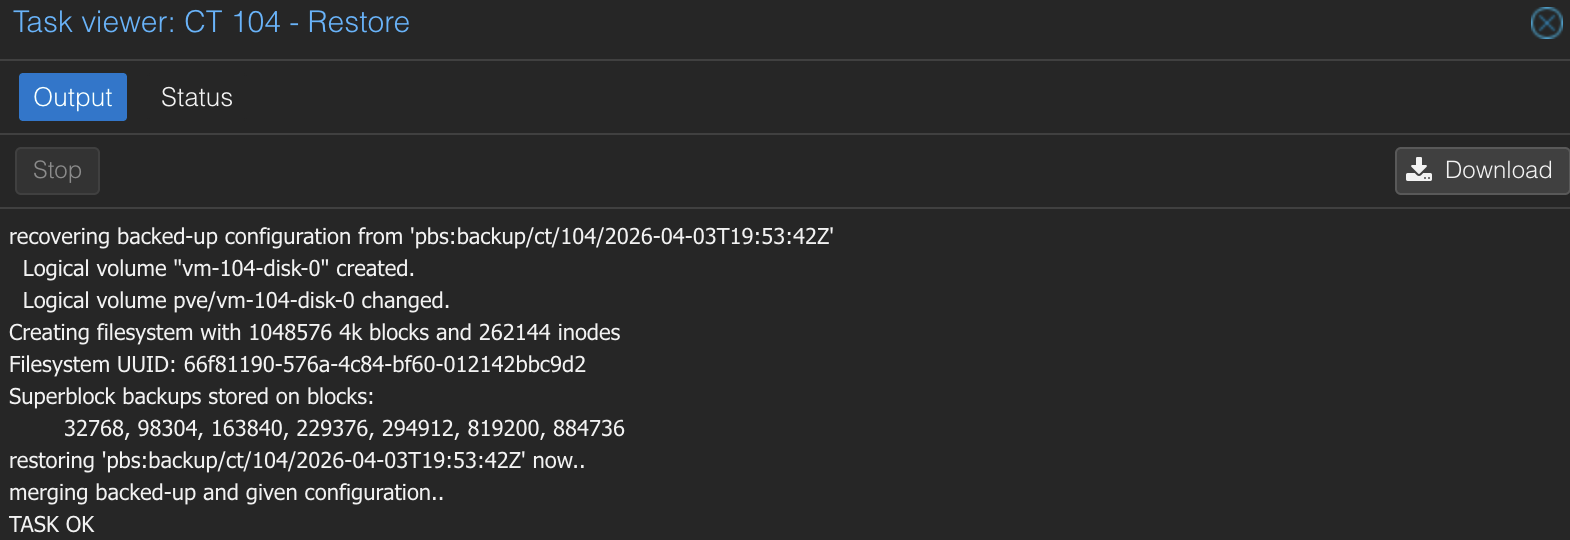
Once complete, the container is back with the exact same state as when the backup was taken — same IP, same hostname, same config, same data.
A few common scenarios:
pct destroy on the wrong container. Restore from the last backup.TIP
You can restore to a different CT ID if you want to compare the backup against the current state. This is useful for debugging — restore as CT 199, check the config, then destroy it once you've found the issue.
Your backups and pruning run on a schedule, but PBS also needs housekeeping. Here's the full picture.
When pruning removes old snapshots, it only deletes the snapshot metadata — the index that says "this snapshot contains these chunks." The actual data chunks stay on disk because other snapshots might still reference them (that's how deduplication works).
Garbage collection (GC) scans the datastore for orphaned chunks — data that no remaining snapshot references — and deletes them. This is what actually frees disk space.
GC is set to run daily by default when you created the datastore. You can verify this in the PBS web UI under the backups datastore settings.
TIP
Why are prune and GC separate? Because chunks are shared across backups. When you prune an old snapshot, its chunks might still be needed by newer snapshots. GC checks every reference before deleting anything. It's a safety mechanism — aggressive pruning can't accidentally destroy data that other snapshots depend on.
Verify jobs check that your backup data is still readable — they read every chunk and confirm checksums match. This catches bit rot, silent disk corruption, and storage issues before you need to restore.
In the PBS web UI, go to the backups datastore and click the Verify Jobs tab.
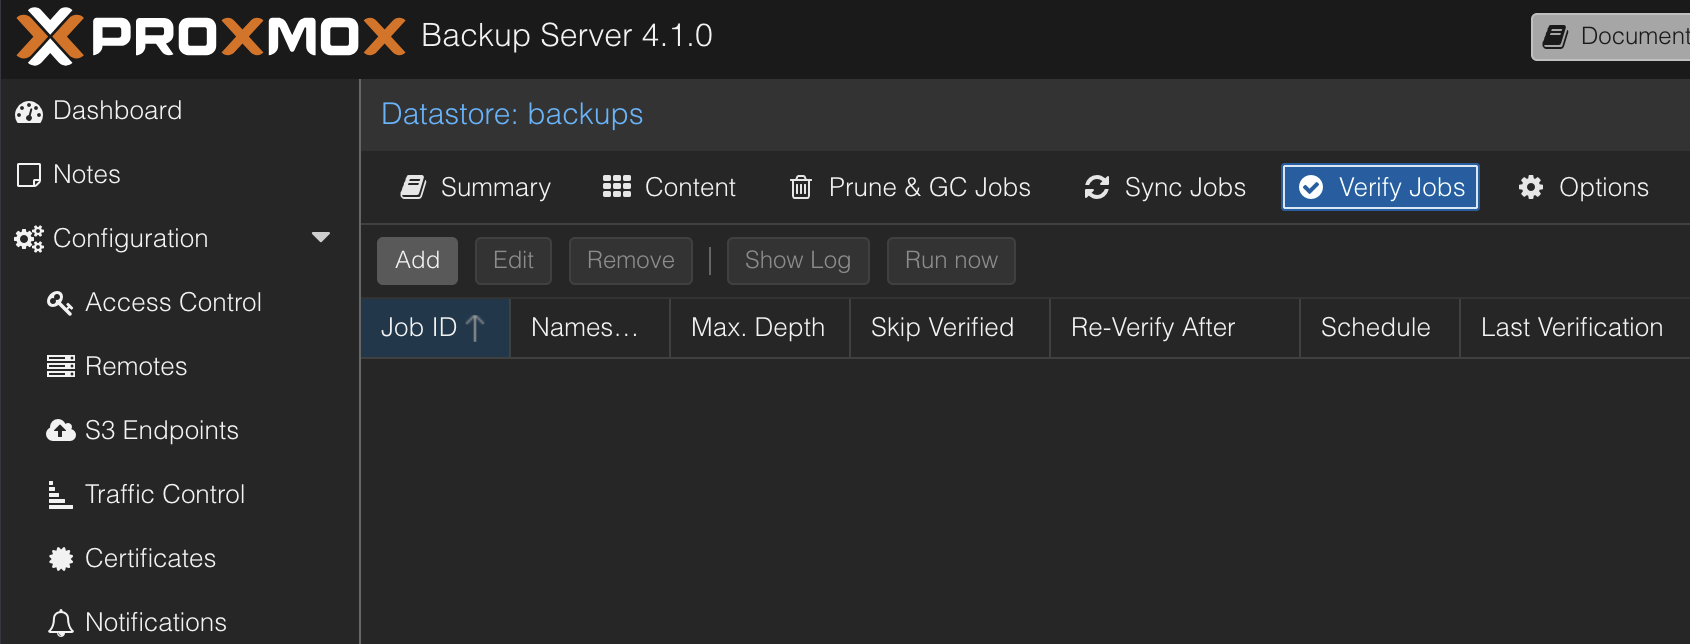
Click Add and set:
Sat 02:00)This checks new backups weekly and re-verifies everything monthly.
Here's what's running without any manual intervention:
| Job | Where | Schedule | What it does |
|---|---|---|---|
| Backup | PVE | Daily | Backs up selected containers to PBS |
| Prune | PBS | Daily | Removes old snapshots per retention policy |
| GC | PBS | Daily | Cleans up orphaned data chunks |
| Verify | PBS | Weekly | Checks backup data integrity |
PVE pushes backups. PBS manages everything else — retention, cleanup, and verification. Set it and forget it.
If you have Uptime Kuma running, add an HTTP(s) monitor for the PBS web UI so you know if it goes down.
https://<your-pbs-ip>:8007PBS runs as a VM, so it's more susceptible to going offline than a container — a host reboot, resource contention, or a failed update could take it down. A monitor gives you visibility into its availability.
Hardware virtualization isn't enabled in BIOS. Reboot your host, enter BIOS, and enable SVM Mode (AMD) or VT-x (Intel). On Gigabyte motherboards, it's usually under Advanced CPU Core Settings.
This is almost always a permissions issue, not a missing datastore. PBS 4.1 creates API tokens with privilege separation — the token has no permissions by default. Run this on your PBS VM:
proxmox-backup-manager acl update /datastore/backups DatastoreAdmin --auth-id 'root@pam!pve'Make sure the datastore name in the ACL path (/datastore/backups) matches the name you gave the datastore when you created it. If you named it something different, adjust the path accordingly.
! character breaks bash commandsAny command containing root@pam!pve must use single quotes in bash. The ! character triggers history expansion — without quotes, bash tries to interpret it as a previous command reference. Always use 'root@pam!pve' in CLI commands. The PVE and PBS web UIs handle ! correctly without quoting.
Delete the token in PBS (Configuration > Access Control > API Token) and create a new one. You'll also need to update the PVE storage config with the new secret.
Expected. The first backup has no existing data to deduplicate against, so PBS stores everything from scratch. Subsequent backups are dramatically faster because PBS only transfers changed chunks.
If pct create fails with "storage 'local' does not support container directories," use local-lvm instead. The local storage only holds ISOs and templates — container rootfs and VM disks go on local-lvm.
You now have automated backups for your Proxmox containers with:
This setup protects against accidental deletion, bad upgrades, and corrupted configs. What it doesn't protect against is hardware failure — if the physical drive dies, the backups die with it. In a follow-up guide, we'll cover adding a second disk, external USB drives, and offsite backups via S3 to complete the 3-2-1 backup strategy.
Some links are affiliate links. I may earn a small commission at no extra cost to you.