GMKtec M7 Ultra (Ryzen 7 PRO 6850U, 32GB)
relatedOwned
⚠This site is under active development. Some features may not work as expected, and new content is being added regularly.
.png)
Your monitors are watching your services, but right now nobody finds out when something goes down until they open the dashboard. That defeats the point. In this part, we'll wire up two notification channels — Pushover for instant phone alerts and Discord for a persistent log — then prove they work by intentionally breaking things.
By the end, your phone will buzz and your Discord will light up the moment any monitored service goes down. And when it comes back, you'll get the all-clear on both channels.
Before starting, you'll need:
TIP
The order matters here. Set up your notification channels before creating new monitors and check "Default enabled" — that way new monitors automatically get notifications. We'll cover why this matters in Step 5.
Pushover uses two credentials: your User Key (account-level, you already have this) and an Application API Token (per-app, we need to create this).
Go to pushover.net, log in, and click "Create an Application/API Token".

Fill in:
Kuma (or whatever you want — this shows as the app name in push notifications)Uptime Kuma Monitoring (optional)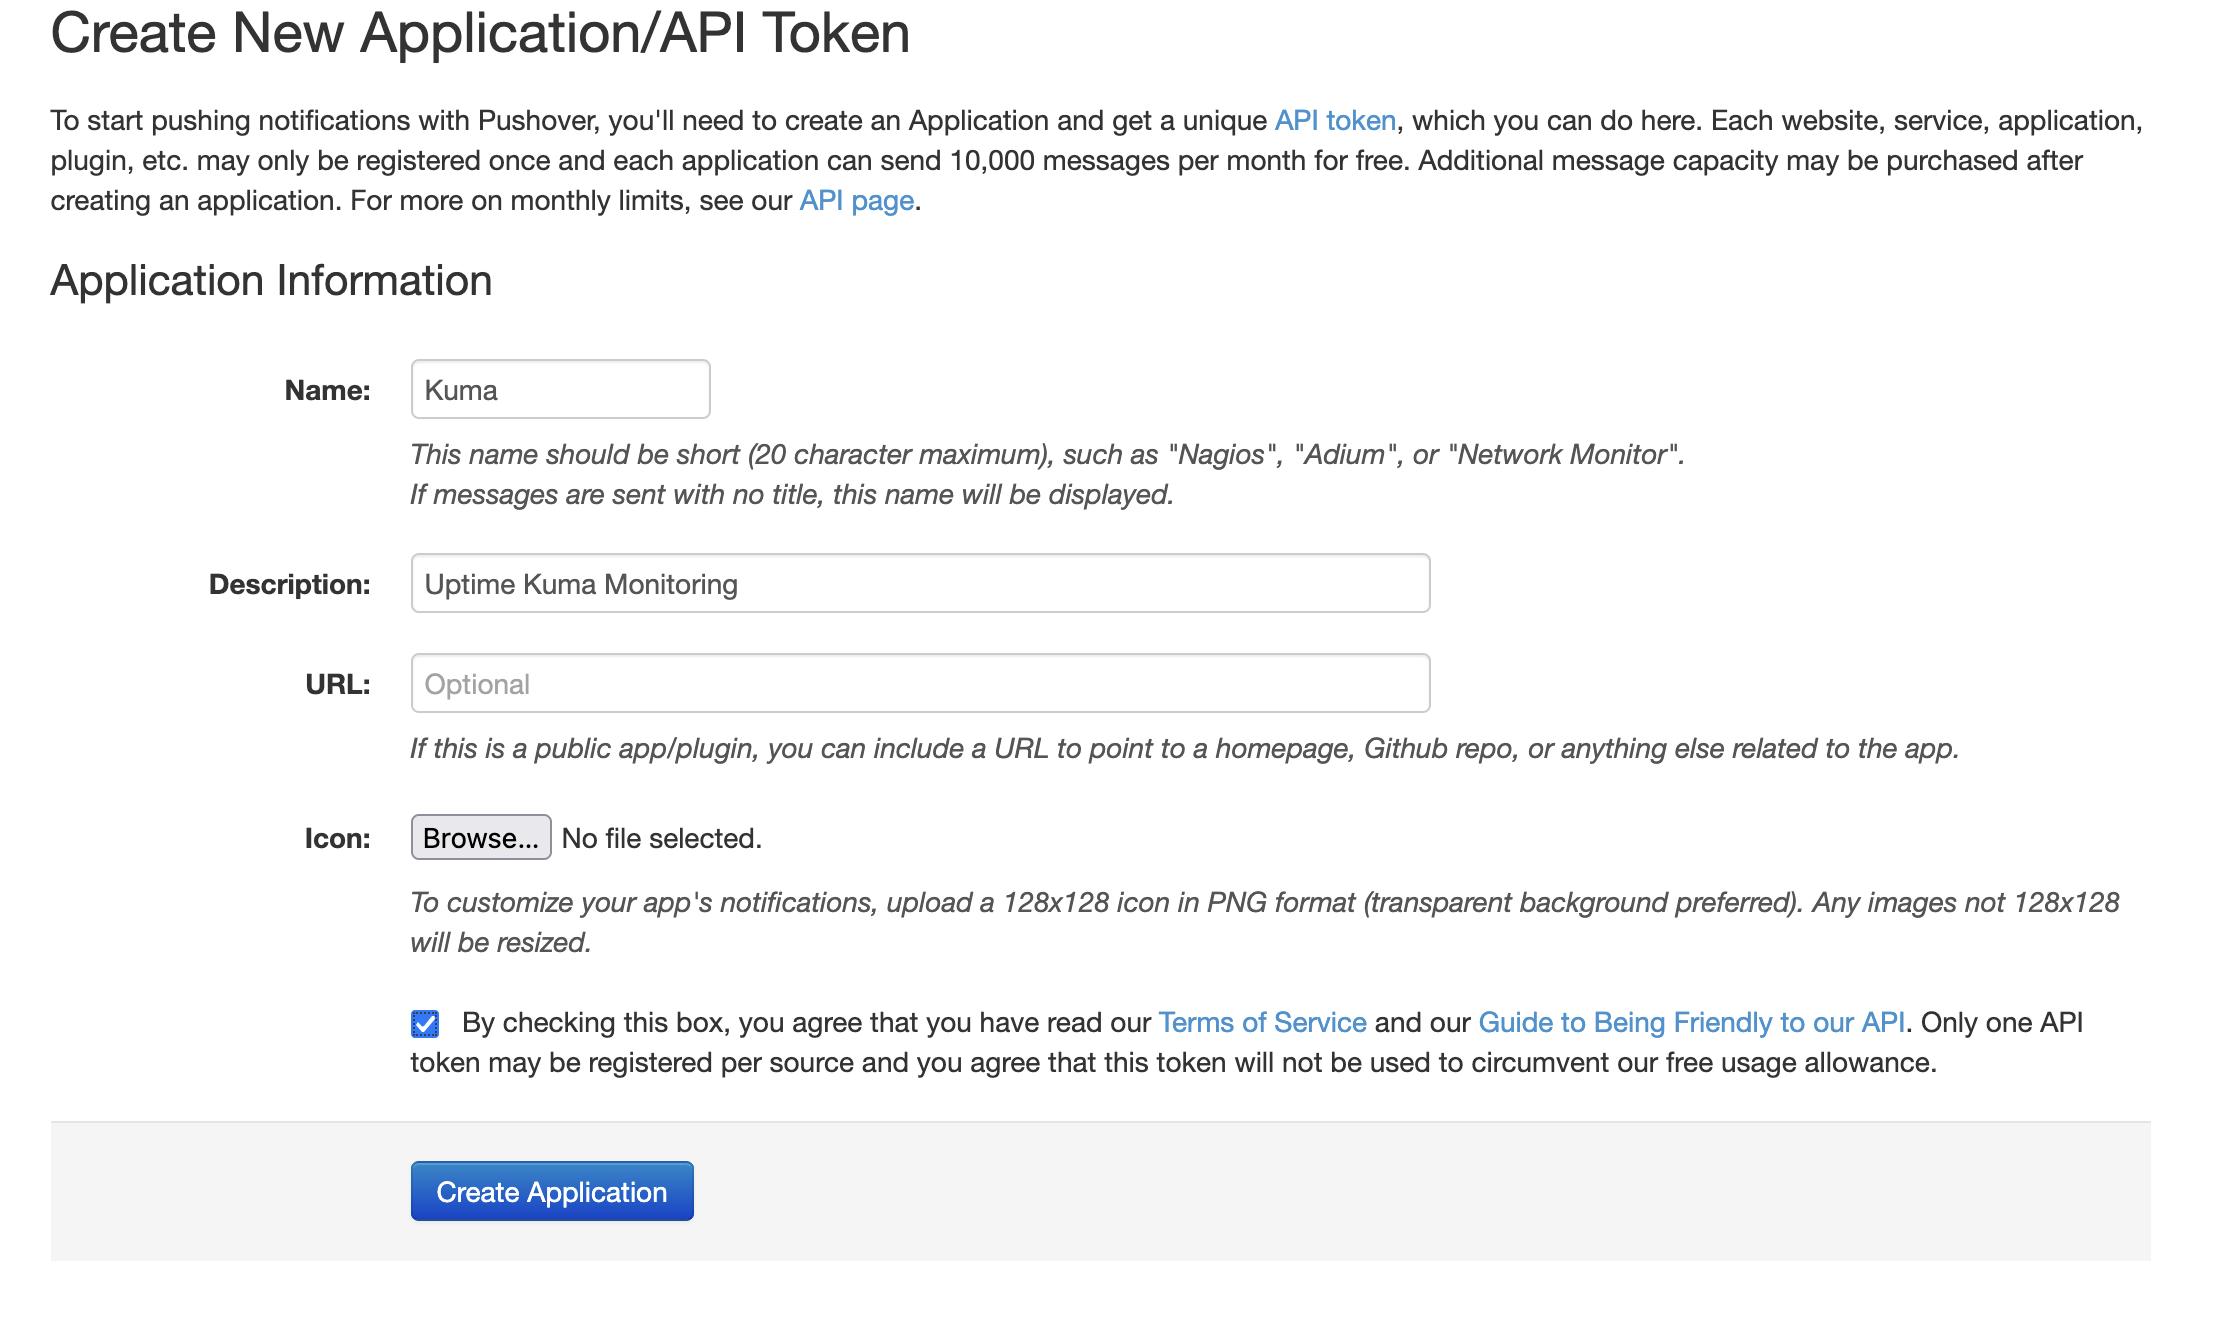
You'll land on the application page showing your new API Token/Key. Copy this — you'll need it in the next step.
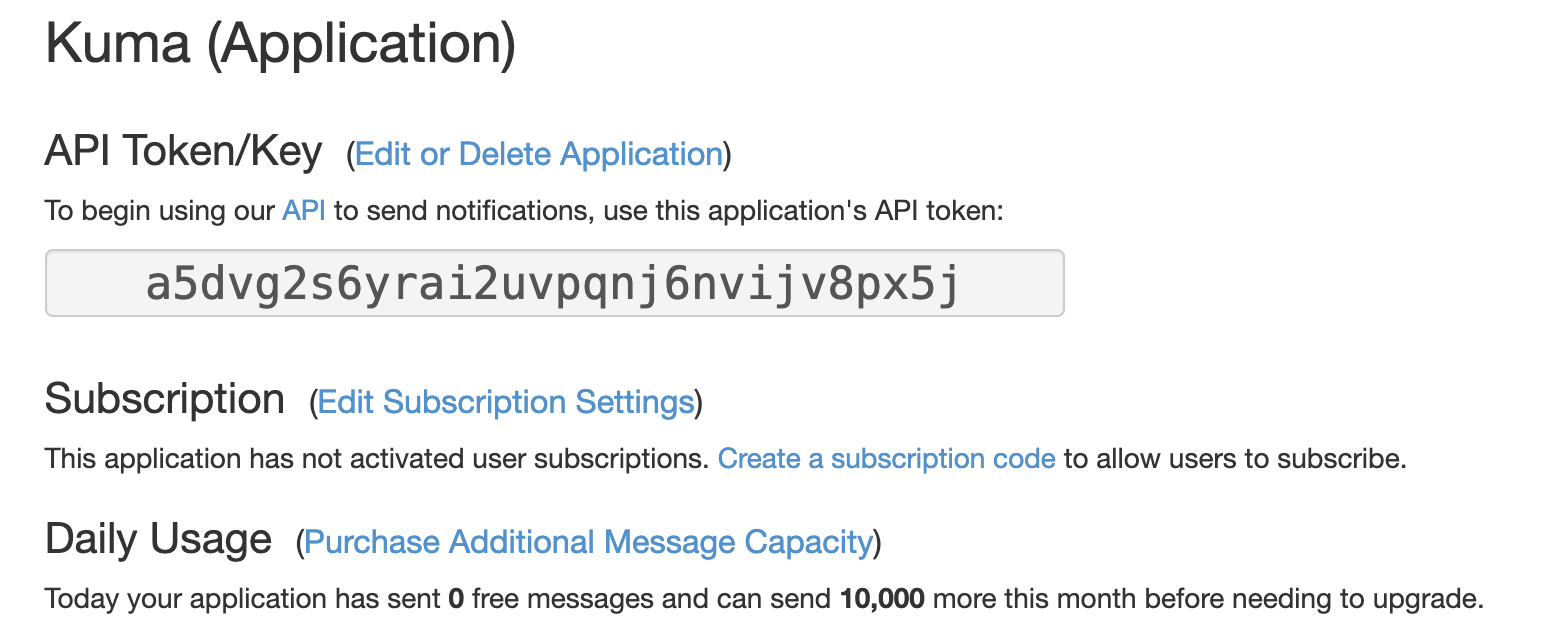
Pushover gives you 10,000 messages per month per application for free. For homelab monitoring, you'll never come close to that.
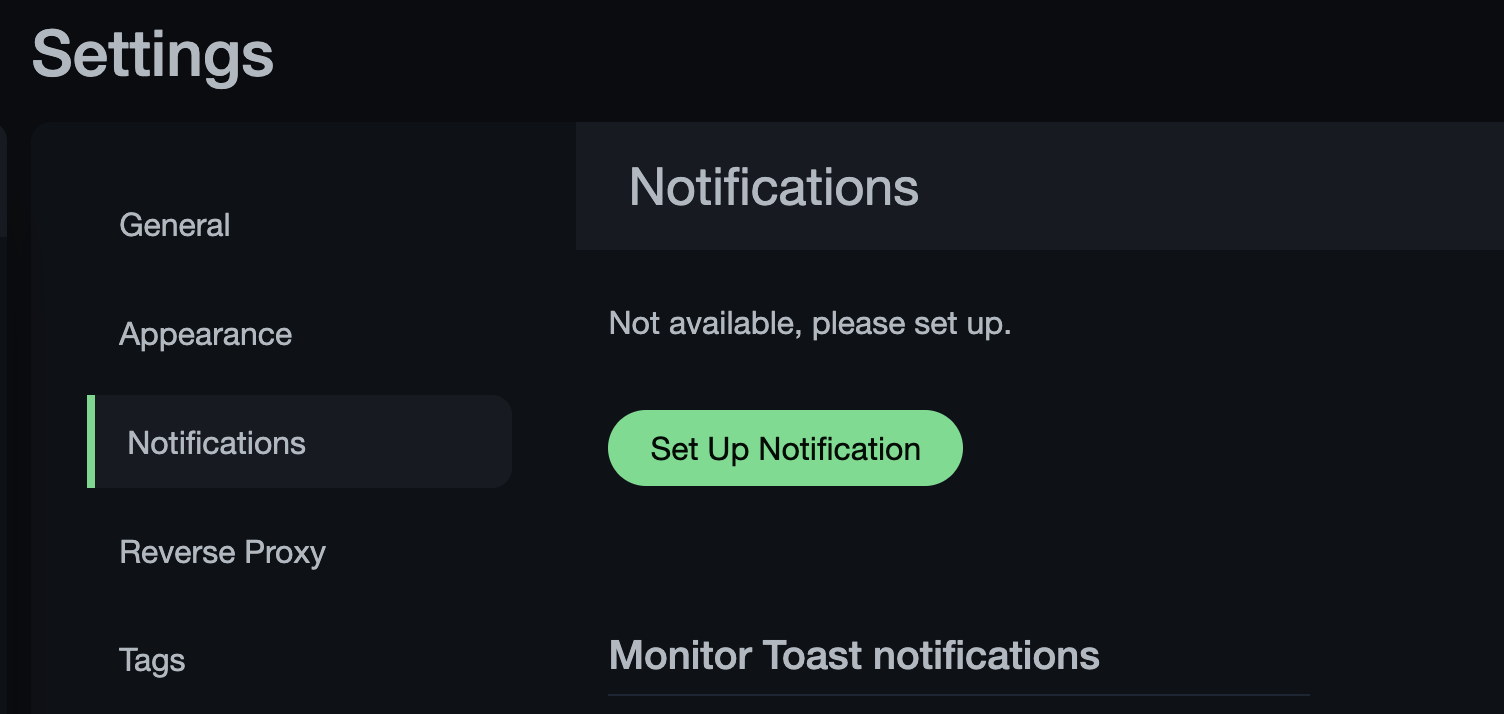
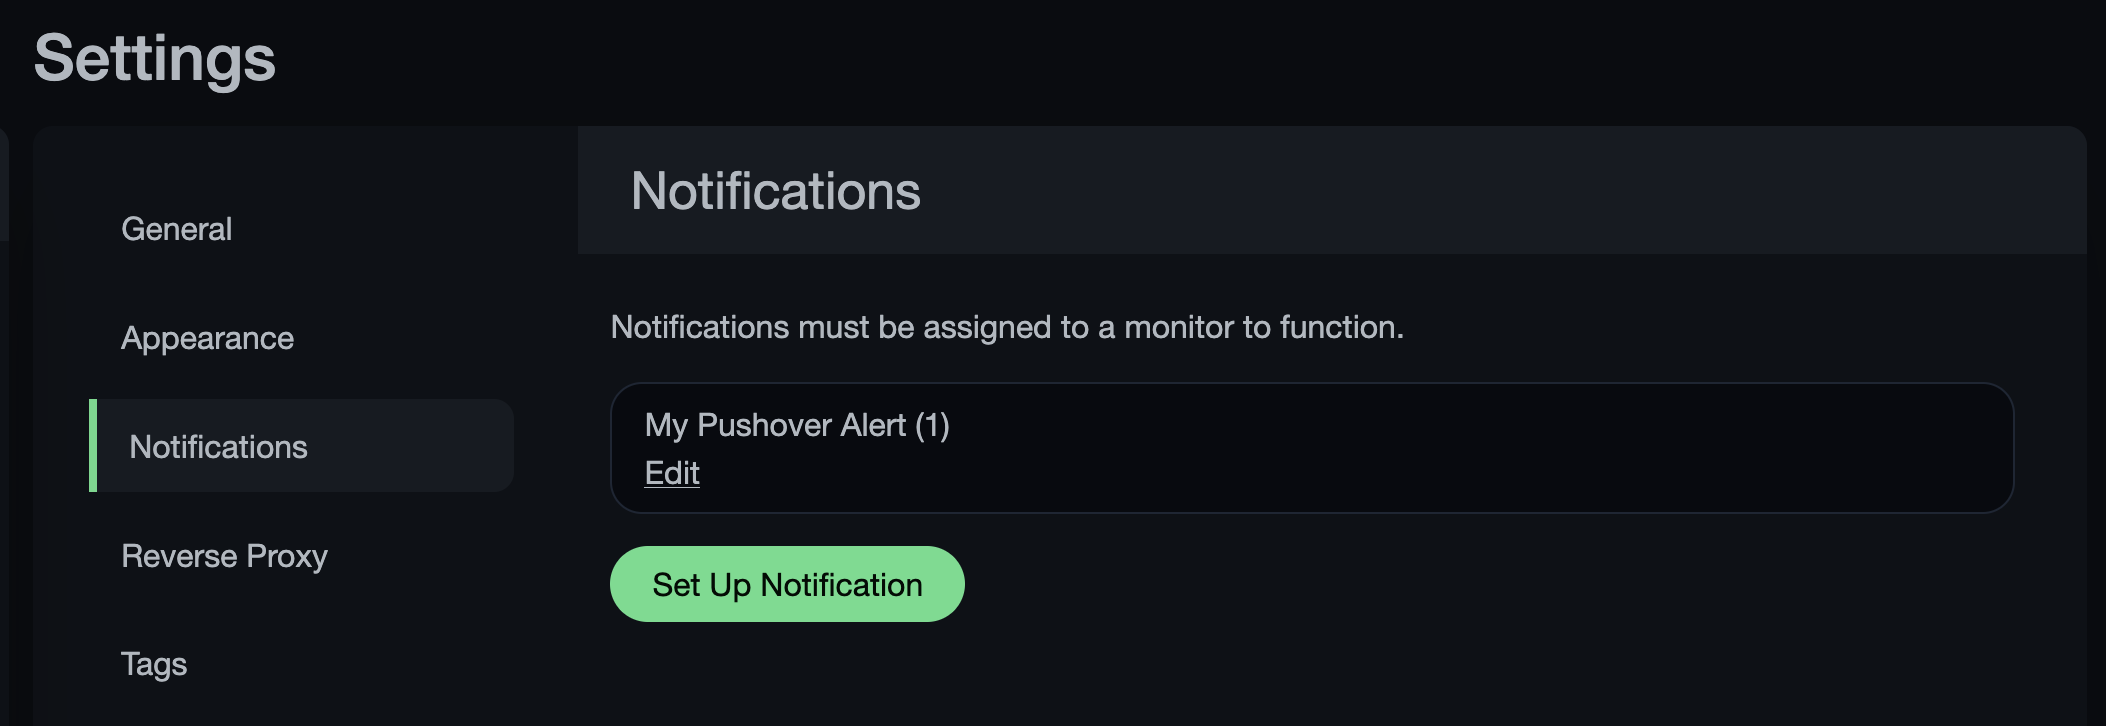
Open your Uptime Kuma dashboard (http://<your-kuma-ip>:3001). Click your username in the top-right corner and select Settings.

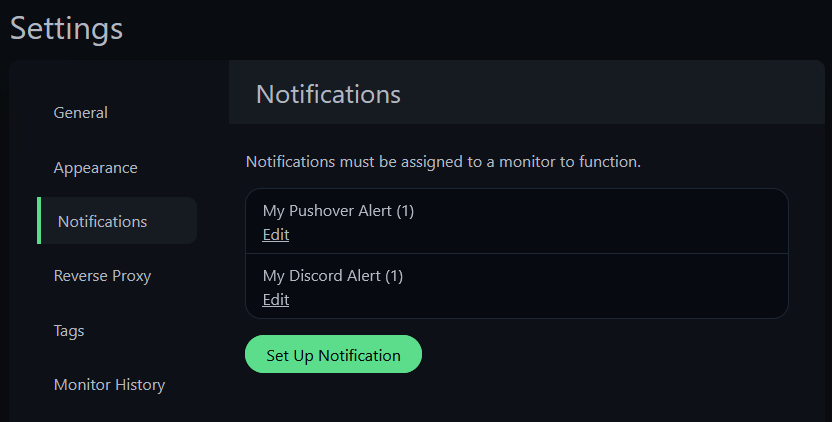
Go to the Notifications tab. You'll see an empty state — no notifications configured yet.
Click Set Up Notification and configure:
My Pushover Alert (1) (or whatever you prefer)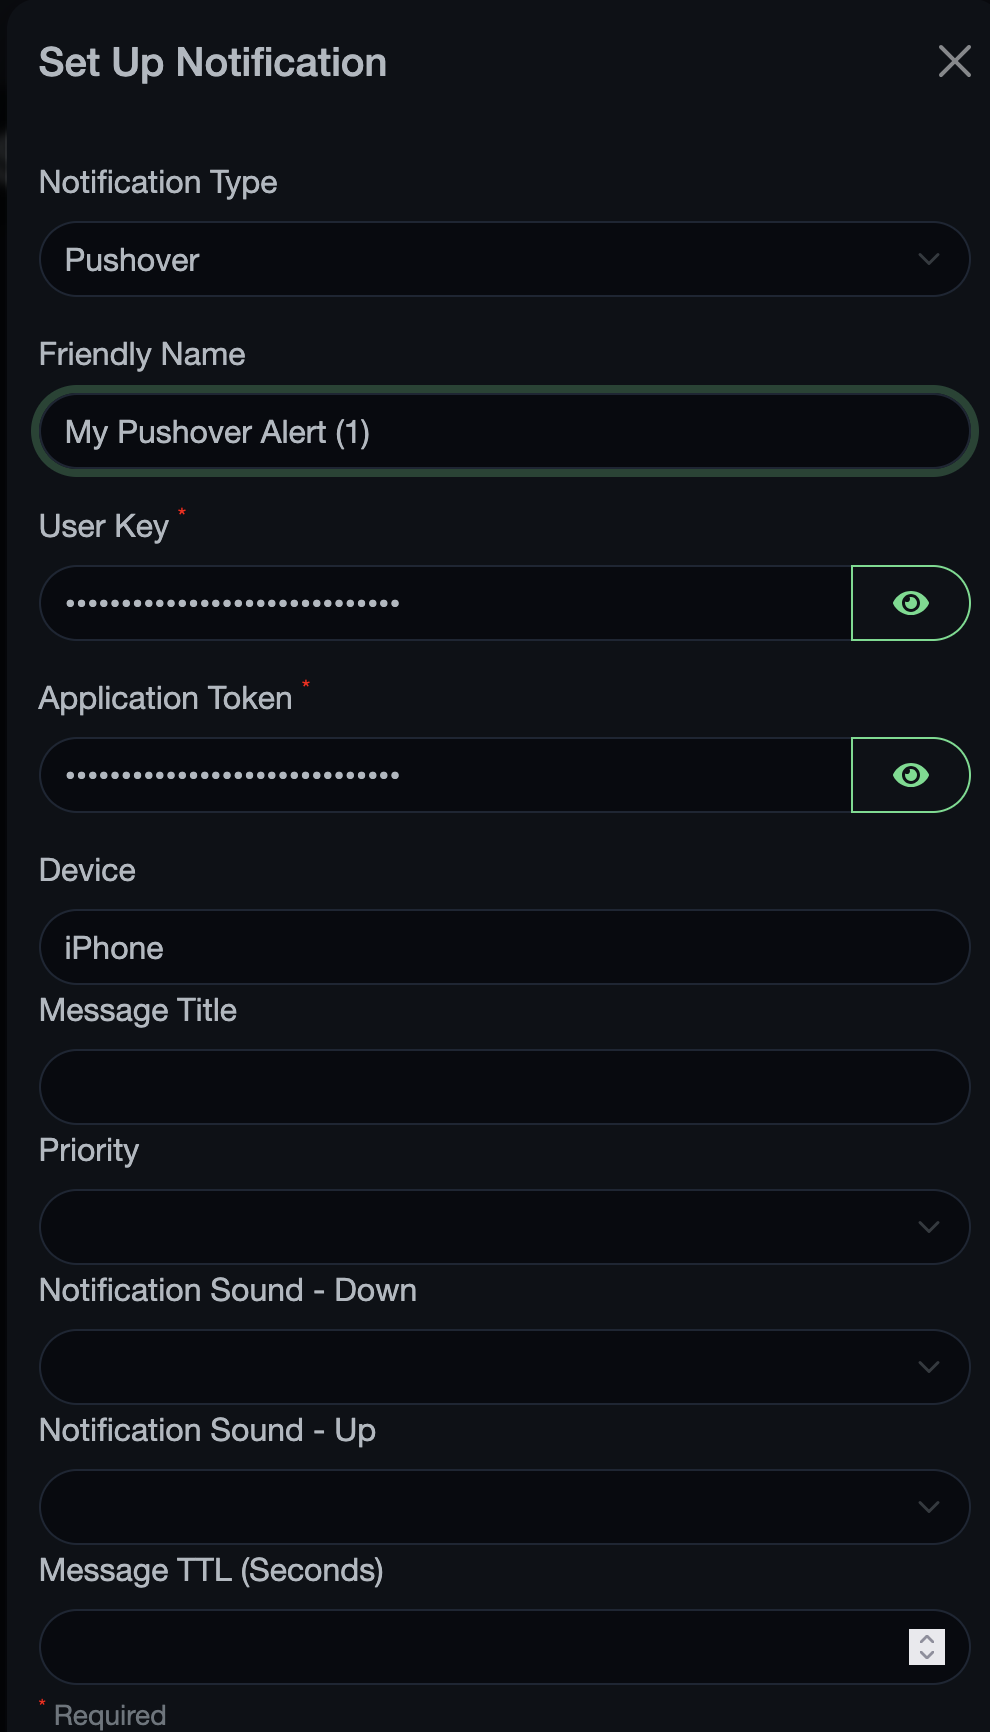
Click Test before saving. Your phone should buzz immediately with a test notification.

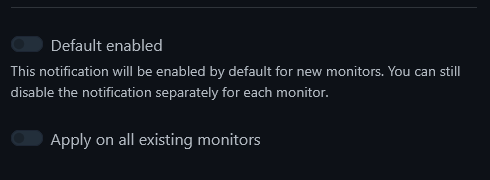
If the test worked, check "Default enabled" so new monitors automatically get this notification channel, then click Save.
TIP
Pushover's Priority setting is worth knowing about. The default "Normal" is fine for most monitors. But for critical services, "High" bypasses Do Not Disturb on your phone — useful for things like your router or DNS server where you want to know immediately, even at 2 AM.
In your Discord server, go to the channel you want alerts posted to. Click the gear icon (Edit Channel), then navigate to Integrations and click Webhooks.
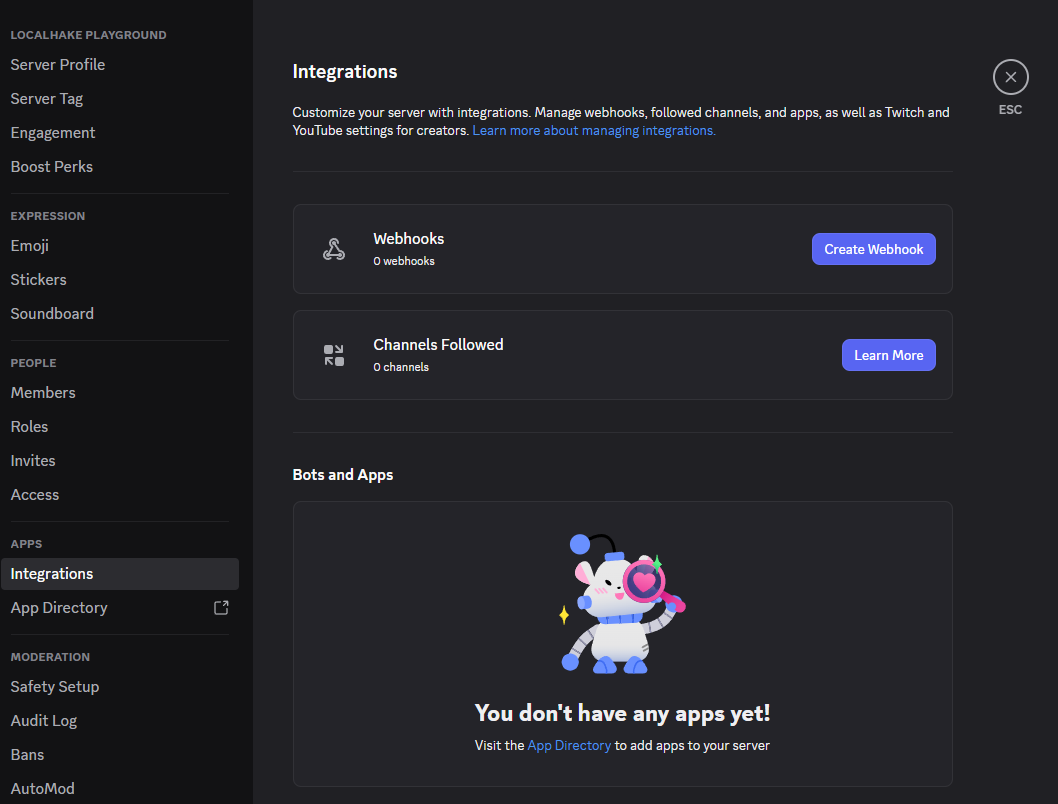
Click New Webhook. Discord creates one with a default name.
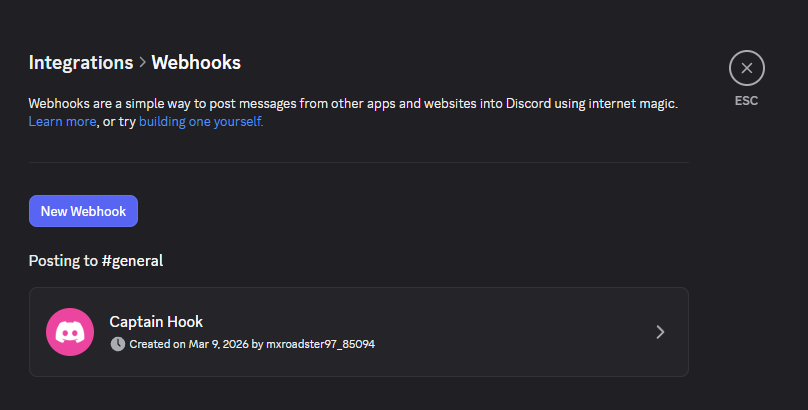
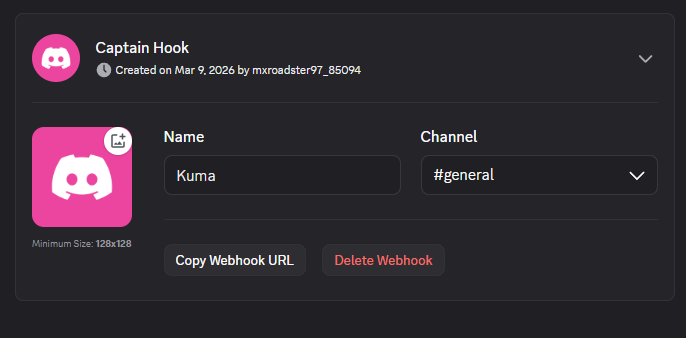
Click on the webhook to expand it. Rename it to something recognizable (like "Kuma"), confirm it's posting to the right channel, then click Copy Webhook URL.
Back in Uptime Kuma, go to Settings > Notifications and click Set Up Notification again:
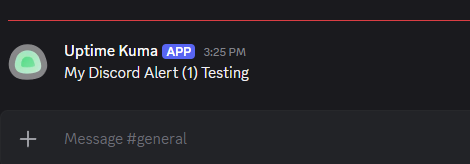
My Discord Alert (1)Click Test. You should see a test message appear in your Discord channel.
Click Save. You now have two notification channels configured.
Here's the gotcha. The 5 monitors from Part 1 were created before we set up notification channels. Even though we checked "Default enabled" on both channels, that only applies to monitors created after the channel exists. Our existing monitors have no idea these channels exist.
Click on any monitor, hit Edit, and scroll down to the Notifications section. You'll see both channels listed but toggled off.

Toggle both on and click Save.

Repeat for all 5 monitors:
WARNING
This is the most common "why didn't I get notified?" question with Uptime Kuma. If you set up notifications first and check "Default enabled", every monitor you create afterward automatically gets them. But existing monitors need manual toggling. When you set up your real production monitors later, set up notification channels first — it saves you this step entirely.
There's also an "Apply on all existing monitors" toggle on the notification channel setup screen that can save you from toggling each one individually. Worth knowing about if you're adding a new channel to a dashboard with dozens of monitors.
Time for the payoff. We're going to stop nginx on tut-web and watch the notifications roll in on both channels.
From your Proxmox host (not from inside the container):
pct exec 151 -- systemctl stop nginxUsing your own services? Stop any service you're monitoring:
pct exec <ct-id> -- systemctl stop <service-name>from the Proxmox host, orsystemctl stop <service-name>inside the container.
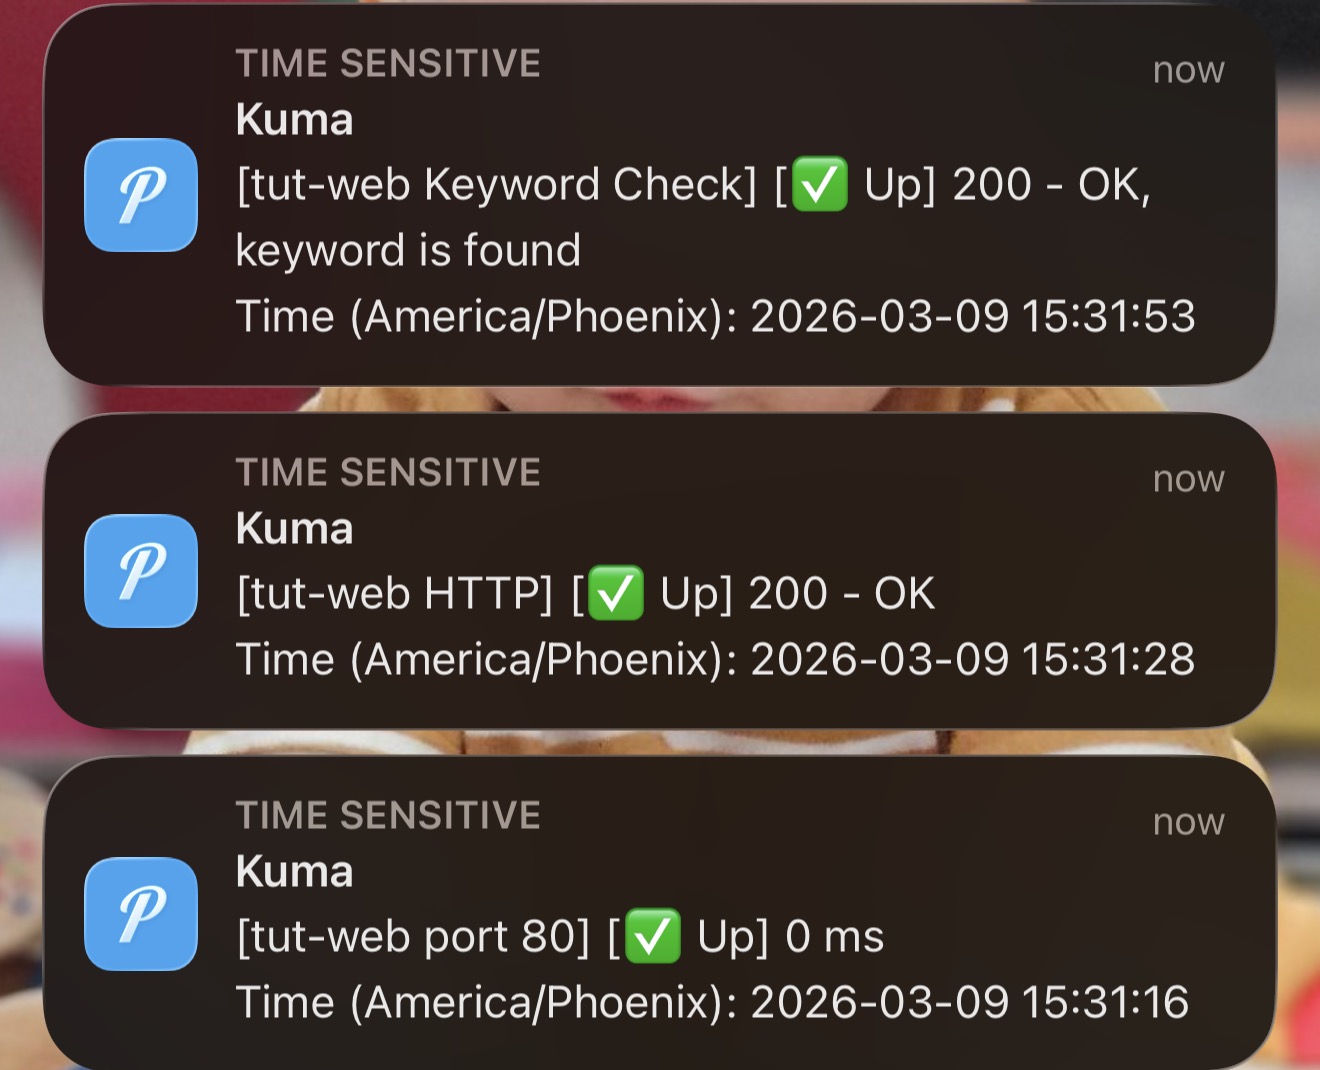
Within about 60 seconds, your phone starts buzzing and Discord lights up.
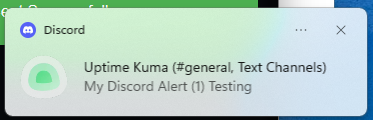
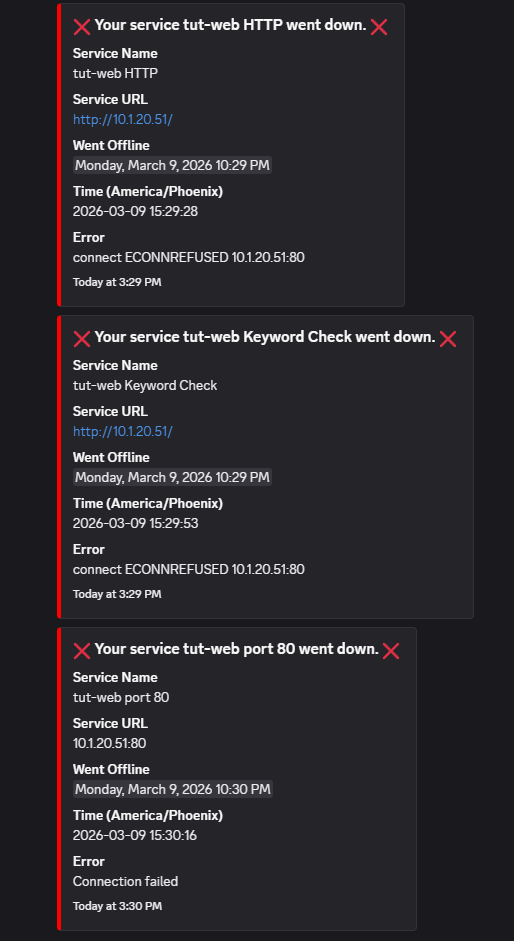
Discord fires first — a detailed embed for each monitor that detected the failure:
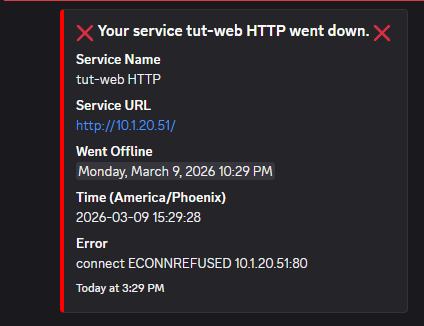
Then the other monitors follow as their check intervals hit:
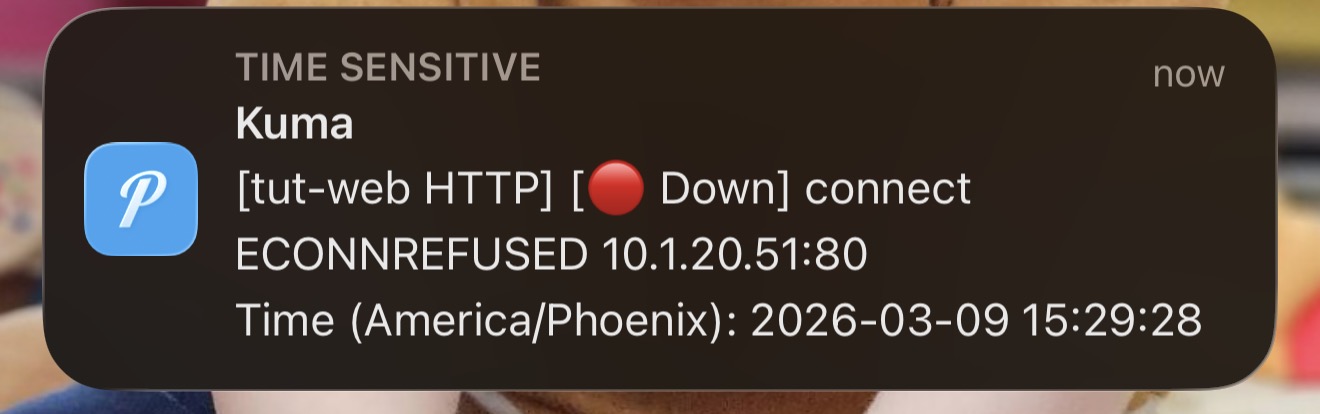
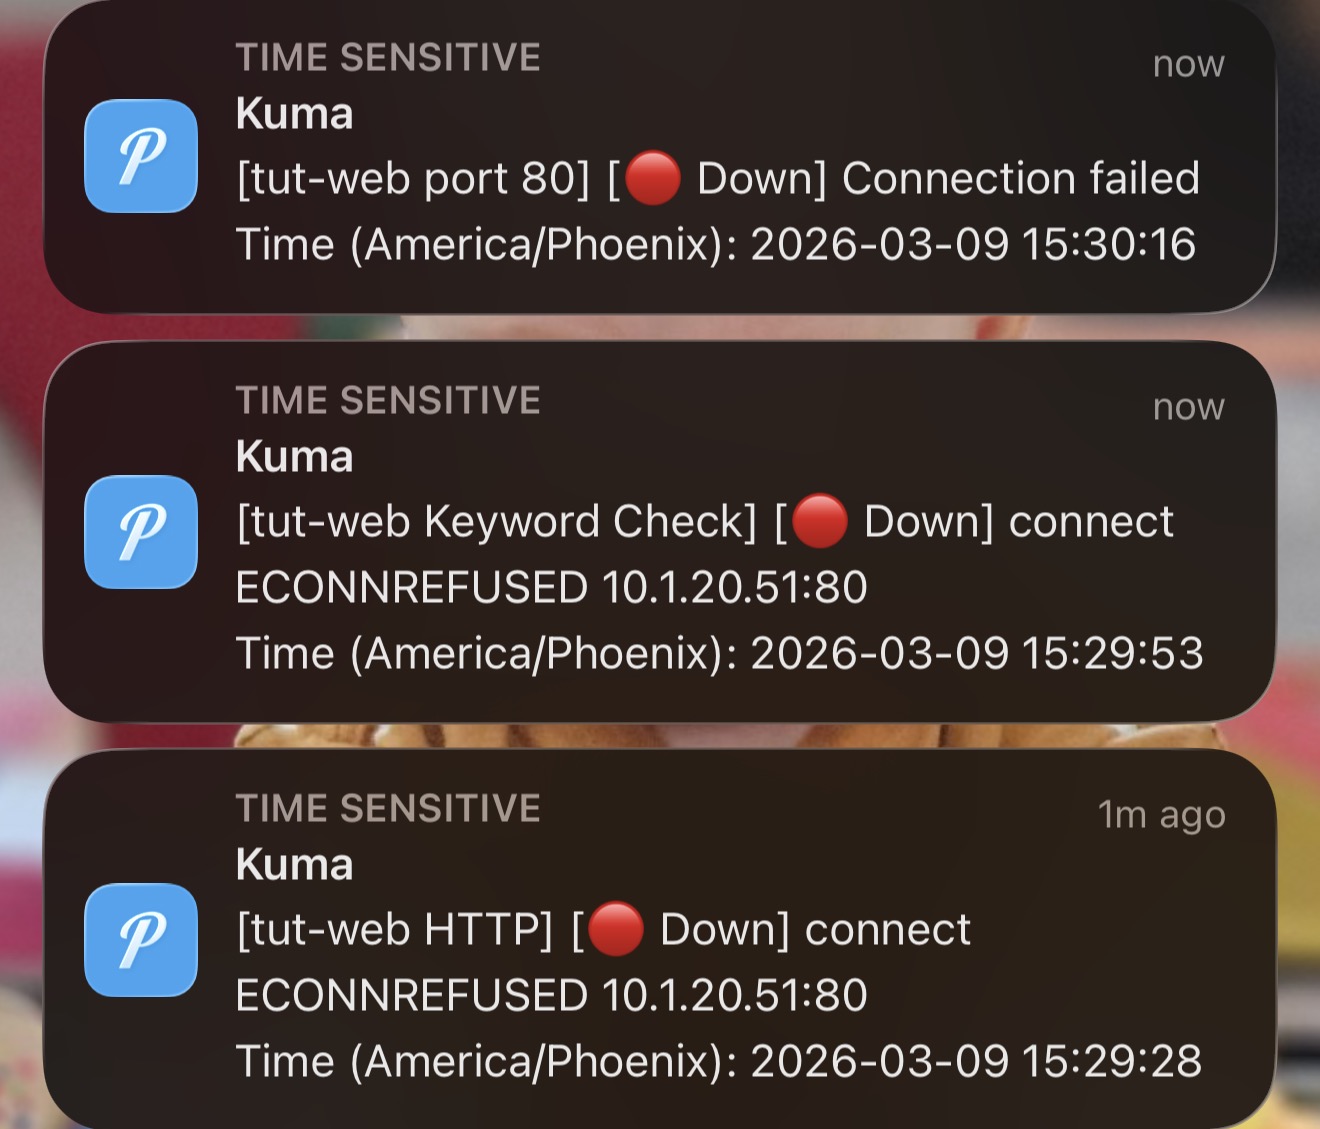
Pushover hits your phone with the same alerts — each one a separate notification with the monitor name, status, error, and timestamp:
When all the check intervals catch up, you get the full stack of down alerts:
Notice that Ping stays green — the container is still running, just the service is down. This is exactly the same behavior we saw in Part 1's kill demo, but now you actually know about it without staring at the dashboard.
Now bring the service back:
pct exec 151 -- systemctl start nginxRecovery notifications fire on both channels within a minute. Discord shows the full recovery with downtime duration:
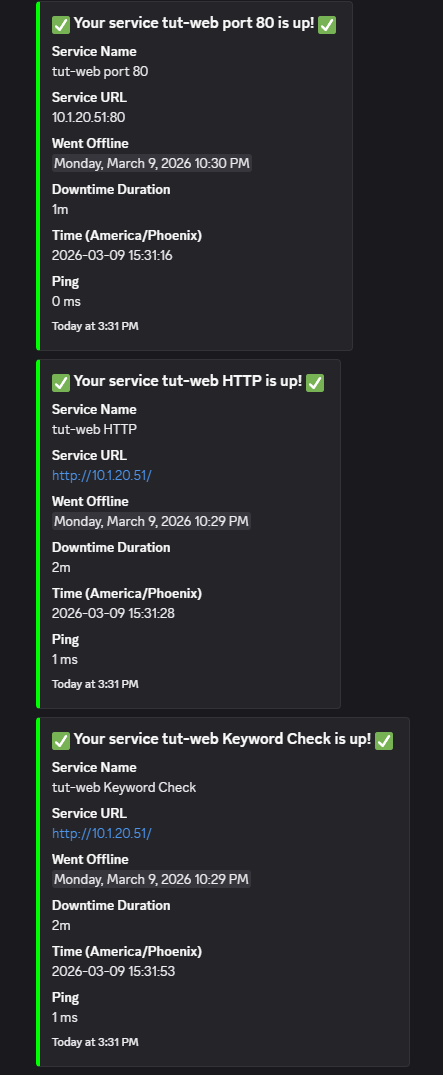
And Pushover confirms on your phone:
That's the full cycle — down alerts on both channels, recovery alerts on both channels, and you never had to open the dashboard.
A couple of settings worth knowing about before we wrap up.
By default, Uptime Kuma sends one notification when a service goes down and one when it comes back. If you want persistent nagging for critical services, each monitor has a "Resend Notification if Down X times consecutively" setting.
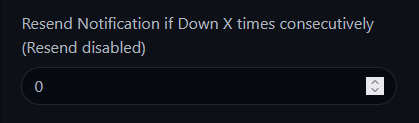
Set this to 5 and you'll get reminded every 5 check cycles while the service is still down. Leave it at 0 (the default) for a single notification per incident. For most homelab services, the default is fine — you'll fix it when you fix it.
Pushover and Discord serve different purposes:
Together, they cover both "I need to know right now" and "what happened while I was asleep."
You now have:
Next up: Part 3: Advanced Features — monitor groups, tags, status pages, maintenance windows, certificate expiry monitoring, and "who watches the watchman?" using Healthchecks.io.
Missed Part 1? Start with Part 1: Install & First Monitors.
Some links are affiliate links. I may earn a small commission at no extra cost to you.