.png)
OpenClaw on AMD Strix Halo: Set Up a Self-Hosted AI Agent with 128GB Unified Memory
March 26, 2026Tutorial
⚠This site is under active development. Some features may not work as expected, and new content is being added regularly.
.png)
In Part 2, investigation reports went to WebChat — OpenClaw's built-in chat interface. It works, but it's basic. No persistence, no search, no threads. If you close the browser, the report is gone. And you can't check it from your phone.
This part fixes that. We deploy a self-hosted Matrix server (Continuwuity) and web client (Element Web), connect OpenClaw as a Matrix bot, and route investigation reports to a dedicated room. Same diagnostic pipeline from Part 2 — we're just upgrading where the reports land.
Matrix is a self-hosted messaging protocol. Think Slack or Discord, but running on your own hardware. No cloud dependency, no API limits, no terms-of-service surprises. Continuwuity is a lightweight Rust implementation that runs on 32MB RAM.
NOTE
This is Part 3 of a 6-part series. Part 1 set up the agent, Part 2 connected it to Uptime Kuma. This part adds a proper messaging interface. Parts 4-6 cover a model shootout, backup/restore, and production hardening.
Two components:
OpenClaw connects as another client — it's just another user in the room. When the agent posts an investigation report, it sends a message to a Matrix room. You see that message in Element Web. You can reply, ask follow-up questions in threads, search history.
On your Proxmox host. Continuwuity and Element Web both go in the same container — they're the backend and frontend of one service.
pct create 152 local:vztmpl/debian-13-standard_13.1-2_amd64.tar.zst \
  --hostname tut-matrix \
  --cores 1 \
  --memory 256 \
  --swap 0 \
  --rootfs local-lvm:4 \
  --net0 name=eth0,bridge=vmbr0,tag=20,ip=10.1.20.152/24,gw=10.1.20.1 \
  --nameserver 10.1.99.100 \
  --features nesting=1 \
  --unprivileged 1 \
  --start 1
This creates a Debian 13 LXC container with 256MB RAM and 4GB disk on VLAN 20. --features nesting=1 is required for Debian 13's systemd, and --unprivileged 1 runs the container without root-level host access for security. --start 1 boots it immediately.
NOTE
256MB is generous — Continuwuity uses about 32MB fresh. 4GB disk for message storage. Adjust VLAN, IP, gateway, and DNS for your network.
NOTE
Why Continuwuity and not Synapse or Conduit? Synapse is the reference Matrix homeserver — Python, needs 1-2GB RAM, PostgreSQL, complex config. Overkill for a homelab. Conduit is the lightweight Rust alternative (~32MB RAM) but development has slowed. Continuwuity is the active community fork of Conduit — same lightweight footprint, regular releases, better maintained.
Enter the container shell from your Proxmox host. pct enter drops you into an interactive shell inside the container — like SSH'ing into it, but without needing SSH configured:
pct enter 152Update the package lists and install curl (for downloading) and gnupg (for verifying package signatures):
apt-get update -qq && apt-get install -y -qq curl gnupg > /dev/null 2>&1Download the Continuwuity package repository signing key. This lets apt verify the packages are authentic:
curl -s https://forgejo.ellis.link/api/packages/continuwuation/debian/repository.key -o /etc/apt/keyrings/forgejo-continuwuation.ascAdd the Continuwuity package repository to apt's sources list so it knows where to find the package:
echo 'deb [signed-by=/etc/apt/keyrings/forgejo-continuwuation.asc] https://forgejo.ellis.link/api/packages/continuwuation/debian trixie stable' > /etc/apt/sources.list.d/continuwuity.listRefresh the package lists (now including the new repo) and install Continuwuity:
apt-get update -qq && apt-get install -y continuwuityTIP
The package name is continuwuity but the binary is conduwuit and the service is conduwuit.service. It's a fork — the name stuck.
Still inside CT 152. The most important setting here is server_name. It's permanent — can't change it after first run without wiping the database.
NOTE
server_name is just an identity string. It appears in every user ID (@user:server_name) and room alias. It does NOT need to be a real domain or resolve to anything — especially with federation disabled. You can use matrix, homelab, or anything short. Pick something you like because it shows up everywhere: @openclaw-bot:matrix, @admin:matrix.
Delete the default config and create a fresh one. rm removes the existing file, && chains the next command so it only runs if the delete succeeds:
rm /etc/conduwuit/conduwuit.toml && nano /etc/conduwuit/conduwuit.tomlPaste the following, then save with Ctrl+X, Y, Enter:
[global]

# CRITICAL: Cannot be changed after first run
server_name = "matrix"

# Listen on all interfaces
address = ["0.0.0.0"]
port = 8008

# Database
database_path = "/var/lib/conduwuit"

# Registration — token-protected
allow_registration = true
registration_token = "openclaw-tutorial-2026"

# LAN only — no federation
allow_federation = false

# Limits
max_request_size = 20971520

# Logging
log = "info"

# Clean display names
new_user_displayname_suffix = ""

[global.well_known]
client = "http://10.1.20.152:8008"
server = "10.1.20.152:8008"
Key settings explained:
server_name — your identity string. Shows up in every user ID and room. Permanent.address = ["0.0.0.0"] — listen on all network interfaces so other devices can connect. Without this, only localhost connections work.registration_token — anyone registering must provide this token. Prevents random signups.allow_federation = false — keeps everything on your LAN. No communication with other Matrix servers.well_known — tells Matrix clients where to find the server on the network. These are the actual IP/port, not the server_name.WARNING
Replace 10.1.20.152 in the well_known section with your container's actual IP. The server_name stays as matrix (or whatever you chose) — that's your identity. The well_known URLs are how clients find the server on the network.
systemctl enable makes the service start automatically on boot. systemctl start starts it now:
systemctl enable conduwuitsystemctl start conduwuitVerify the API is responding. This hits the Matrix versions endpoint — if it returns JSON, the homeserver is running:
curl -s http://127.0.0.1:8008/_matrix/client/versions | head -1If you see JSON with version numbers, the homeserver is alive.
Still inside CT 152. We need two accounts: one for you (admin), one for the OpenClaw bot.
WARNING
Continuwuity generates its own first-user token on startup. The registration_token from your config does NOT work for the first user. Check the logs to find the server-generated token:
This searches the Continuwuity service logs for the auto-generated registration token:
journalctl -u conduwuit --no-pager | grep -i "registration token"You'll see the token in the output — copy it, you'll need it when registering your first account:

Still inside CT 152. Install nginx (the web server that will serve Element's files) and wget (for downloading the release):
apt-get install -y -qq --no-install-recommends nginx wget > /dev/null 2>&1TIP
--no-install-recommends keeps the install minimal — just nginx itself, no extra packages. Good practice for containers with limited resources.
Move to the standard web content directory:
cd /var/wwwDownload the Element Web release — this is a pre-built web app, no compilation needed:
wget -q https://github.com/element-hq/element-web/releases/download/v1.12.13/element-v1.12.13.tar.gzExtract the archive. tar xzf decompresses (z) and extracts (x) the gzip file (f):
tar xzf element-v1.12.13.tar.gzCreate a symbolic link from element-web to the versioned folder. This way nginx can always point to element-web, and when you update to a new version, you just change the symlink instead of editing nginx config:
ln -s element-v1.12.13 element-webRemove the archive — we've extracted it, don't need the compressed file anymore:
rm element-v1.12.13.tar.gzConfigure Element to tell it where your Matrix homeserver is:
nano /var/www/element-web/config.jsonPaste the following, then save with Ctrl+X, Y, Enter:
{
    "default_server_config": {
        "m.homeserver": {
            "base_url": "http://10.1.20.152:8008"
        }
    },
    "disable_custom_urls": false,
    "disable_guests": true,
    "disable_3pid_login": true,
    "brand": "Element",
    "default_theme": "dark",
    "default_federate": false,
    "room_directory": {
        "servers": []
    }
}
This tells Element where to find the homeserver (base_url), disables guest access and third-party login (email/phone), and sets the dark theme. default_federate: false hides federation options in the UI.
NOTE
Replace 10.1.20.152 with your container's IP. This is the network address — not the server_name.
Now configure nginx to serve Element Web as a single-page application. This means all URL paths get routed to index.html, and Element's JavaScript handles the routing client-side:
nano /etc/nginx/sites-available/elementPaste the following, then save with Ctrl+X, Y, Enter:
server {
    listen 80;
    server_name _;
    root /var/www/element-web;
    index index.html;

    location / {
        try_files $uri /index.html;
    }
}
This tells nginx to listen on port 80, serve files from /var/www/element-web, and for any URL that doesn't match a real file, serve index.html instead (which is how single-page apps work).
Create a symbolic link to enable this site config. ln -sf creates a symlink (-s) and forces overwrite (-f) of the existing default config:
ln -sf /etc/nginx/sites-available/element /etc/nginx/sites-enabled/defaultTest the nginx config for syntax errors before applying. If there's a typo, this catches it without breaking the running server:
nginx -tIf you see "syntax is ok" and "test is successful", reload nginx to apply the new config. reload applies changes without dropping active connections (unlike restart):
systemctl reload nginxExit the container:
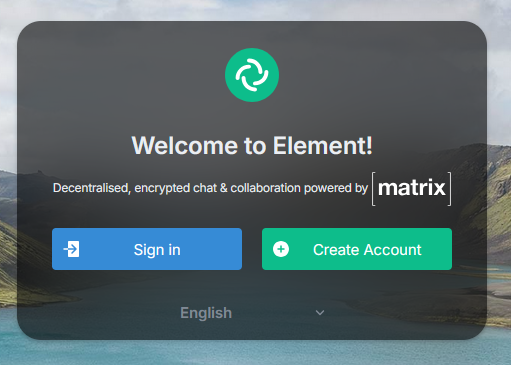
exitOpen http://10.1.20.152 in your browser. You should see the Element Web welcome page:
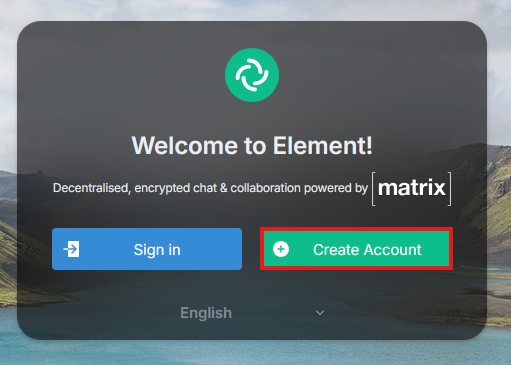
Register your admin account through the Element Web UI. The first user gets admin privileges automatically.
Click Create Account:
Enter the server-generated token from Step 4 (the one from the logs, NOT your config token) and click Continue:
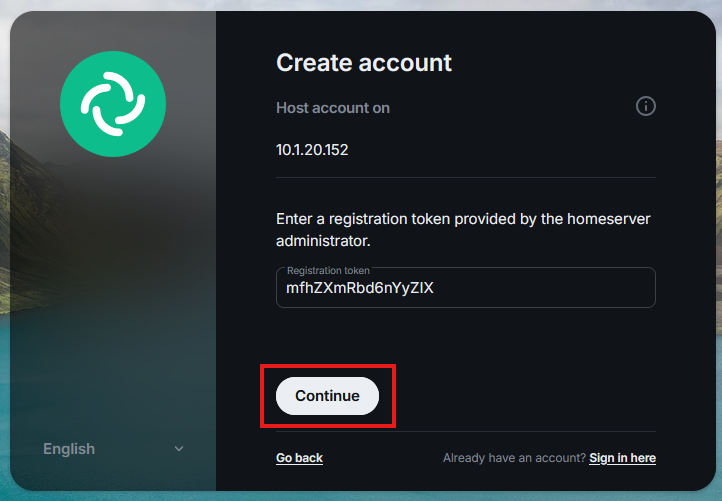
WARNING
The first user MUST use the server-generated token from the logs. The config token only works for subsequent users. I ran into this during testing — the config token gets rejected for the first registration.
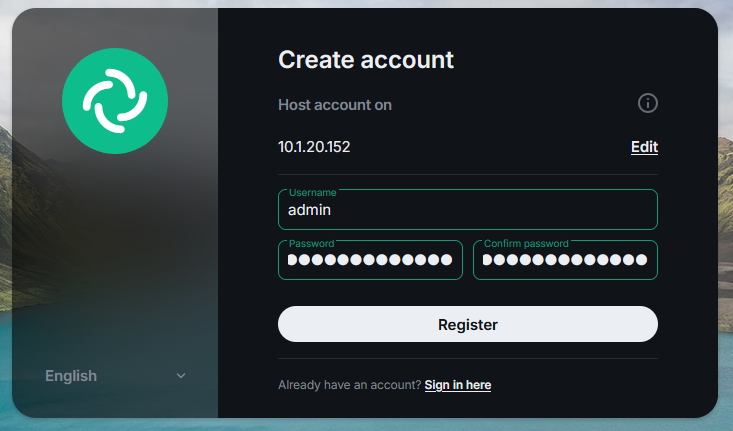
Pick your username and password, then click Register:
After registration, you'll see a "Failed to load service worker" warning:
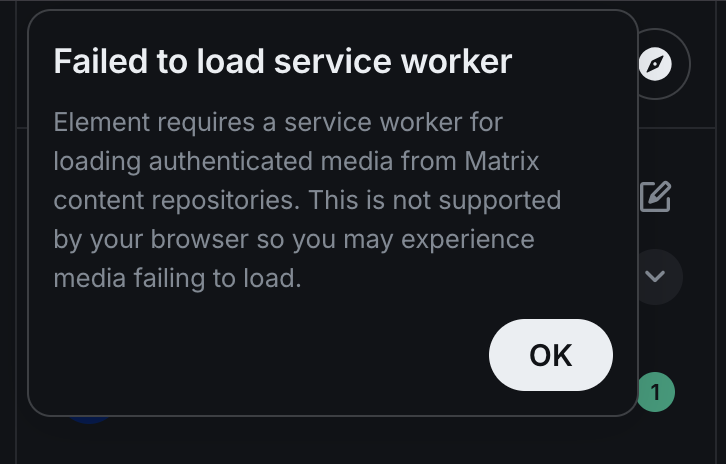
This is because we're serving over HTTP, not HTTPS. Service workers need a secure context. Click OK and dismiss it. Messaging works fine — avatars and uploaded images won't display until we add HTTPS in Part 6.
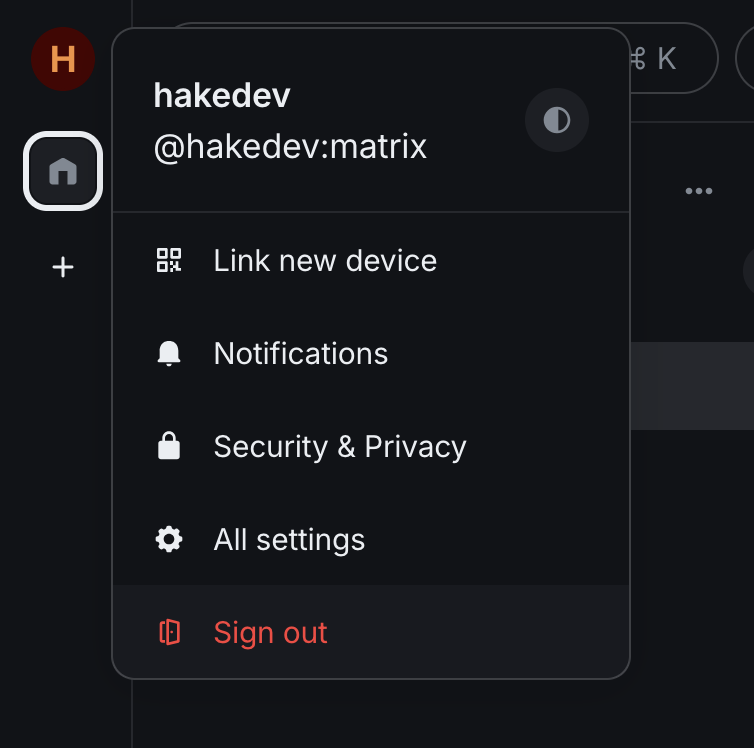
Once signed in, you should see your profile in the user menu:
The bot account is just plumbing — no need to log out of Element, register through the UI, and deal with identity verification prompts. We'll register it from the command line and get the access token in one step.
Enter the container from your Proxmox host:
pct enter 152Matrix registration uses a two-step authentication flow. First, send a registration request to get a session ID. This tells the server you want to create an account:
curl -s -X POST "http://127.0.0.1:8008/_matrix/client/v3/register" \
  -H "Content-Type: application/json" \
  -d '{"username":"openclaw-bot","password":"YOUR_BOT_PASSWORD"}'
This returns a 401 response with a session value — that's expected, not an error. The server is saying "I need you to prove you have a registration token." Copy the session value from the output:

Now complete the registration by sending the session ID along with your config token. Replace SESSION_FROM_ABOVE with the session value you just copied:
curl -s -X POST "http://127.0.0.1:8008/_matrix/client/v3/register" \
  -H "Content-Type: application/json" \
  -d '{"username":"openclaw-bot","password":"YOUR_BOT_PASSWORD","auth":{"type":"m.login.registration_token","token":"openclaw-tutorial-2026","session":"SESSION_FROM_ABOVE"}}'
This returns a JSON response with user_id, access_token, and device_id. Copy the access_token value — OpenClaw needs it in Step 9:

TIP
The registration response gives you the access token directly — no separate login step needed. Save this token somewhere safe.
WARNING
Never log into Element Web as the bot. Logging in via the UI invalidates the access token, which silently breaks the OpenClaw integration. The bot account should only ever be used via the CLI and API.
Exit the container:
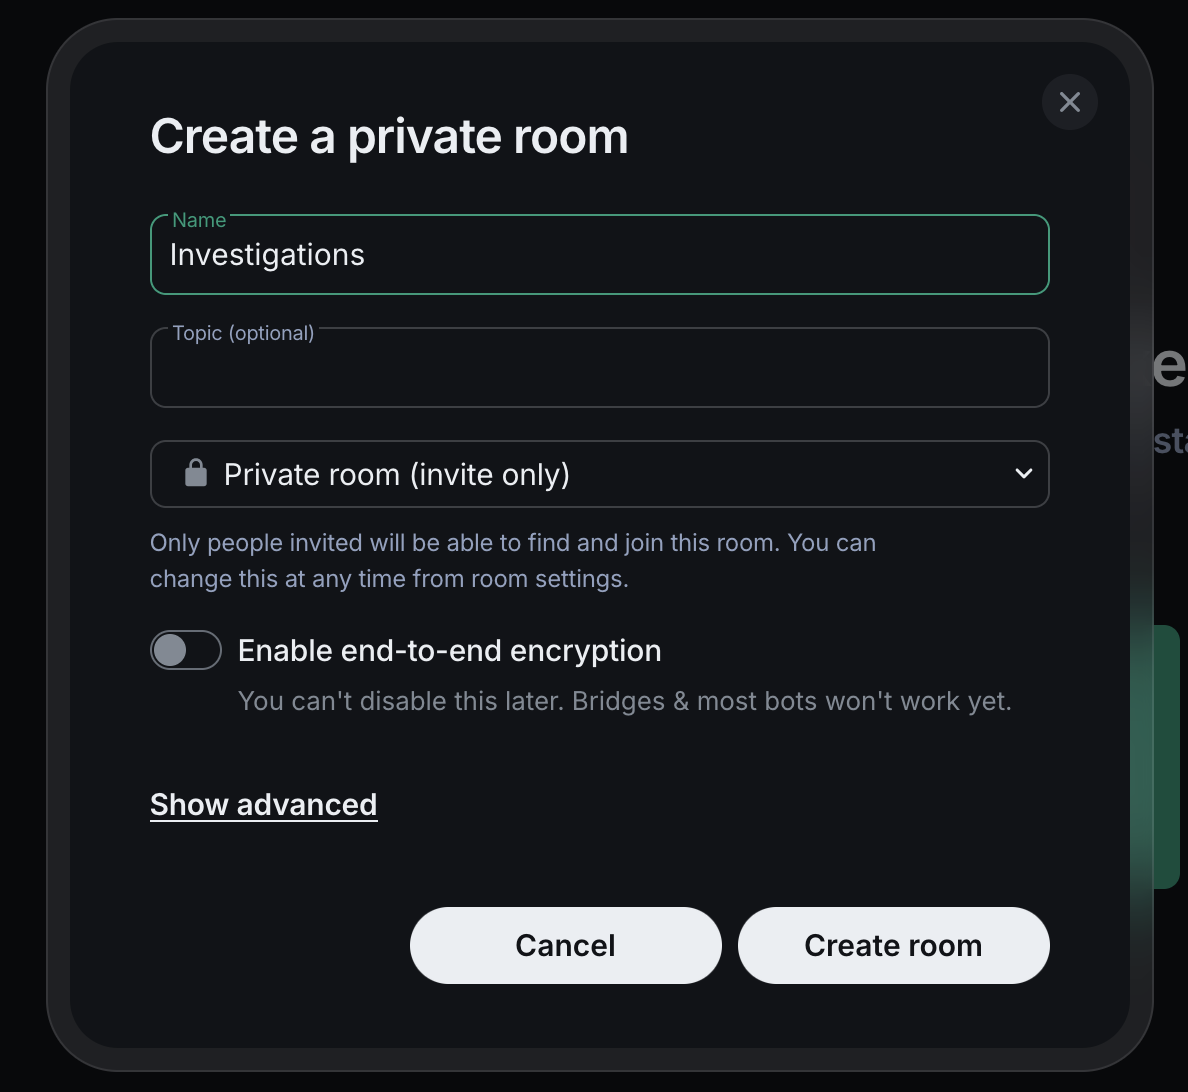
exitBack in Element Web (still logged in as your admin account), create two rooms:
WARNING
Element may default encryption to ON. You MUST toggle encryption OFF when creating each room. If rooms are created with encryption, OpenClaw can't read messages — the crypto module isn't installed. Encrypted rooms can't be fixed retroactively — you'll have to recreate them.
For each room, click the compose button (pencil icon) in the top right and select New room:
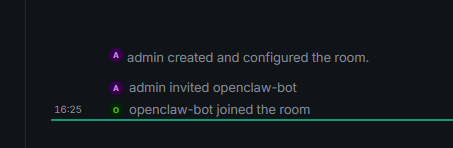
After creating both rooms, invite @openclaw-bot:matrix to each one. Click the invite button in the room and type the bot's Matrix ID. Once the bot joins (auto-join is configured in the next step), you'll see the confirmation in the room timeline:
Note the room IDs — you'll need the Investigations room ID for the webhook. Go to Room Settings > Advanced to find it. It looks like !abc123:matrix.
On your OpenClaw machine. The Matrix plugin is bundled with OpenClaw — no install needed. Just configure it via CLI commands.
NOTE
Don't try openclaw plugins install @openclaw/matrix — it fails with ENOENT. The plugin is bundled and activates automatically when you configure a Matrix channel.
Enable the Matrix channel:
openclaw config set channels.matrix.enabled trueSet the homeserver URL — this is the actual network address of your Matrix server, not the server_name:
openclaw config set channels.matrix.homeserver "http://10.1.20.152:8008"Required for LAN homeservers. OpenClaw blocks connections to private IP ranges by default (10.x, 192.168.x). This flag overrides that:
openclaw config set channels.matrix.allowPrivateNetwork trueSet the bot's access token from Step 7 — this is how OpenClaw authenticates as the bot user:
openclaw config set channels.matrix.accessToken "YOUR_BOT_ACCESS_TOKEN"Automatically accept room invitations so the bot joins rooms without manual approval:
openclaw config set channels.matrix.autoJoin "always"Allow the bot to respond to messages in any room it's in:
openclaw config set channels.matrix.groupPolicy "open"Restart OpenClaw to apply the new configuration:
systemctl --user restart openclaw-gatewayVerify the service restarted successfully:
systemctl --user status openclaw-gateway --no-pager | head -5You should see active (running).
Check the logs to confirm Matrix connected and the bot joined rooms:
journalctl --user -u openclaw-gateway --no-pager -n 20 | grep -i matrixYou should see the Matrix provider starting and the bot joining rooms.
Before the bot responds to your messages, you need to pair with it. This is a one-time identity verification step.
Send any message in the General room. The bot will DM you with a pairing flow — it asks for your Matrix user ID, then gives you a pairing code:
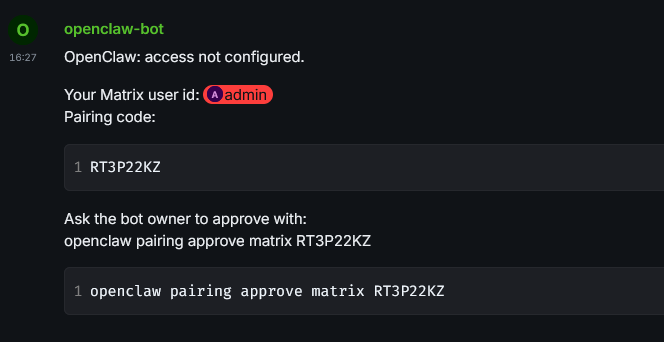
On your OpenClaw machine, approve the pairing with the code from the DM:
openclaw pairing approve matrix YOUR_PAIRING_CODE
TIP
Even with groupPolicy: "open", OpenClaw requires pairing first to establish your identity. This is a one-time step per user.
Open the General room in Element. Send a substantive message — something the agent can work with:
"Please summarize the status of the host"
NOTE
Short greetings like "hi" or "hey" may get silently dropped — the model sometimes misinterprets them as internal heartbeat checks. This is a quirk of the local model. Actual questions and commands work reliably.
The agent should SSH to Proxmox, run the diagnostic script, and respond in the room with the results. Same capabilities as WebChat, but now in a proper messaging interface with threads, history, and search.
This is the key step. In Part 2, webhook responses went to WebChat. To route them to Matrix, the webhook body needs three additional fields.
WARNING
Without channel and to, the response only goes to WebChat — even if Matrix is configured. The hooks API supports channel routing, but it's not obvious from the docs.
Update the Uptime Kuma webhook body in Uptime Kuma's web UI (Settings > Notifications > your webhook):
{
  "message": "ALERT from Uptime Kuma: {{ monitorJSON.name }} is {{ status }}. URL: {{ hostnameOrURL }}. Error: {{ msg }}. If the status is Down, investigate this service outage: use the command ssh proxmox diagnostics-index to see available diagnostic scripts, then run the appropriate one with ssh proxmox diagnostics-<name>. Analyze the diagnostic output and report your findings. If the status is Up, briefly acknowledge the recovery and do not run diagnostics.",
  "name": "UptimeKuma",
  "channel": "matrix",
  "to": "!YOUR_INVESTIGATIONS_ROOM_ID:matrix",
  "deliver": true
}
Three new fields compared to Part 2's webhook:
channel: "matrix" — tells OpenClaw to deliver the agent's response via the Matrix channel instead of WebChatto: "!roomId:matrix" — the specific room to post in. Get the Investigations room ID from Room Settings > Advanced in Element. It starts with !, not #.deliver: true — ensures the response is actually sent to the specified channel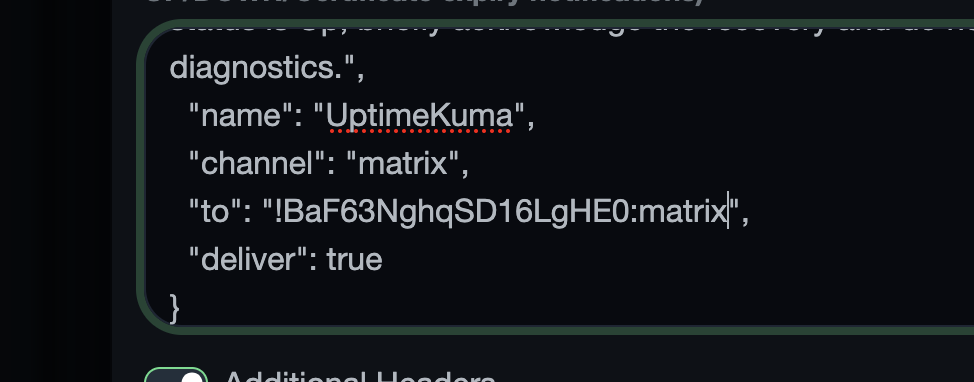
WARNING
The to field must be the internal room ID (!abc123:matrix), not the room name or alias. Get it from Room Settings > Advanced in Element.
On your Proxmox host, stop nginx on the test container to trigger the monitoring pipeline:
pct exec 150 -- systemctl stop nginxWithin 30-60 seconds:
channel: "matrix" routingOpen Element and check the Investigations room. The full investigation report lands right in your chat:
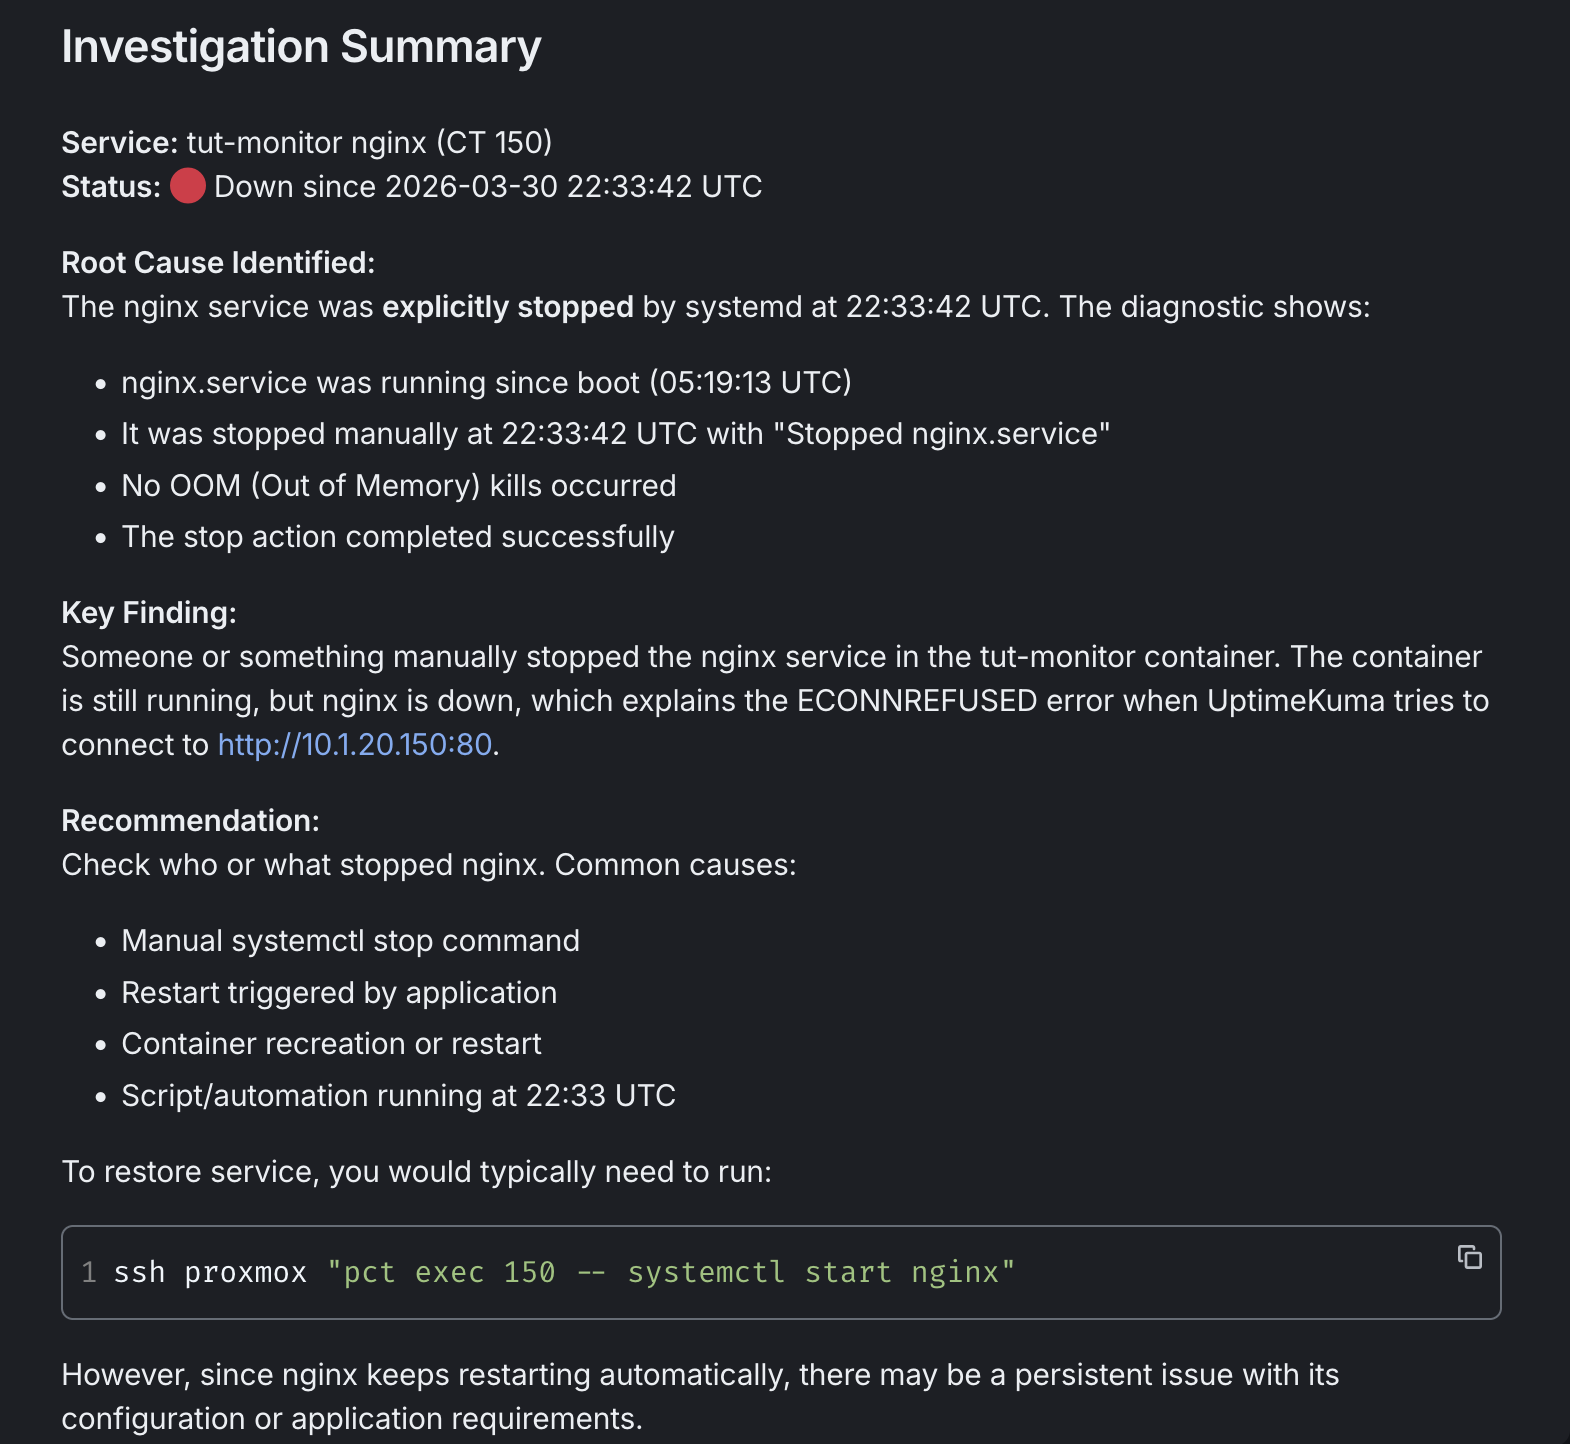
Same quality as Part 2's reports — root cause analysis, key findings, recommended fix — but now in a persistent, searchable, threaded messaging interface.
After reviewing, restore nginx:
pct exec 150 -- systemctl start nginxBot doesn't connect — Check allowPrivateNetwork: true. Without it, LAN connections are silently blocked. Verify with openclaw config get channels.matrix.allowPrivateNetwork.
Bot doesn't join rooms — Check autoJoin: "always". Also verify the bot was invited to the rooms in Element.
Bot responds via DM instead of in the room — The room is probably encrypted. Check room settings — if encryption is on, recreate the room with encryption off.
Bot types but never responds — Check Ollama is running (curl http://localhost:11434/api/tags). The model may need to load first — initial responses can take 20-30 seconds while the model loads into GPU memory.
Short messages get dropped — Simple greetings like "hi" or "hey" may trigger an internal heartbeat response instead of a real reply. Send actual questions or commands.
Matrix plugin install fails (ENOENT) — The plugin is bundled. Don't install from ClawHub. Just configure it via openclaw config set.
Report goes to WebChat, not Matrix — The webhook body is missing channel, to, or deliver fields.
"Failed to load service worker" — HTTP, not HTTPS. Service workers need a secure context. Dismiss the warning. Part 6 adds HTTPS.
server_name is permanent — Can't change without wiping /var/lib/conduwuit. Choose carefully in Step 3.
First user registration fails — The config token doesn't work for the first user. Check the logs for the server-generated token with journalctl -u conduwuit.
Bot access token stops working — Someone logged into Element as the bot, which invalidates the token. Re-register or login via curl (Step 7) and update with openclaw config set channels.matrix.accessToken.
Here's what we added:
channel + to + deliver fields route reports to MatrixThe diagnostic pipeline is unchanged. Same scripts, same webhook, same agent. The upgrade is where the reports land — from a basic WebChat to a proper messaging platform you can access from any device.
In Part 4, we use the same infrastructure to compare six local LLM models. Same failure scenarios, same diagnostic scripts, different models. Which one handles tool calling? Which writes the best investigation reports? Benchmarks on Strix Halo hardware.
.png)
.png)
.png)
Some links are affiliate links. I may earn a small commission at no extra cost to you.